
DIY Mixed Material Light Fixture
Happy second day of Spring! That might not mean a lot here in South Texas (where it’s basically sunny all the time), but for all your northerners…this is big stuff. I lived in Northern New York for nearly six years, and the day you can dash from your house to your car without wanting to DIE of frostbite…well, that’s a good dang day.
This spring I have plans for a few outdoor projects, the first one is building a front porch light. Adam and I have a lot of DIY projects under our belt, but somehow DIYing light fixtures wasn’t one of them. Our first attempt didn’t turn out half bad though…
I wanted something made of a few different materials, and I dreamed up a boxy wood, glass, and metal one. I was pretty sure it would work, so the boys and I headed to Home Depot for supplies. When Adam got home that day I explained to him my idea, hoping he would say it was doable. Sometimes when I present my ideas to him he scrunches up his face and says some variation of “that would never work in real life”…but not this time. I must be getting better at this. Or may HE’S getting better at it.
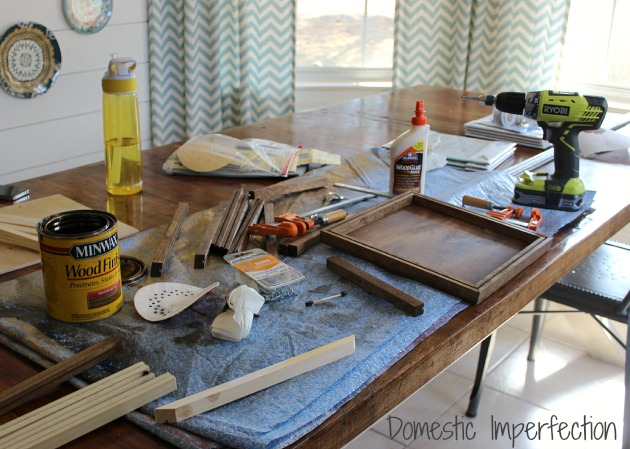
Here is what you will need…
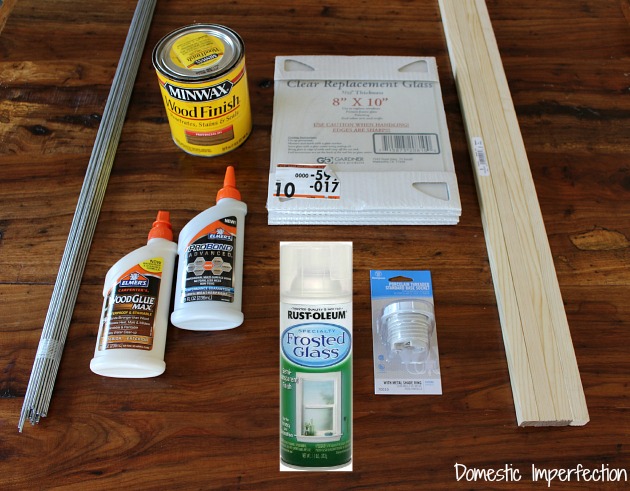
- Square dowels (4)- I used 5/8 inch, but if you use a larger dowel this project will be easier.
- Picture frame glass (4) – I used 8×10 and bought them at Home Depot for $1.98 each (you can find them at garage sales and thrift stores for much cheaper though)
- Light socket kit
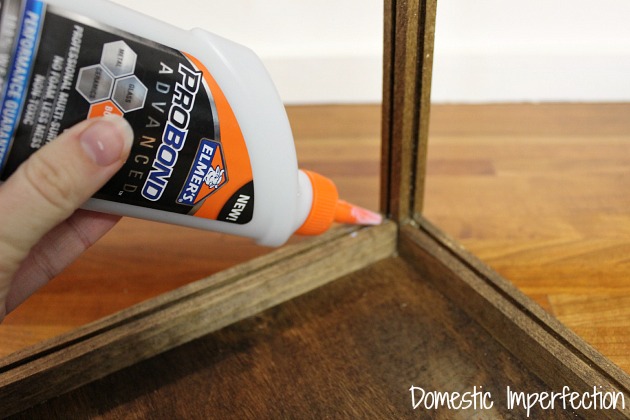
- Wood glue (clear is best)
- Stain
- RustOleum Frosted Glass spray paint
- Some sort of thin metal rod (found mine next to the ceiling tiles at HD, no idea what they are called)
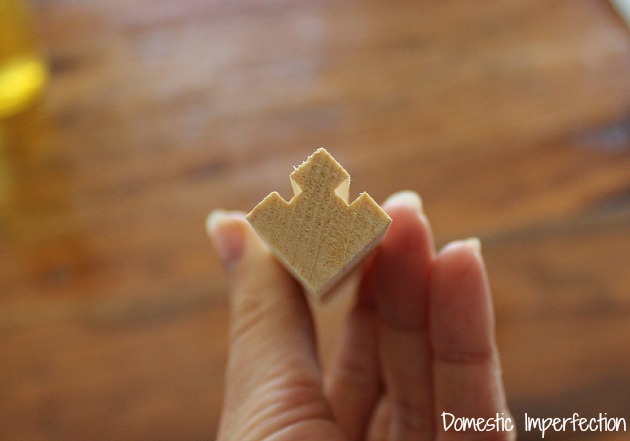
So step one, you will need to cut a shallow groove (1/8 inch deep) in the square dowels so that there is a secure place for the glass to rest. I’d try to explain to you how Adam did this, but a simple picture would probably be much less confusing…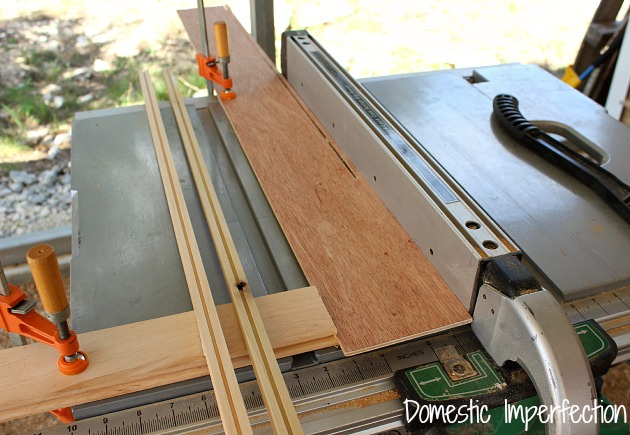
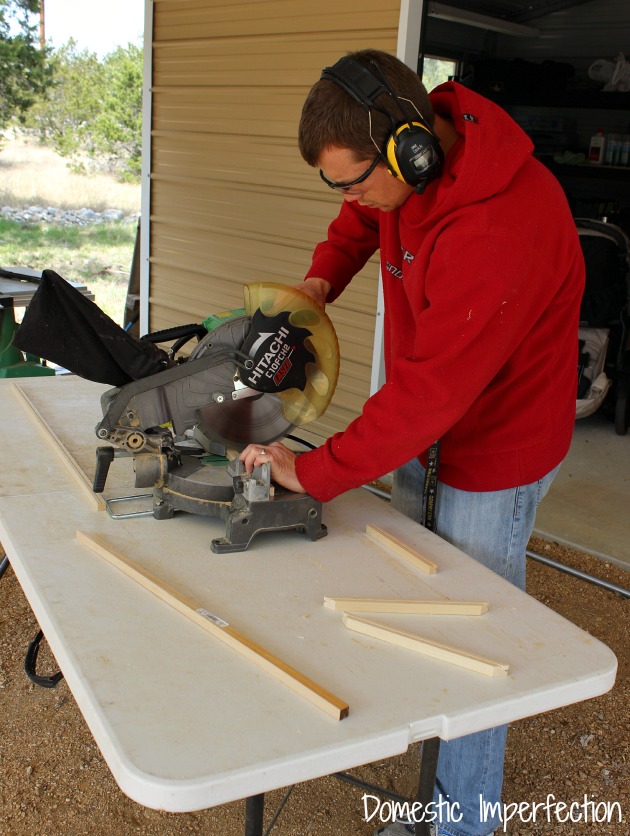
Next cut the dowel pieces down to size. You will need four pieces that are 7 3/4 inches long inches (cut square) and eight 9 3/4 inches pieces (cut at a 45 and measured from the short side).
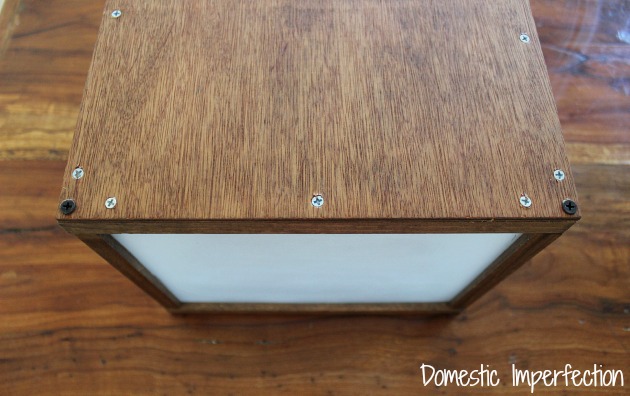
And also a thin 10×10 piece of plywood for the top.
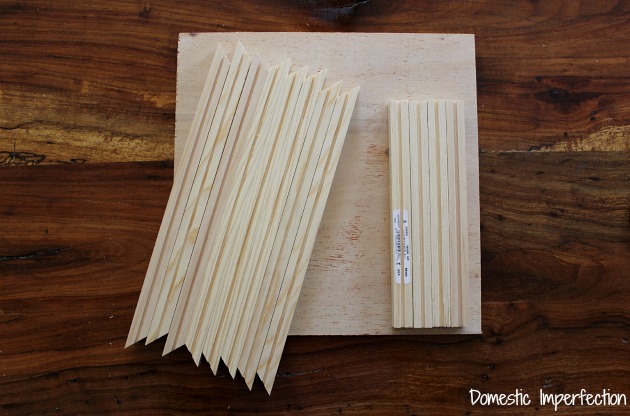
Here is a closer look at the groves, the corner pieces have two.
The next step (after staining) is to start assembly. I had to make dinner so Adam did this part too…it’s not all fun DIY projects all the time. After cooking dinner I did the dishes, cleaned the kitchen, and then folded a mountain of laundry. You know, just living the dream, basically. Assembly took Adam about a quarter the amount of time it would have taken me, which gave me plenty of time to finish putting away that laundry, toddlers in tow. I think he may have had an ulterior motive with all the extreme light helpfulness.
So, assembly. First you will want to glue the first four dowel pieces to the wooden square using wood glue.
Then glue the corner pieces on, making sure to keep everything square.
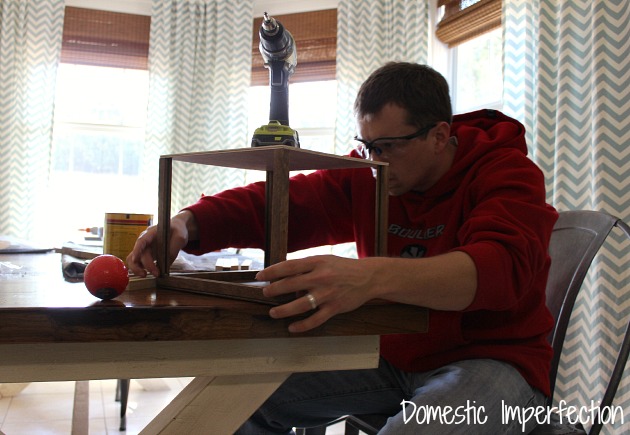
Just look at that concentration y’all. He’s dedicated.
This next picture is out of order, but he also added screws to make it more secure. The silver ones go into the base frame and the black ones go into the corner pieces (this is where those bigger dowels would come in handy).
Okay, my turn. First I sprayed one side of my picture frame glass with a few thin coats of frosted glass spray paint, then I added a little glue to the grooves, slid my glass into place (make sure the painted part is inside), and then glued the rest of the grooved dowels in place.
The wooden box is actually really square, but (much to my surprise) the picture frame glass is NOT. It needed to be clamped and allowed to dry, but for some reason we only own two clamps, and I needed more than that. Solution?
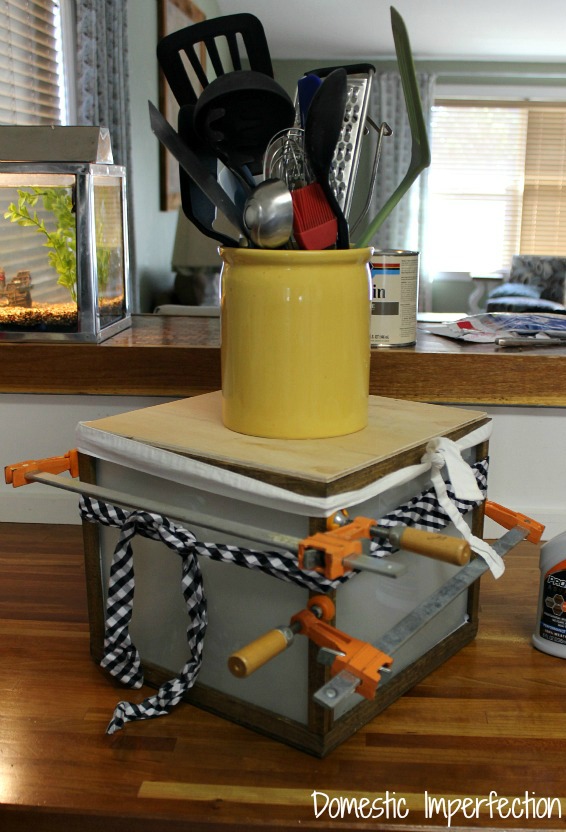
I’m officially putting in my early Mothers Day gift request…Mama needs a band clamp. And let’s throw in a massage for good measure.
Next I added the metal embellishments. I had originally planned to put a simple X on each side…but then I decided to rub some funk on it instead.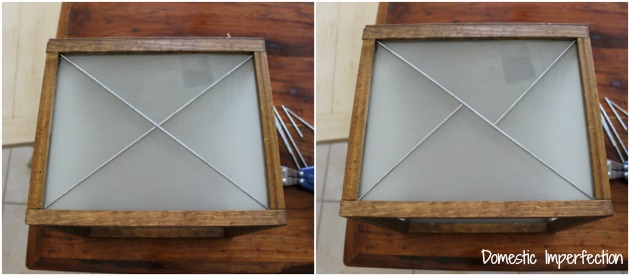
I glued them right to the glass.
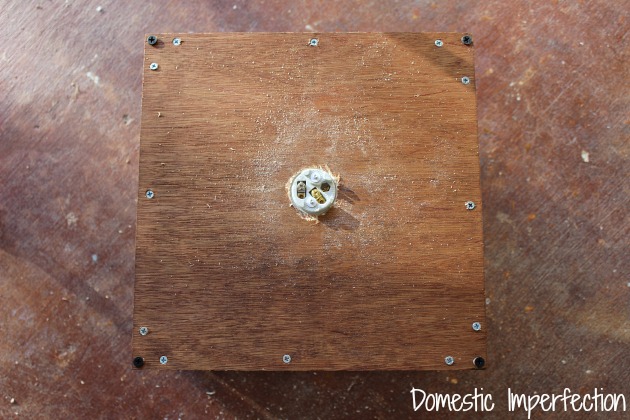
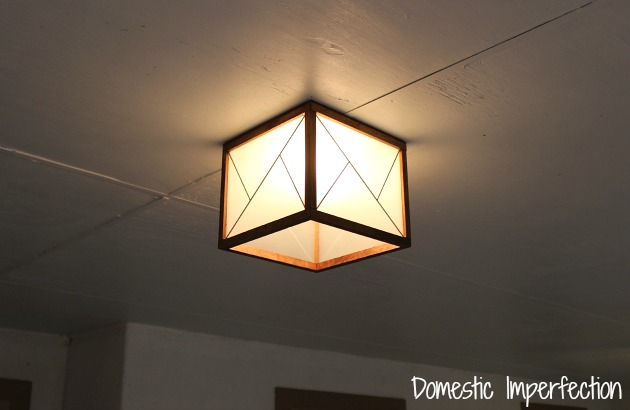
Then we installed the light socket, wired it up, and screwed it directly into the ceiling.
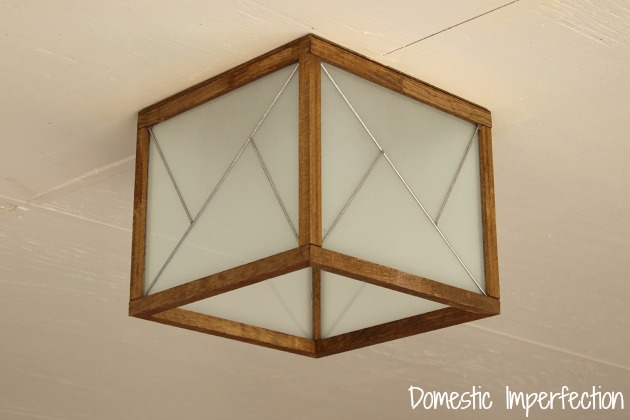
….aaaand then I decided that it looks awesome. It even passed the nighttime test.
To me it kinda looks like a weird modern twist on a craftsman style light. Sorta? You know what, lets not label it. It’s that cool light in school that fits in everywhere…or nowhere. It walks to the beat of its own drum and it’s okay with that.
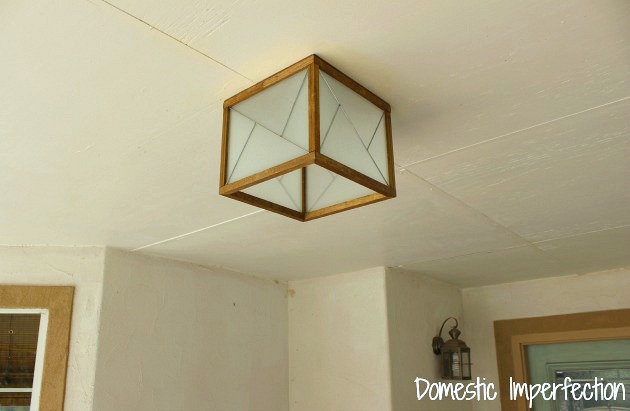
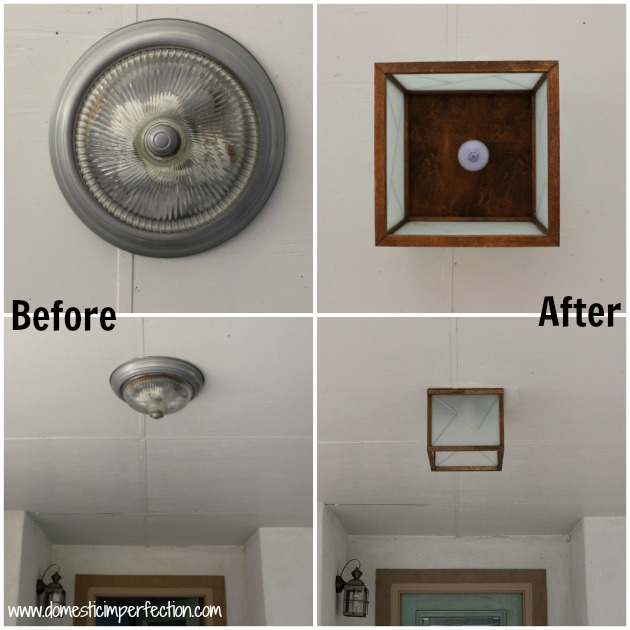
Whatever it is, it’s better than the cheap old boob light that was there before (which was bright gold before I spray-painted it years ago). Oh, and I almost forget…the new light cost less than $20 to make!
I actually made two one these, but the second one is taking longer to make so I’ll have to post about it next week. It’s for the foyer though, and is a fancy chandelier version of this. Not to label it or anything.
You may also like –


Very cool! Love the look of mixed materials. Good job, both of you!
Ashley, that is gorgeous–great job!
Amazing! You are so creative and talented!
That is fantastic, Ashley! I love how this turned out – and the “funkified” X is just perfect! Love it!
Can’t believe you MADE that! Stellar.
This is so terribly clever. I love the addition of the metal rods in that slightly offset pattern. Good call.
I totally love that you don’t mind sharing how you do things! Thanks so much for encouraging us to be able to do the things that you can do.
I’m very impressed that you even thought to DIY this. It turned out great! How did Adam cut the grooves in the dowels?
Thanks! I’m excited to finish the chandelier one, that one should be even better. Adam did the grooves on the table saw, he rigged up some wood over the blade so that it wouldn’t cut too deep. He said a router on a table would be the proper way to do it, but we don’t have that. Basically what I’m saying is that this my projects and this blog would suck without the knowledge and helpfulness of my husband!
I’d hazard a guess that he’s got some areas of his life that you significantly improve, too ;)
Impressed! Totally new idea? Love it!
oh, I love this! Adding it to the list of reasons DH needs a fancier selection of saws :)
I say it’s never a bad move to buy tools for your husband!
I have been trying to figure out something for my entry hall and this is great! I love the Mcgyver clamping!
Can’t wait to see your projects, it’s been awhile! They are amazing.. Grandfather
looks great Ashley! I always look forward to your creativeness!
This is an amazing light, girl!! Can’t believe you guys made it!
Hugs,
Jamie
I love the light you both made! :) I am soo impressed.
Love it! It’s cool to build a fixture yourself. I hope you never get tired of looking at it! Thanks for sharing.
This is genius! I have a boob light in our computer room and I hate it. But I don’t want to spend a ton of money on a new light fixture either. Were you able to use the old boob light set up to hang the new fixture?