
Installing Shiplap Over Drywall + Brick Flooring Samples
Progress on the mudroom and laundry room is well underway! The shiplap and trim are finished and I’m loving the way the room is headed.
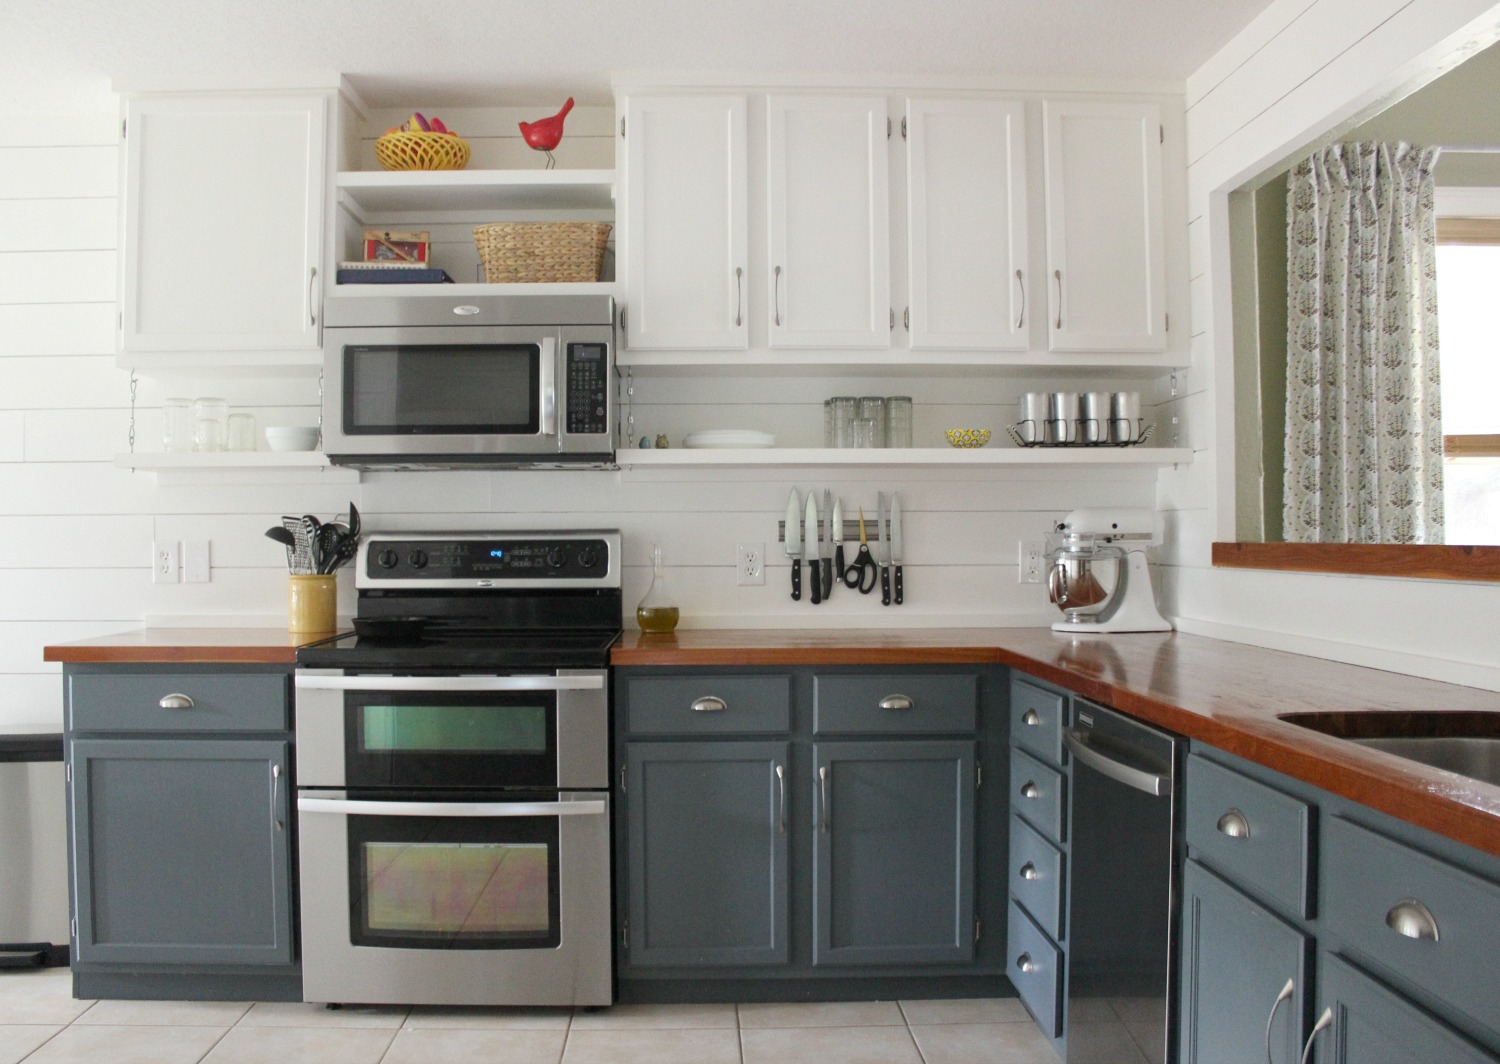
As far as installing shiplap goes, this isn’t our first go around. Adam and I added the same wall treatment to the kitchen and dining room back at the previous house, way back when before all planking was dubbed “shiplap”. For that room we did a very budget friendly faux version out of strips of cheap plywood.
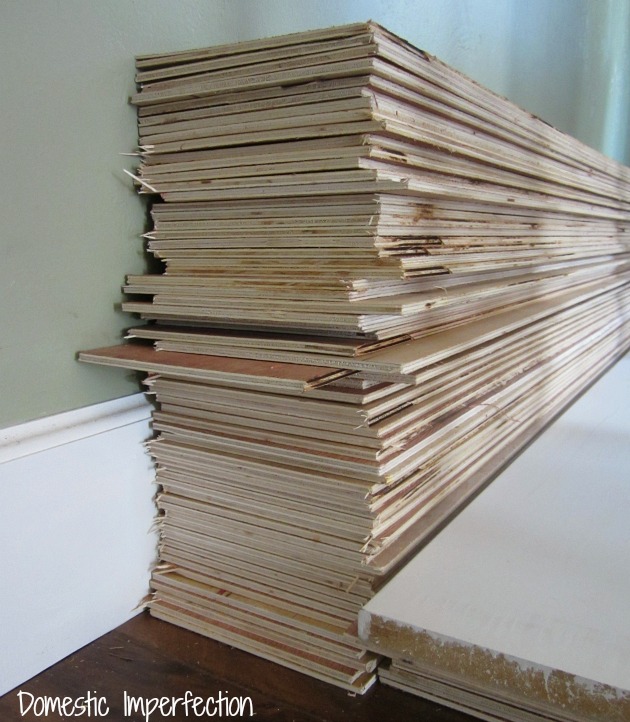
We installed the plywood planks right over the drywall, brad nailing everything in as we went.
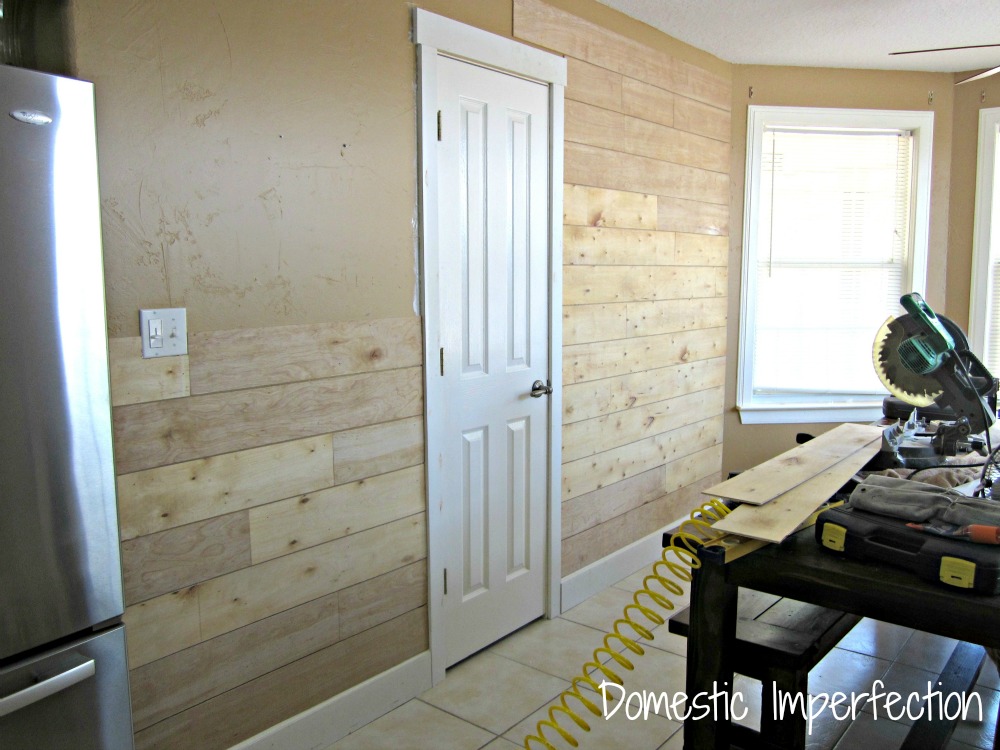
As you can see the results were pretty darn wonderful, and the cost was only about $100.
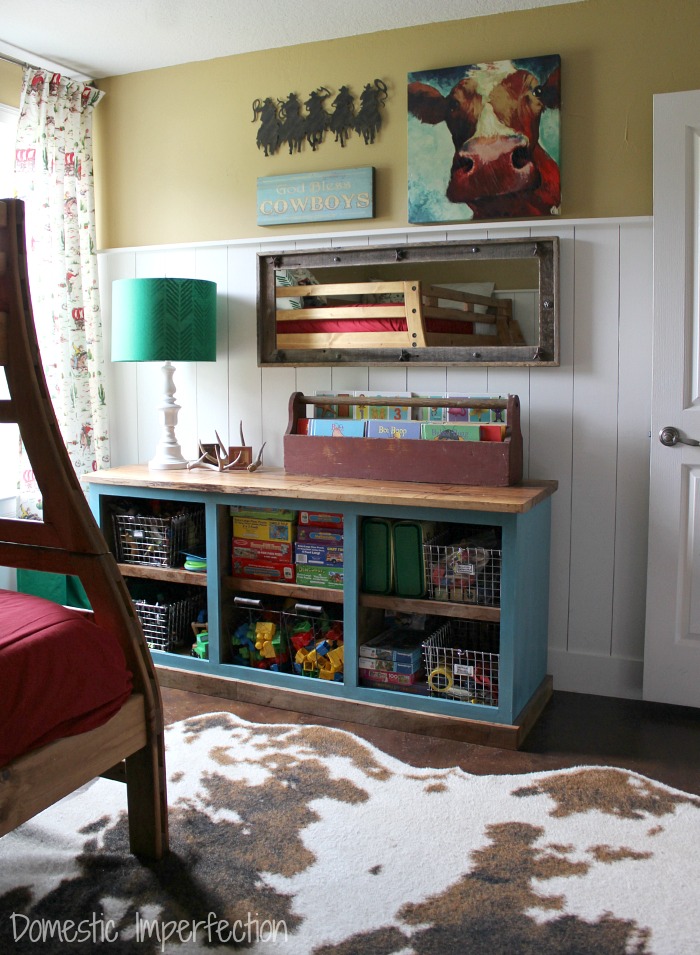
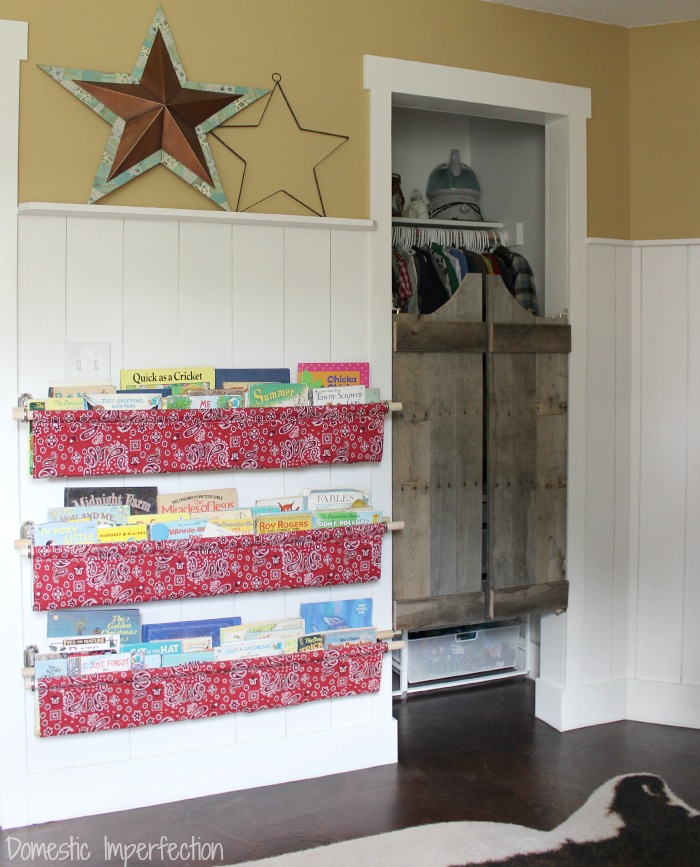
Then we used the same method in our older boys room to do some vertical planks 3/4 up the wall.
Here are links to those projects for those that want to read more –
- How to Plank a Wall (the budget-friendly way!)
- Painted Plank Walls (and my whitewashing fail)
- Farmhouse Kitchen Reveal – A complete overhaul for under $4,000
- Planking, Round Two – Going Vertical
- Cowboy Bedroom Reveal
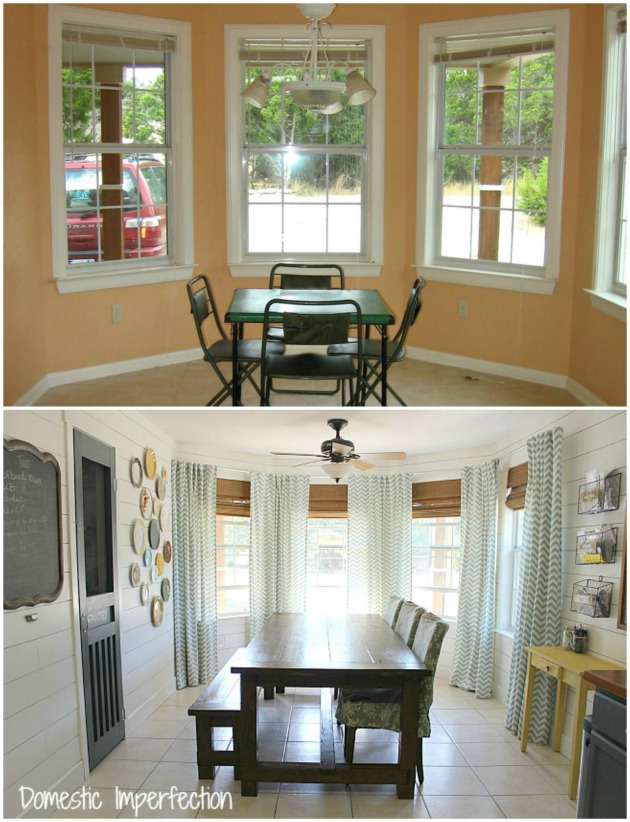
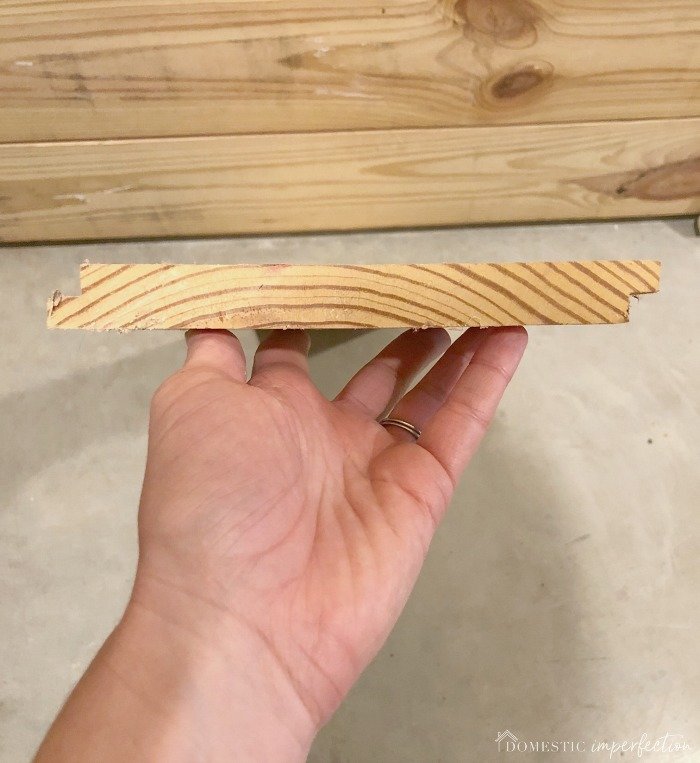
I loved those walls, so when we designed the new house I knew that planking was going to be a big part of it. This time though (since we were upgrading from starter house to dream house) we decided to spring for the real thing.
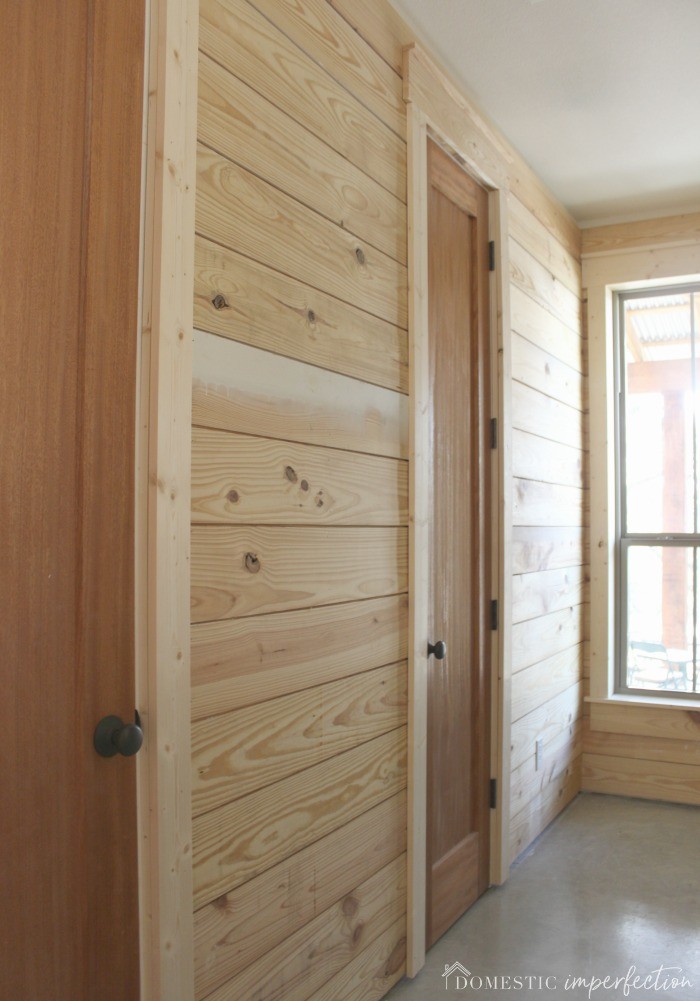
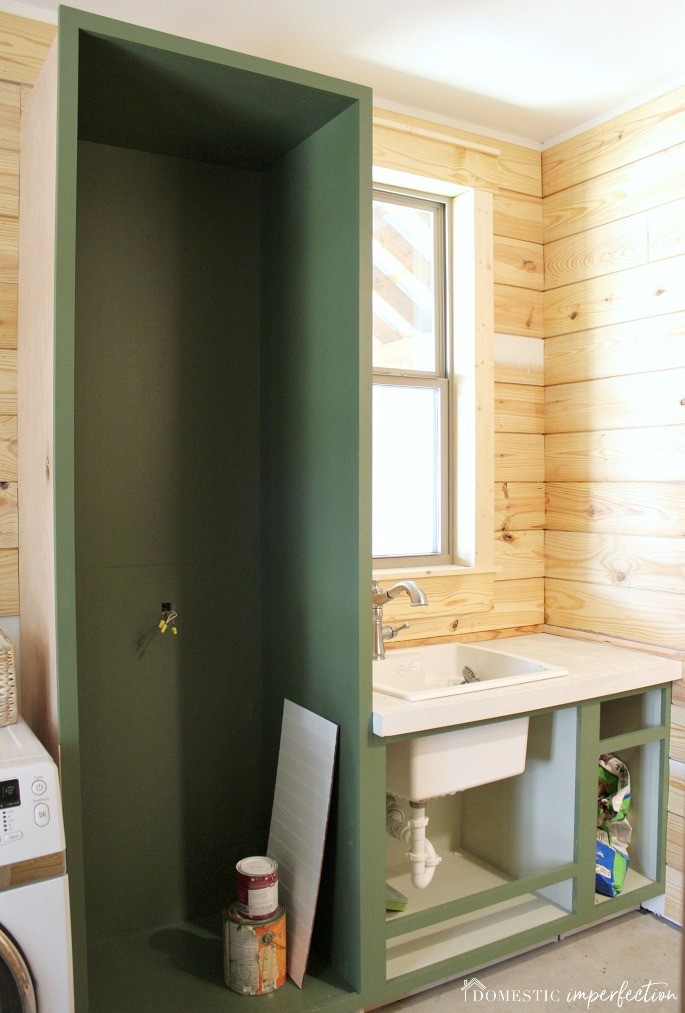
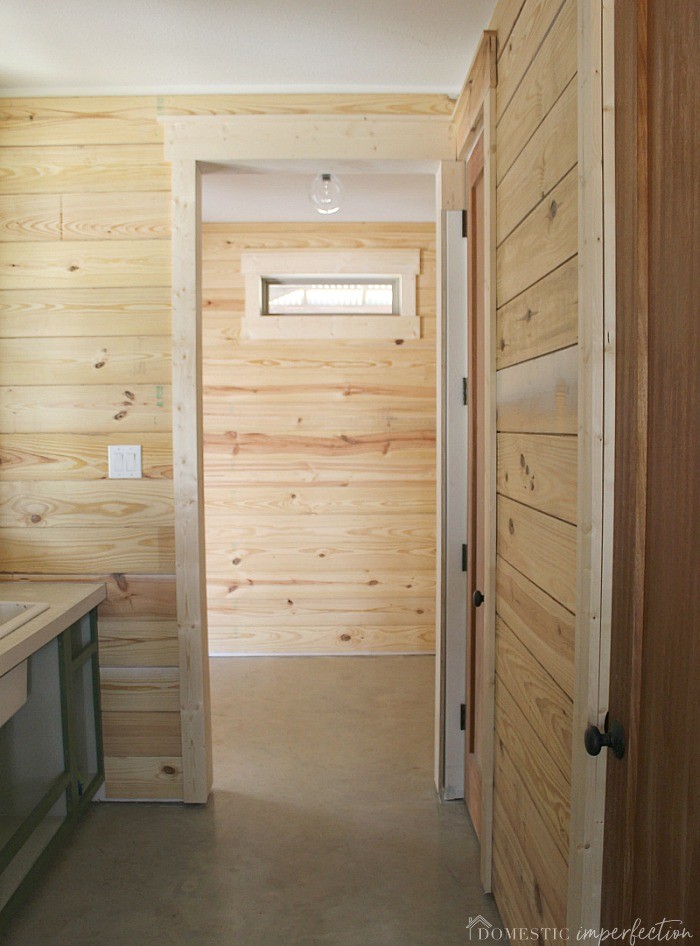
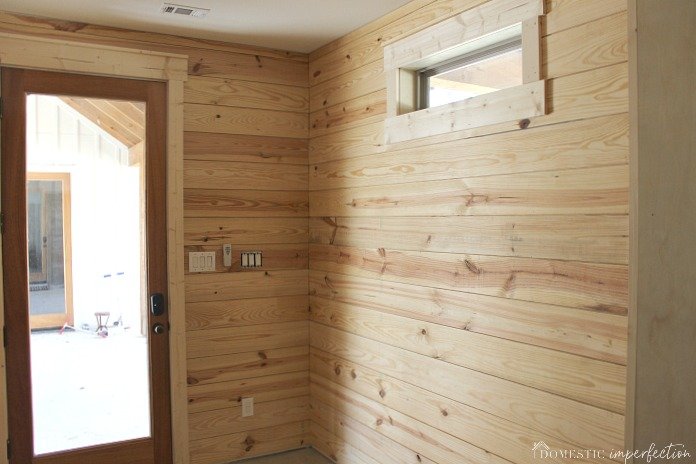
So this is 1 x 8 pine shiplap –
The entire mudroom and laundry room are getting covered, you can see the layout of that area below.
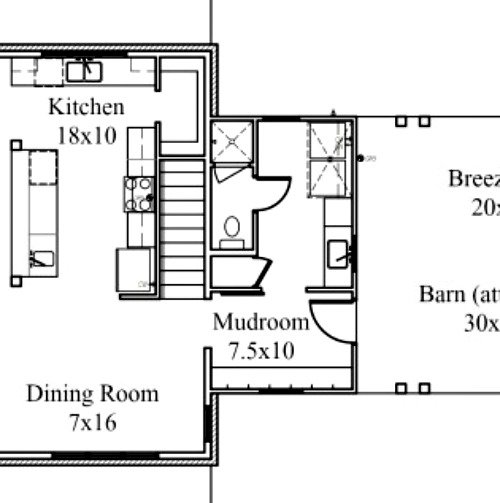
The process of installing shiplap over drywall is pretty much the same as the faux planks, you simply attach it to the wall using a nail gun. The only difference is the real thing is heavy, so finding the studs and marking them first is a must.
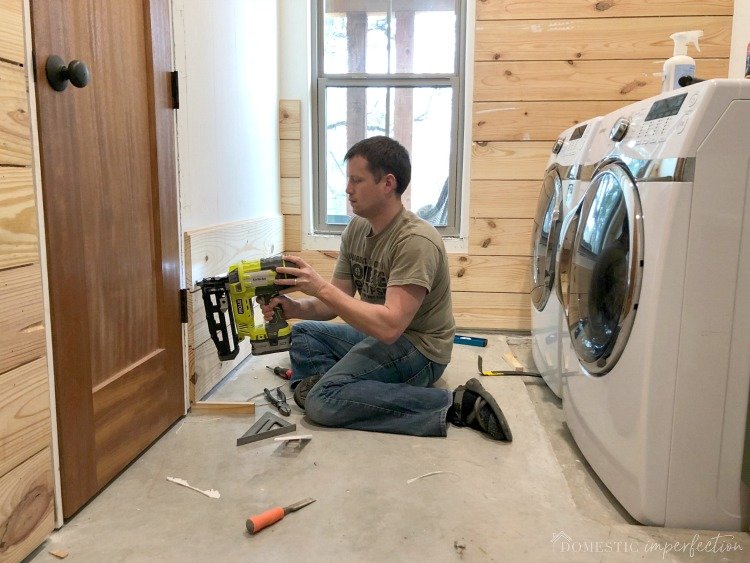
There are a few catches though, the first being that you will have to extend the outlets to be flush with the new wall depth (tutorial here). Also, the frames around your doorways will be pretty thick, and you will also have to trim the windows (tutorial here).
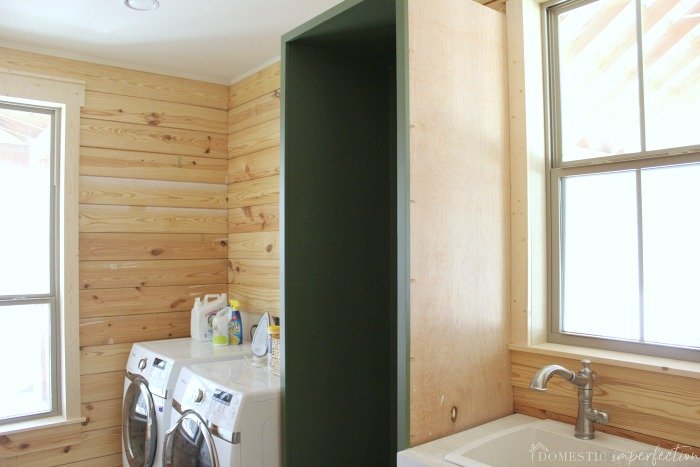
So here was the laundry room earlier this month…
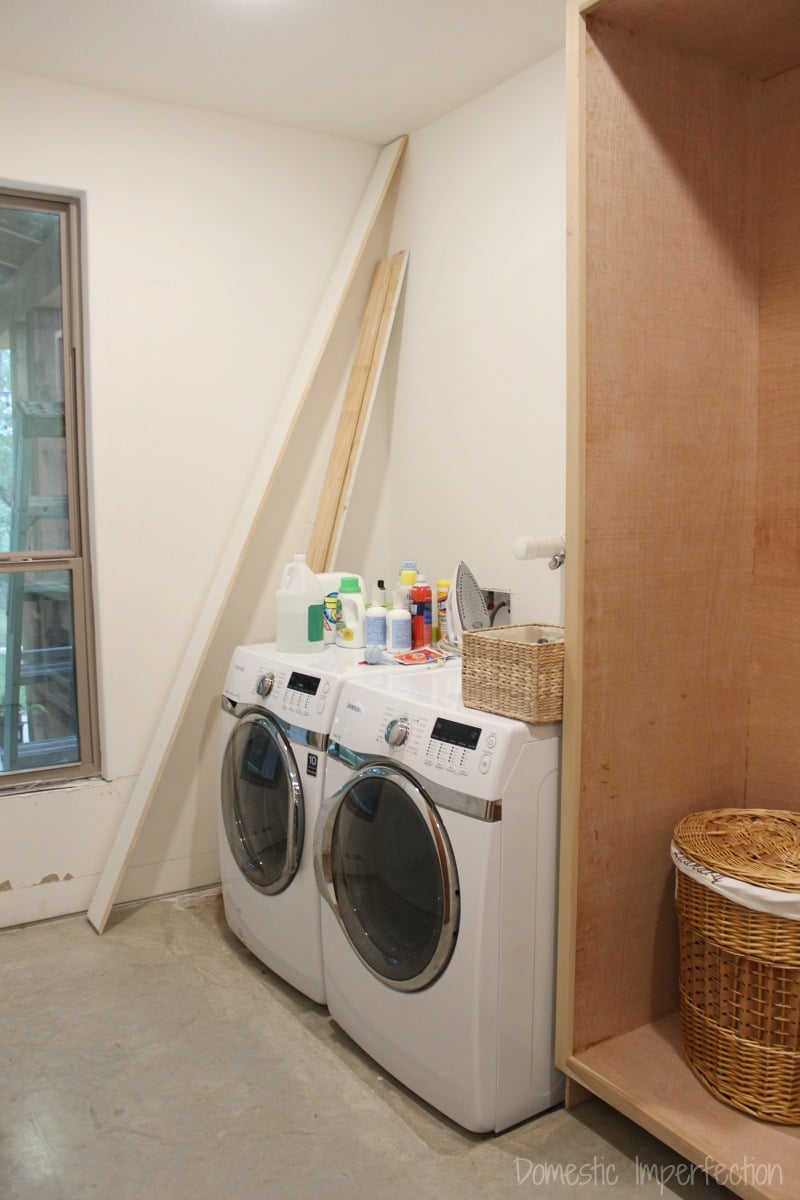
and here it is now!
(There are a few small pieces that still need to be cut…I tripped over the jigsaw and broke it a few days ago, so we’ll have to buy a new one to finish up.)
All the shiplap is going to be white, so if anyone is wondering how I’ll be spending my “me” time after all the boys go to bed each night, it will be here…with a tub of patch, tube of caulk, and music that better suited for a club than a farmhouse.
The good news is that after all the torturous patching and painting are finished, the brick flooring is next on the list! I ordered four different color samples from Home Depot (they aren’t carried in store), from left to right we have Little Cotton, Dixie Clay, Promontory, and Castle Gate.
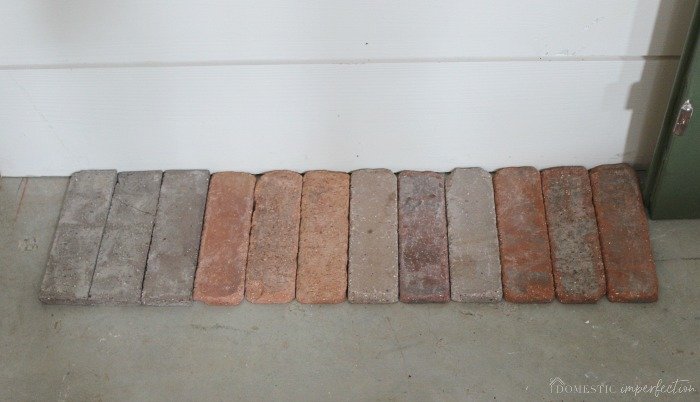
Adam and I immediately eliminated the two samples on the left, the first was too bland and grey, and the second was very orange. The third one (Promontory) I really like, although I agree with Adam that it reads a little purple. The red one on the right is likely the winner, even though I would never pick it from this sample. I know from my research that it has a ton of color variation, but they happened to send me three red ones. Admittedly I’m kinda annoyed by that…if I’m paying for a sample then I want an actual sample, three red ones doesn’t help me. Anyway, here it is on the Home Depot website –
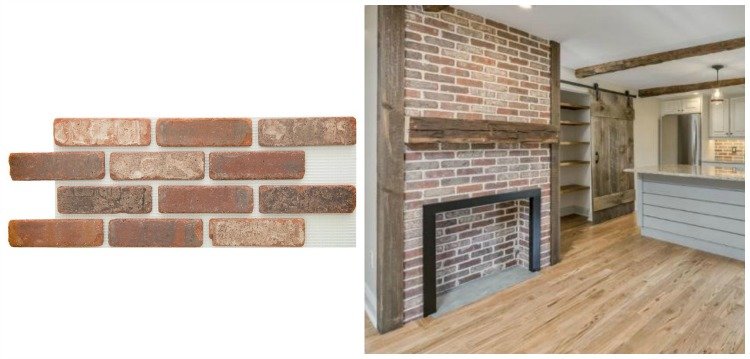
Luckily a friend is installing this exact color in their house next week, so I get to check it out over there before making the final decision. Anyway, that’s what has been going on around here for the last couple of weeks… I hope everyone has a great weekend!
Click here to see the painted shiplap and read all my tips and tricks!
I was definitely thinking the red brick on the right was the winner too!
2 questions: would you please share the square foot cost difference between the plywood planks anther real thing? what kind/color paint did you use?
thanks!
Well let’s see…the faux planks were about 30 cents a square foot, and the real shiplap is a 1x8x16 for $16, which makes it a dollar per linear foot, or about $1.60 per square foot. So yeah, the real stuff is WAY pricier.
We plan to prime it with Kilz and paint it with SW Alabaster in eggshell.
We are looking to do planking in our house real soon and I literally logged on this morning to see if you had a tutorial for what you did in the new house and you must have read my mind! Thanks! I would be fine with the budget version, but my husband says it’s too much work to cut it all, so I’ll look into the premade boards. Thanks again!
Your Home Depot will probably do all the cutting for you for free, that makes a world of difference! Also, I just calculated the prices for another reader, and the fake planks are 30 cents a sq ft, and the real ones are about $1.60.
Loving everything you two tackle! You probably know this already but please use a really good primer/sealer that will keep the wood from bleeding through your finished coat of paint. We used a basic primer in our 22’ long entry when we built and now have spots all over and will have to prime and paint it again!!!
What primer did you use? We were planning to use Kilz.
We only used a basic house paint primer. Not Kilz, Zinzer it oil based paint. Live and learn!
Don’t go with the Zinsser Bulls eye. After about 6 months, we had so many spots bleeding through. Even if we used a floor paint over it. The Kilz is better, because it is oil-based (but it stinks). So we went over all the spots again…we were lucky to have only done this in our bathroom. Our lack of time to continue saved us! Live and learn! We used the good stuff everywhere after that!
Agreed on the brick choice! It’s all going to look awesome. I’m heading over to read about your budget planking as I have a blue sprigged bathroom I desperately need to freshen up from the 80s and I simply don’t have any more wallpaper removal mojo left. Nailing white planks over it will be ideal, and the thin fake stuff won’t steal space from an undersized room. Just wondering how the edges in between look, so hopefully you mention that.
The planking is gorgeous. What a beautiful place your home will be! I’m looking forward to seeing the planking in white. I like the bricks you chose too, though at first I was also drawn to the Promontory. Hopefully you like the red ones when you see them at your friend’s house.
Yay for progress!!
This clearly shows that through some creativity, smart planning and research you can completely transform the interiors beyond recognition at very low cost. This is truly inspirational.
It’s looking so good! I still love the green you chose for the cabinets, and if the brick really looks like it does on the website it’s going to be amazing!
Looking good! We also just finished building our home here in West Texas, but my house has so many windows I couldn’t really see shiplap on any walls working, so we put it on our island. Did y’all space the shiplap ? I am still pondering where I could put some more in my home!
“I tripped over the jigsaw and broke it a few days ago, so we’ll have to buy a new one to finish up.”
I hope you’re okay, but this made me LOL.
Ya, there is a ton of color variation in brick for red. They may be sent you only those sample which has more demand. Whatever but your selection is really outstanding.
Loving the classic planking look on those walls. Looks phenomenal!
Hi. We wanted to install 1/4 shiplap per our existing drywall but our contractor says we can’t because of the molding. Do ou need to use specific molding sizes? Thank you!!
Love this tutorial! Curious what 1×8 pine you used for the shiplap?!
I’ve been told that the wall that the shiplap is going to be installed on should be painted black. Is this correct?
How would you compare the looks on the DIY vs Real planks? I love shiplap and want to add it to our forever house in the future, but budget it always a factor. Is it really obvious that the DIY is plywood?
So these planks are real shiplap planks from the lumber yard, and in our last house we did the DIY plywood planks. The plywood planks were fine, but I can’t sit here and tell you that the real shiplap isn’t much more authentic looking. In your forever house, if it were me, I would spring for the real thing.