
Reupholster RV Cushions…Without Sewing!
This is it, the last project of the RV remodel! Admittedly, reupholstering the banquette cushions is the project I’ve been dreading most… which is why I saved it for last. It’s always a good idea to save the worst for last, right? I’ve been putting it off was becuase I thought that I was going to have to sew actual cushions, which for me would be a terrible project. I can sew, but I really only flat square things like curtains and throw pillows. Thankfully I ended up conquering this project without even touching my sewing machine, which is a huge win in my book.
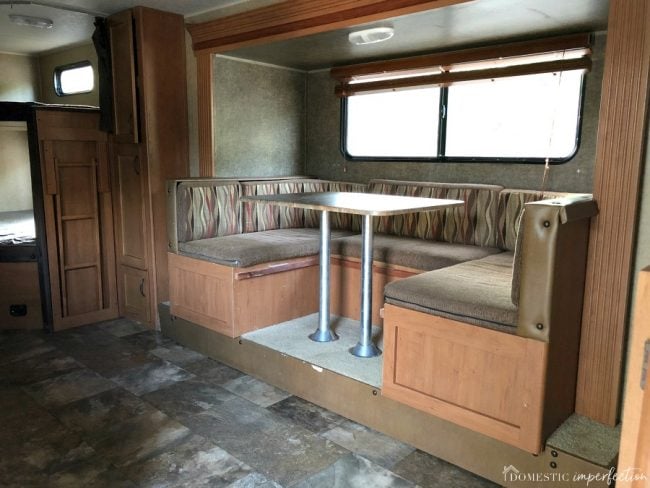
So here is the original banquette –
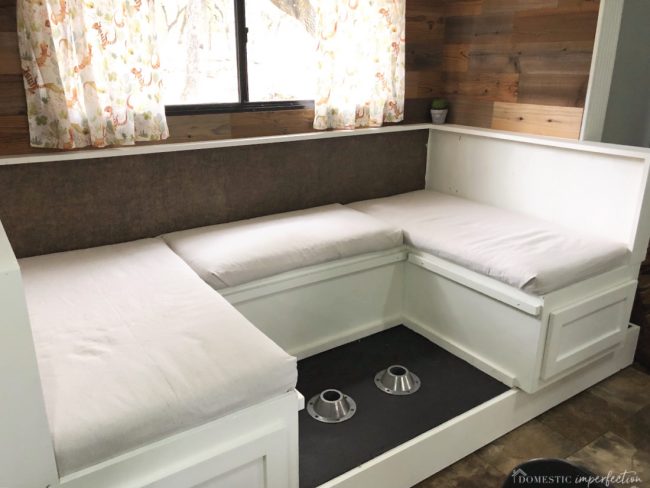
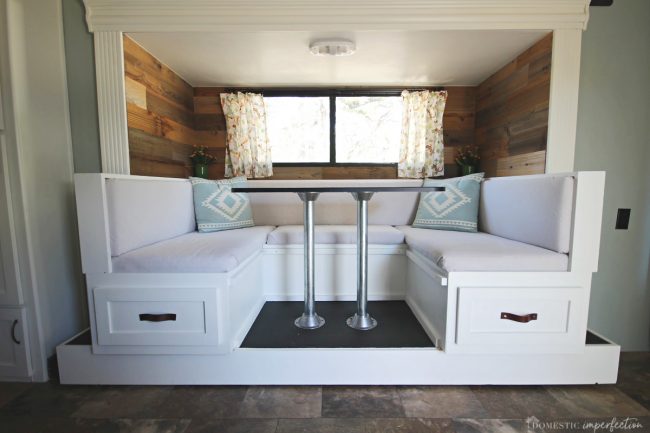
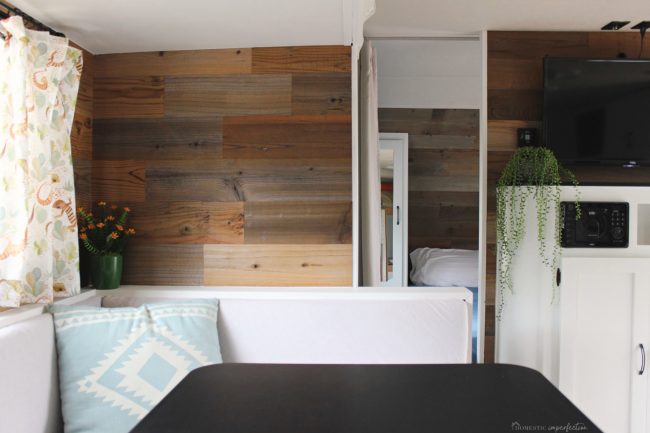
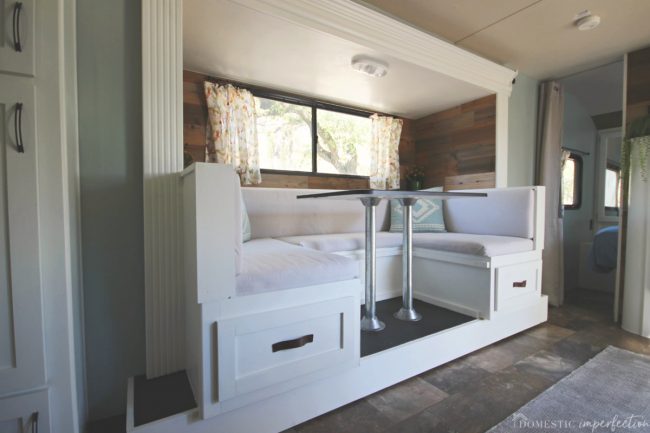
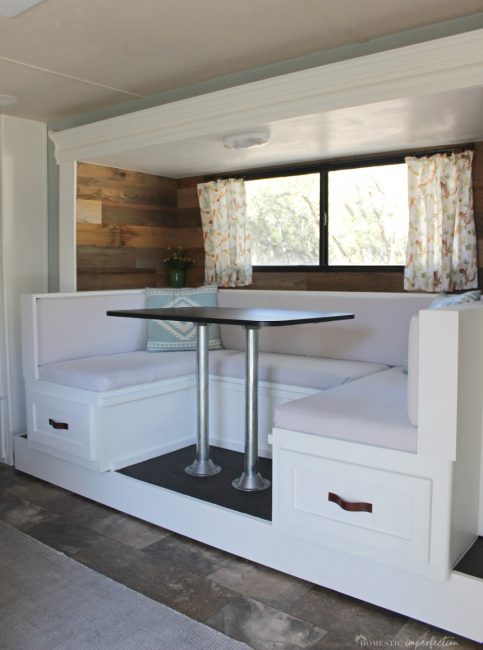
and here it is now!
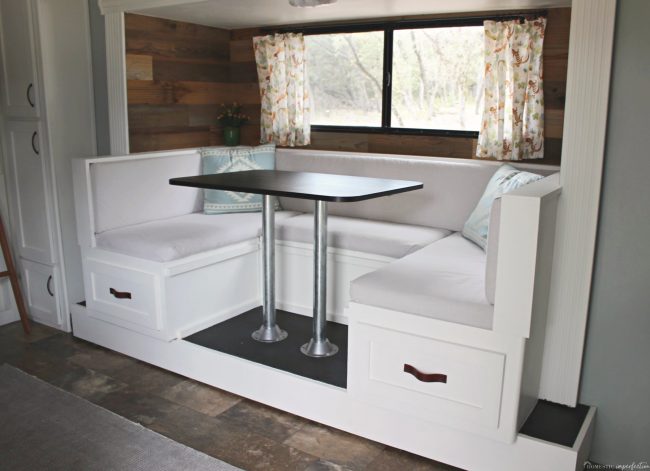
Is there anything more satisfying than a good before and after?! Man it feels good to finally be at this stage.
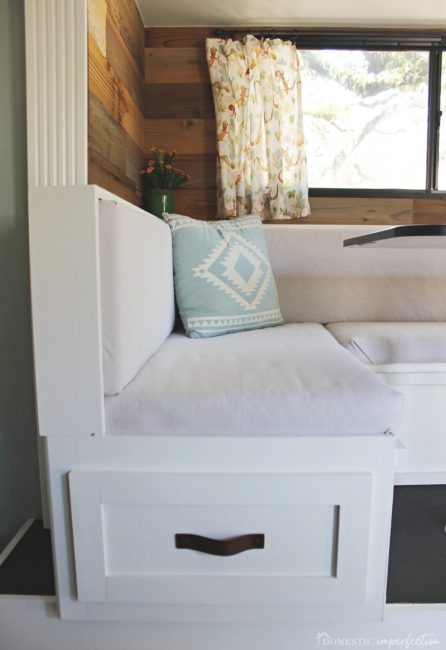
So the original banquette had storage underneath it, but to access it you had to take off the cushions, fight with the plywood underneath, the table was in the way….it was a whole thing. In order to make the storage more usable, Adam and I decided that adding drawers would be the best idea. I actually can’t believe it didn’t already have drawers, but that’s another conversation.

So Adam built some drawers, then in true Domestic Imperfection fashion we got carried away and decided to rip out everything….the floor, the trim….it all came out.
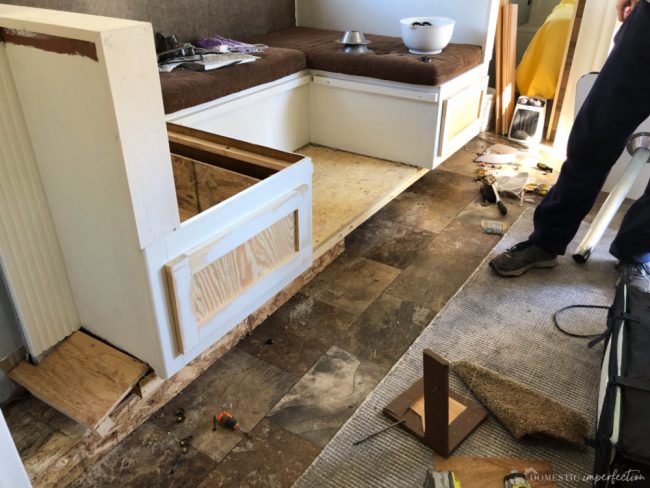
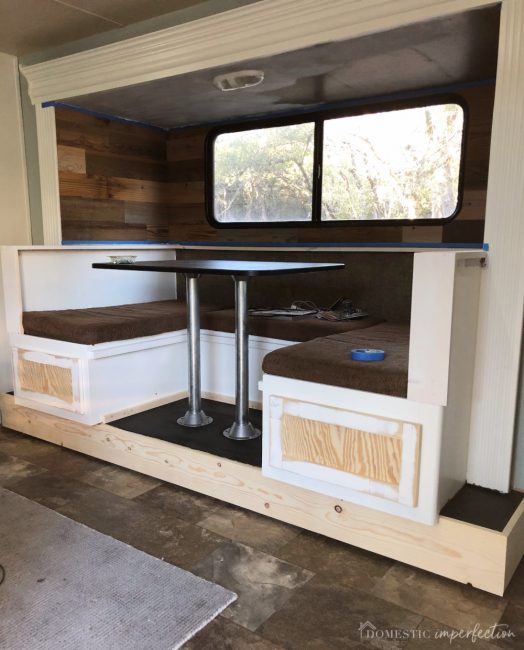
The carpet in the “dining room” was replaced with simple, non-gross black paint, and the ripped fake leather trim was replaced with white painted pine. All that was left was those dang brown cushions.
The addition of the drawers meant we no longer had to move the cushions to access the storage, which meant I could permanently attach them to the plywood. In other words, this project just became 1,000% easier.
So let’s jump into the tutorial!
How to reupholster RV cushions (without sewing!)
Materials –
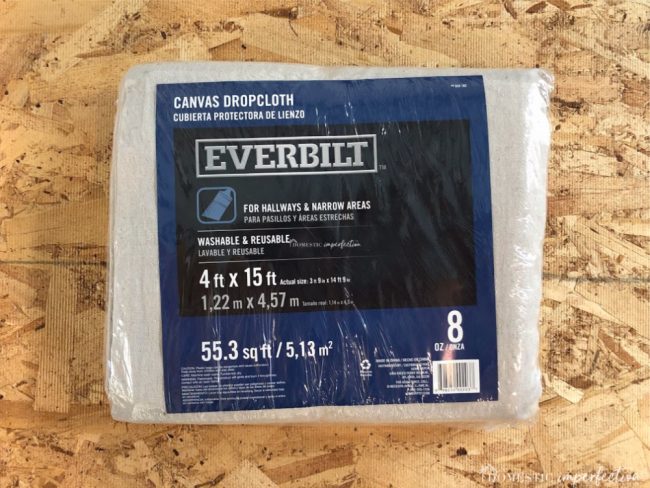
- upholstery fabric (I used canvas dropcloth)
- foam (I used three inch, best price was at homedepot.com)
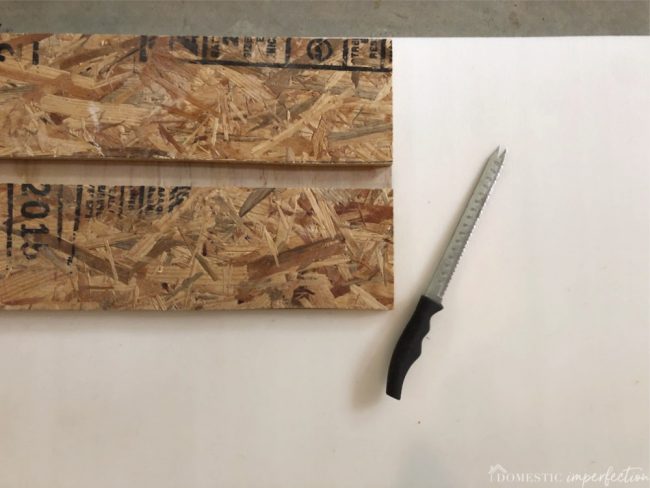
- serrated knife (an electric turkey knife would be even better)
- stapler (manual or power)
- batting
- scissors
The material I used for the cushions is just canvas dropcloth from Home Depot. I’ve used it for upholstery before, and it is thick and well made, plus a really nice neutral color (kinda like linen). Best of all, it’s cheap and easy to come by.
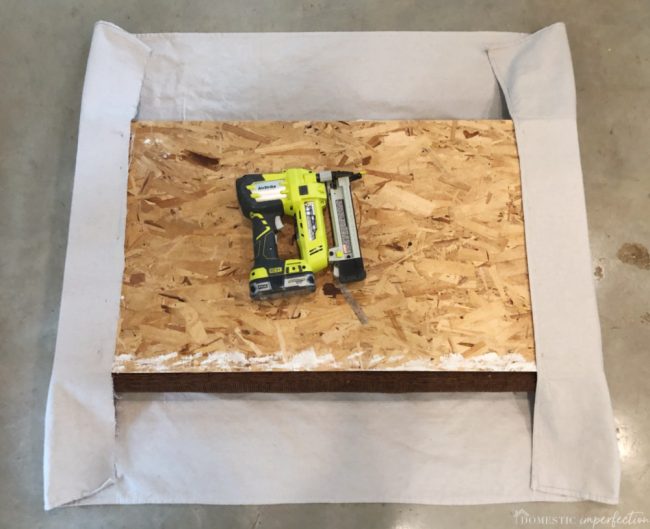
To make the cushions you have to have a backing (plywood) so that you can staple the dropcloth to something solid. If you don’t have the plywood you are going to have to sew actual cushions, which is to be avoided at all costs.

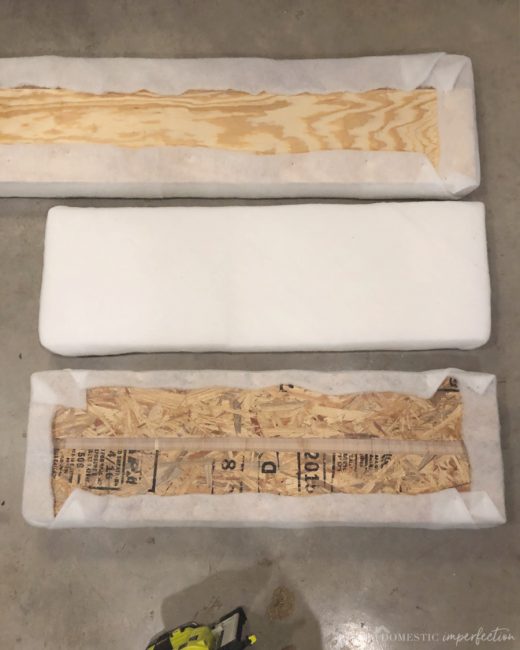
Then cut your drop cloth to the correct size, lay it on the floor, place your cushion on top of it, and then your plywood on top of that.

Once everything is in place you just start wrapping and stapling (this is the stapler we have).
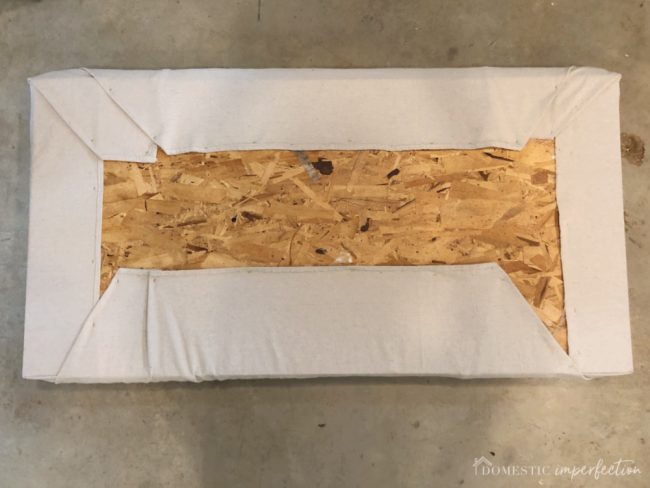
That is how I redid the bottom cushions, it was super simple since I reused what was already there.
Related Post – How to Recover a Dining Room Chair
The back cushions were slightly more complicated since I didn’t reuse the existing ones (they were too thin and needed to be reconfigured anyway), but still super simple. For these Adam created new plywood backs out of garage scraps, and I bought new foam and batting. Foam, by the way, is not cheap. I scoured high and low for the cheapest foam, and it turns out that Home Depot actually sells it (online only) and it is a great price.
Also, here is a tip about cutting foam. You would think scissors would be the way to go, but using a serrated knife is the best way to cut foam. If you have an electric knife, even better. Just cut it like you would a loaf of bread and it will have a nice smooth (enough) edge.
Since I was using new foam I also used batting, which I wrapped and stapled over the foam before adding the dropcloth.
And that’s it! So simple, so pretty.
Here is the same shot with the old fabric and the new –
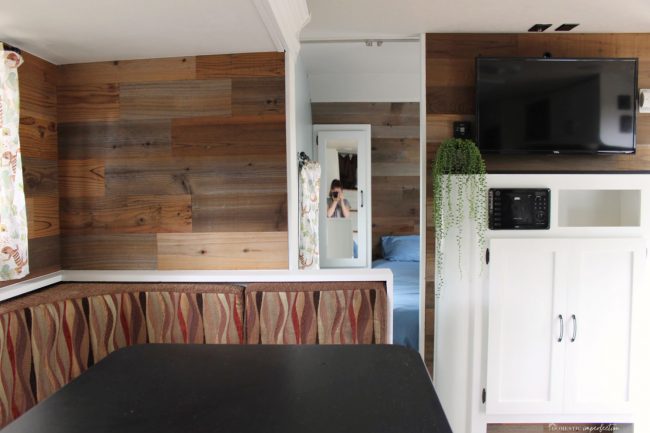
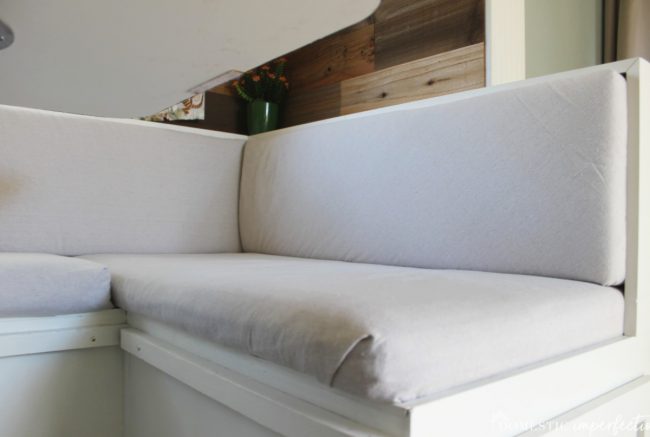
So much better, right? The dropcloth fabric is thick and should be easy enough to clean, but let’s be honest…I have four boys. We will be camping and getting dirty. Eventually, this booth will probably look pretty gross. The good news is that this project is so easy and cheap that ripping off the old dropcloth fabric and adding fresh stuff isn’t a big deal.
Anyway, I still have to add some decor/storage/bedding, etc, but next up is the final reveal!


This looks great! Y’all did such a good job. And just in time for spring break. You might consider adding adhesive Velcro to the drop cloth and the plywood when you replace the fabric. That way you can wash them and put them back on! You might have to label each panel/plywood piece to make it easier to put them back. Way to go!
Attaching them with velcro is a GREAT idea. Like…why didn’t I think of that?!
So much better!!
So many fun memories to be made in the RV! Excited for your family :)
So clever and a great re-do! I love the new look!
Absolutely gorgeous transformation. Love Love Love.
Looks SO good! Consider spraying the cushions with Scotchgard to repel stains and liquids. I spray my girls’ school backpacks and canvas shoes between washings. Have fun camping!!
Great post keep it up!
Can the dinette still be used as a bed with the new cushion configuration? Great job! SO much inspiration for our camper.
SUCH a good idea to convert the storage to drawers! And the cushions look gorgeous. The whole thing looks gorgeous! You guys are amazing – both vision and talent!
This is awesome! Can the dinette still be used as a bed with the new cushion shapes?? I want to do the same to ours!
It can!
Hi Would you know the measurements of the seat and table parts. I would like to build one the same