
Mudroom Reveal – Where Form Meets Function
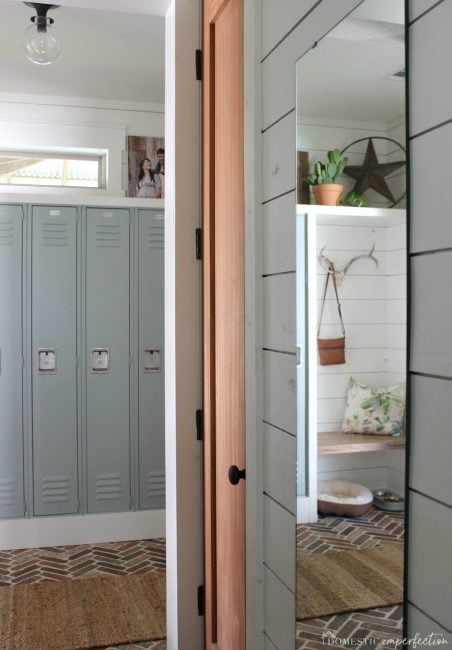
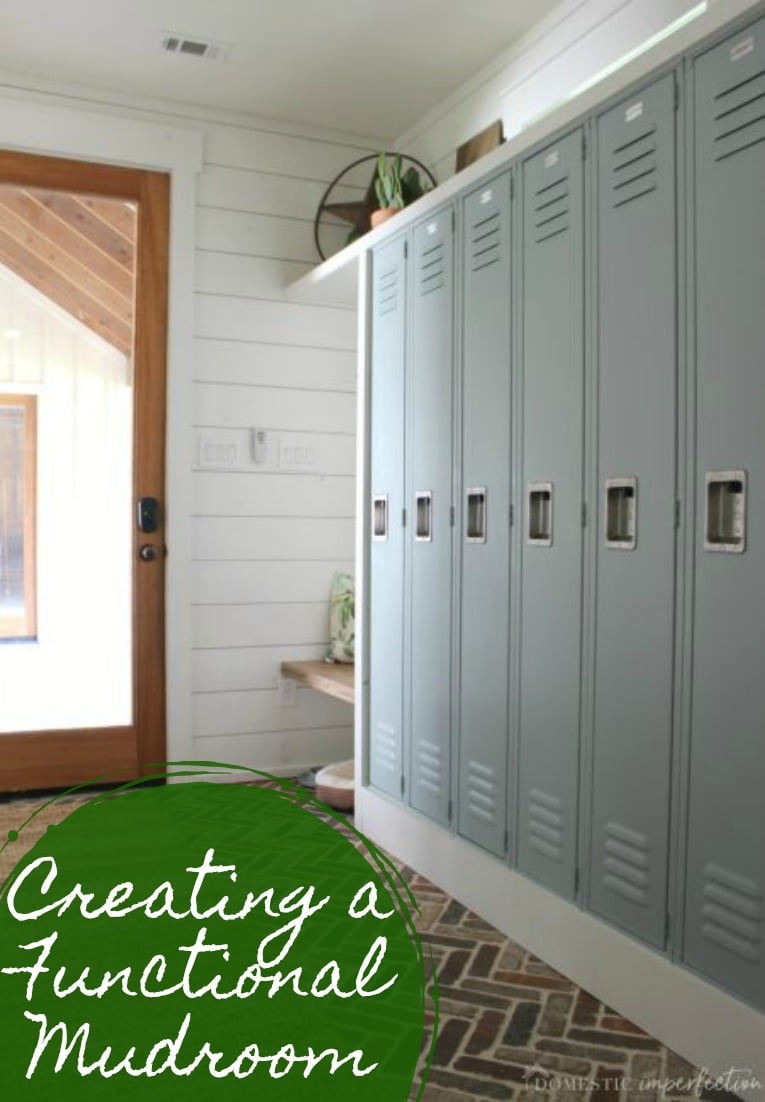
IT’S MUDROOM REVEAL DAY!! Let’s just skip the forced introductory paragraph and get right to the good stuff. Here she is!
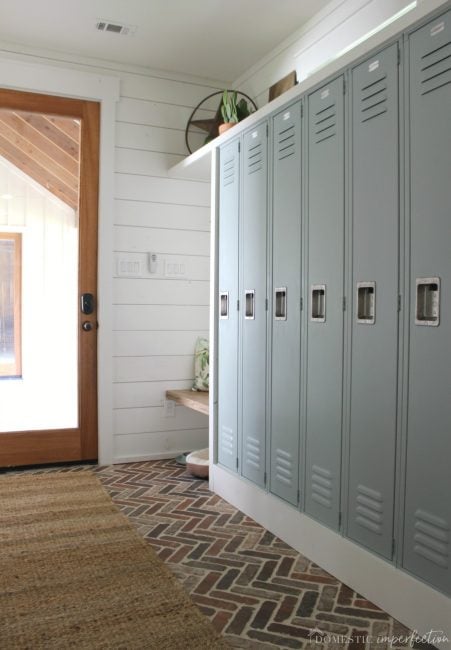
I don’t think I could love it more. It’s so satisfying to have a blank space and a vision, and then watch that vision actually come to life!
From start to finish the mudroom remodel (makeover/finish out/whatever you want to call it) took us almost exactly six months. That definitely isn’t a short amount of time, but I think it’s realistic for a DIY family with very real time and budget constraints (if you are a DIYer then you are nodding your head in agreement, because the timeline is never what you think it will be.)
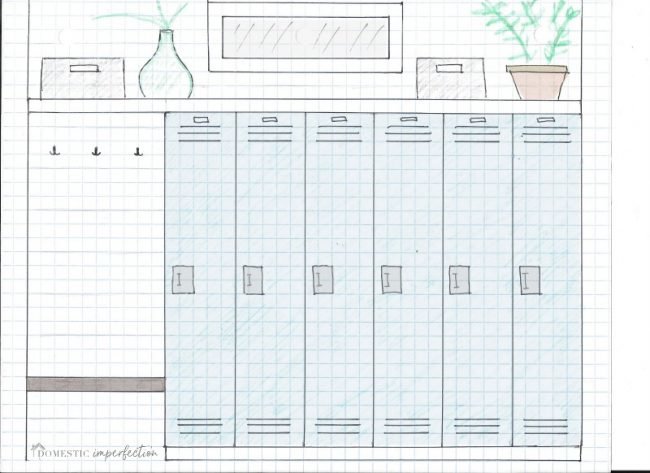
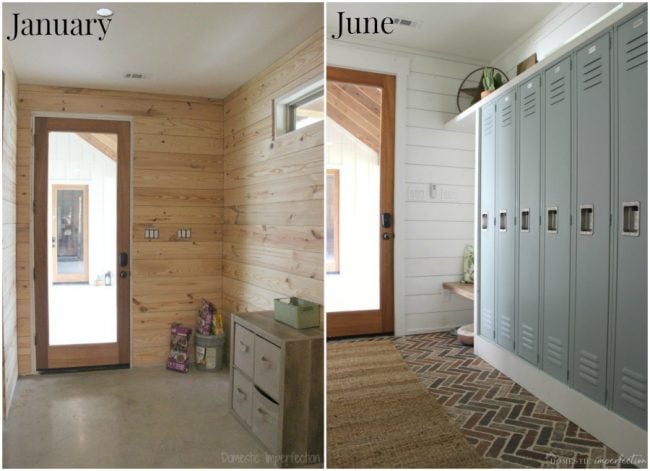
So back in January Adam and I came up with our design, which somehow (despite the number of lockers) looks nearly identical to the finished product.
The main goal for the mudroom was for it to be extremely functional. I wanted each person in the family to have a space for shoes, backpacks, coats, rollerblades, swim goggles, guitars….all that stuff that has been scattered all over the house for nearly two years now. Secondly, but nearly as important, I wanted it to be beautiful. I wanted it to flow with the rest of the house, but also be a room with personality that can stand on its own.
To get a better handle on things, here is the floorplan to our house. The red arrow points the mudroom, which is really just a glorified hallway.
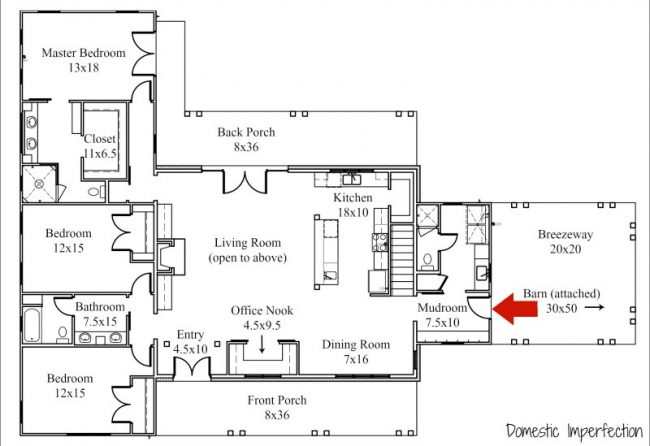
Our family comes in through the mudroom almost exclusively, since the garage is just on the other side of the breezeway. Guests use it a decent amount of the time as well, mostly family. The Jehovahs Witnesses use the front door exclusively.
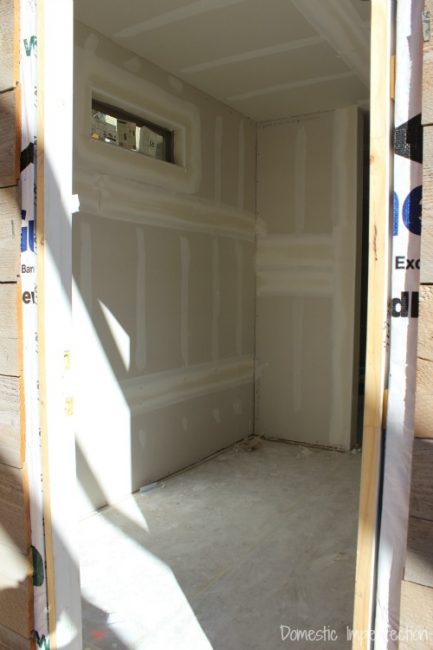
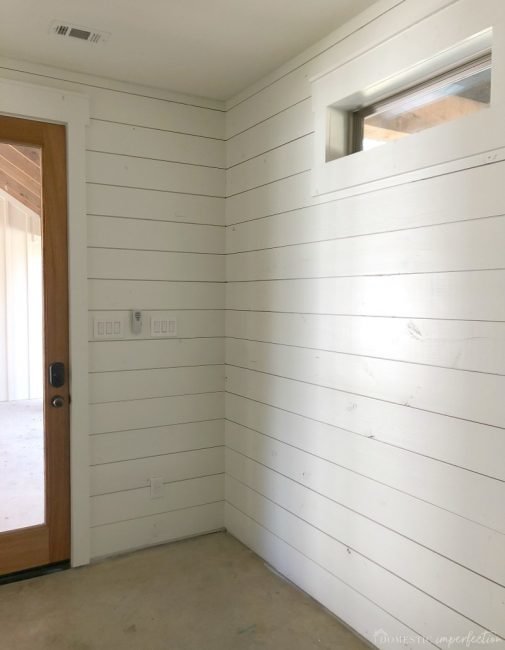
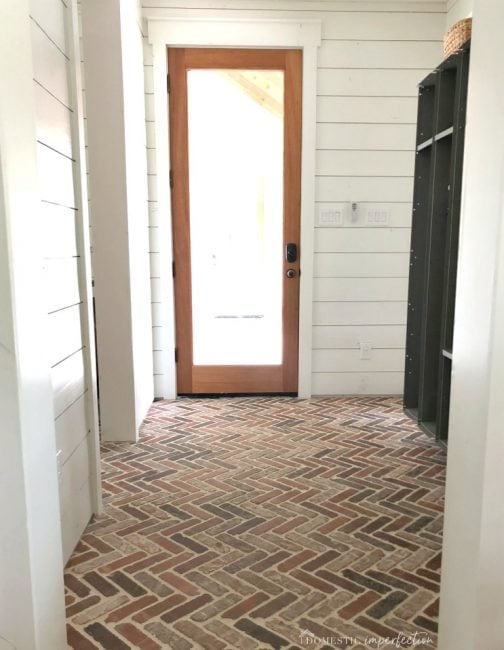
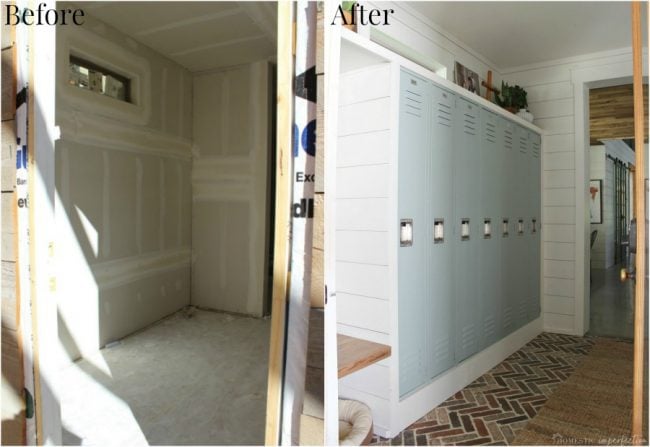
So here is what I’m using as the official “before” picture. It was just a plain drywall box with absolutely nothing in it, which is how the entire house looked when the builder handed it over to us.
The first step was to add shiplap and trim (you can read all the thrilling details here)
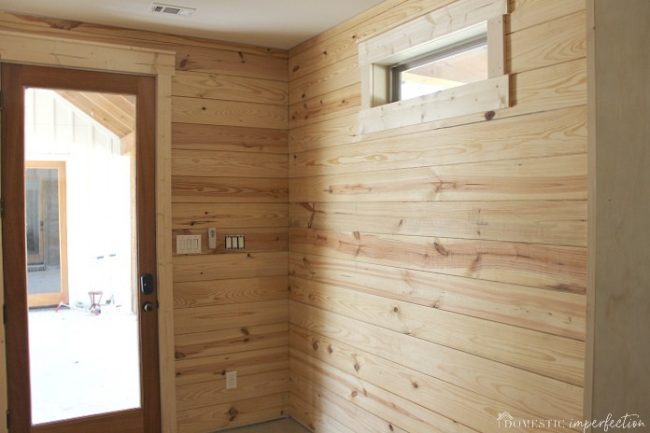
Next came the white paint (this post has all the shiplap painting details and tips).
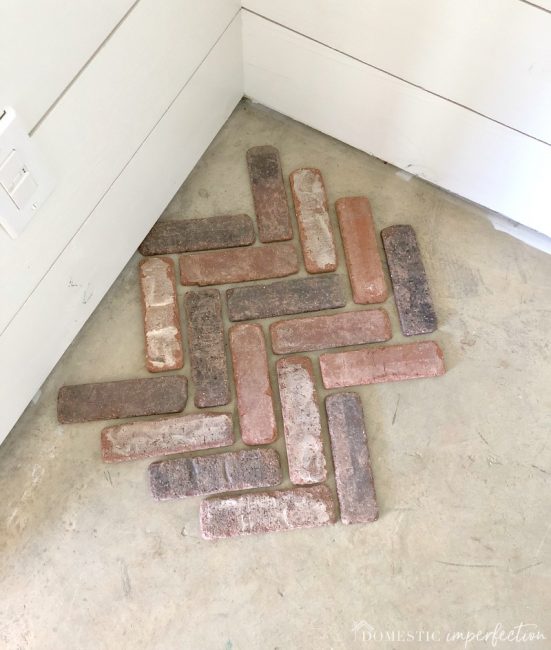
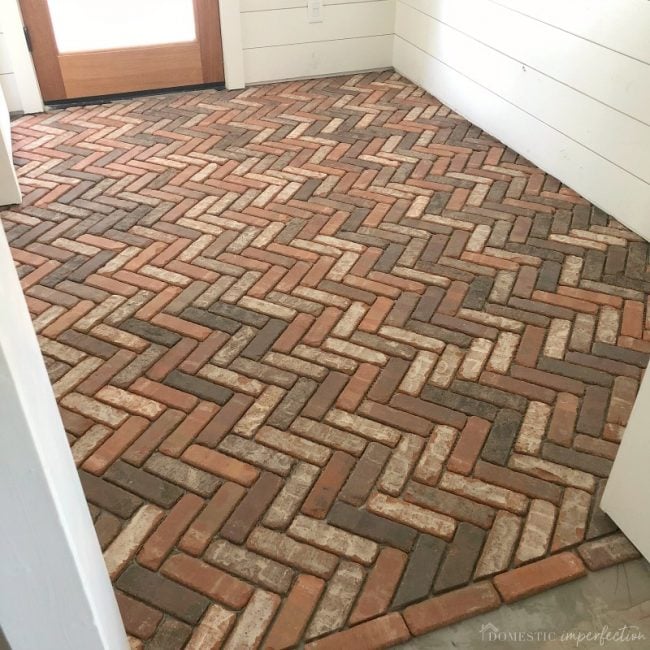
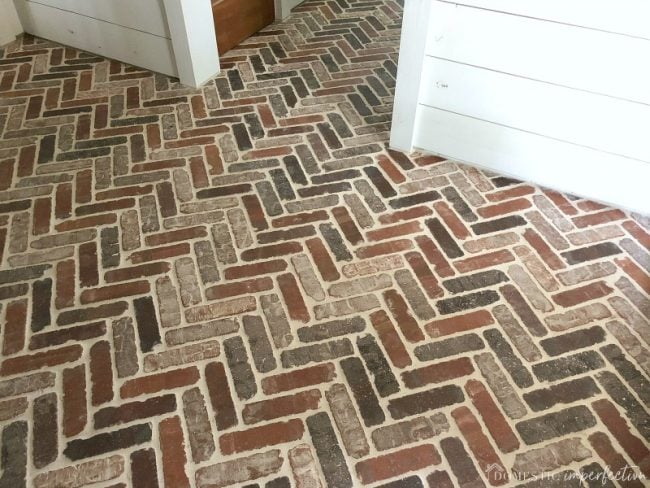
And then it was time for the most highly anticipated part, the brick floor. I’ve been lusting over brick floors for a few years, so the fact that we actually installed them and they turned out amazing was pretty dang exciting (read all about that project here).
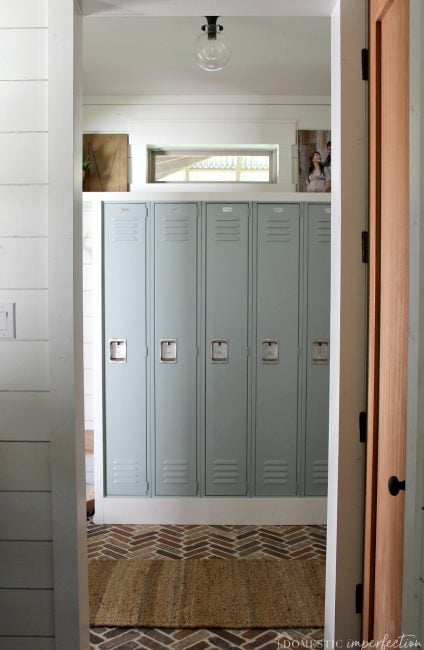
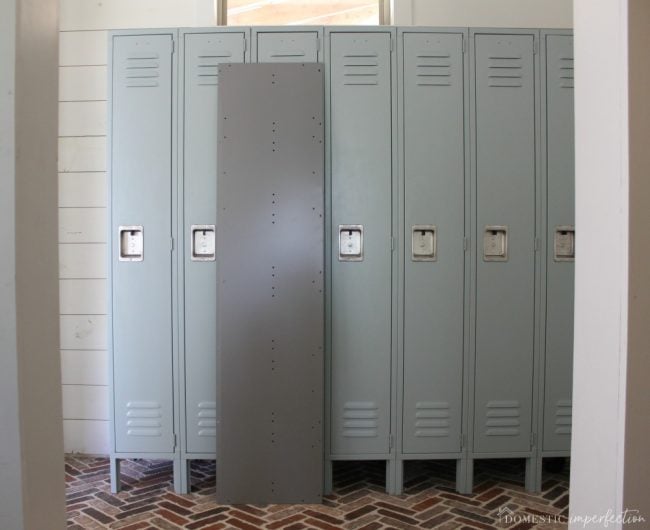
Next came the whole reason for the mudroom in the first place, the lockers. They are just standard lockers from Home Depot, and I painted them to get the exact color I wanted (tutorial here).
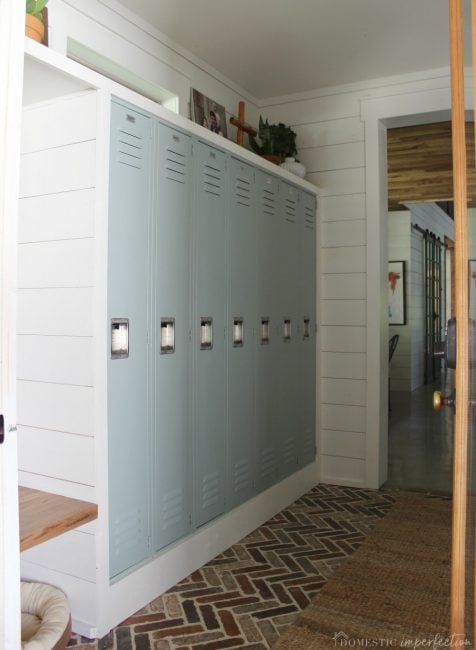
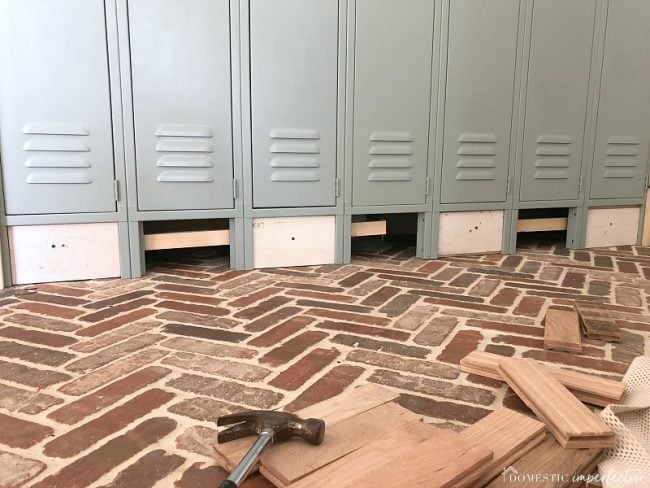
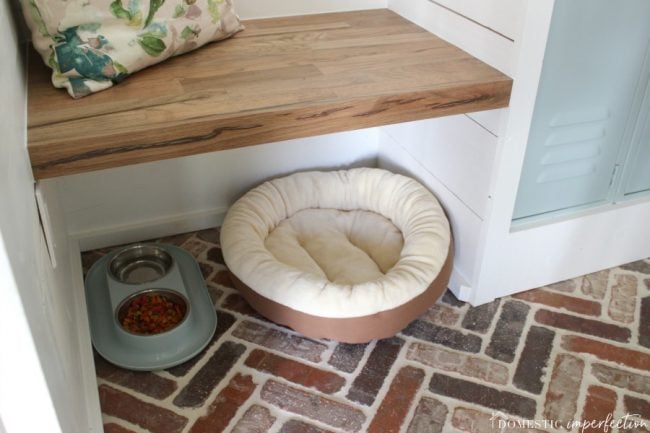
After that we built them in and added the wood bench, which I just realized I never blogged about. Building them in was pretty much the last step, and I’m just so excited to finally be finished that I skipped ahead and went straight to the reveal post. Anyway, the bench is made of two sandwiched together pieces of plywood covered in oak wood flooring.
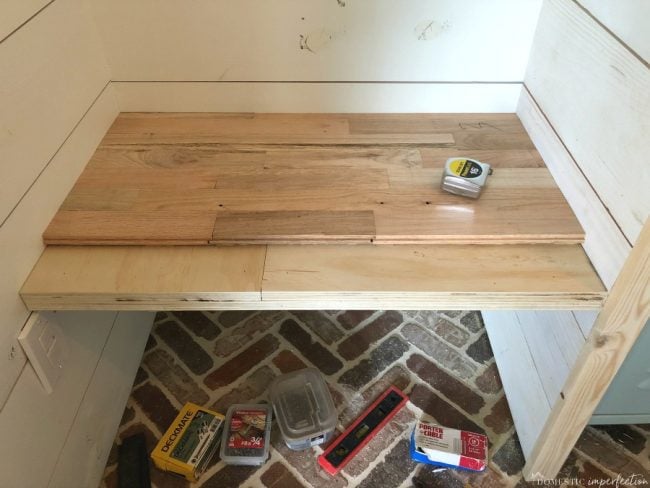
The flooring is utility oak from Lumber Liquidators. This is basically their cast off/flawed pieces that they sell for .99 cents a square foot. I stained it a very unique blend of stains (because I couldn’t get the color right) and sealed it with a matte poly.
Building them in was simple. The most complicated part was the bottom trim piece, since there was nowhere to attach it. My husband came up with a great solution, which was to add a board behind the legs, then add smaller pieces in front of a small lip on the legs. Once screwed together this made a sturdy point of attachment for the front trim piece.
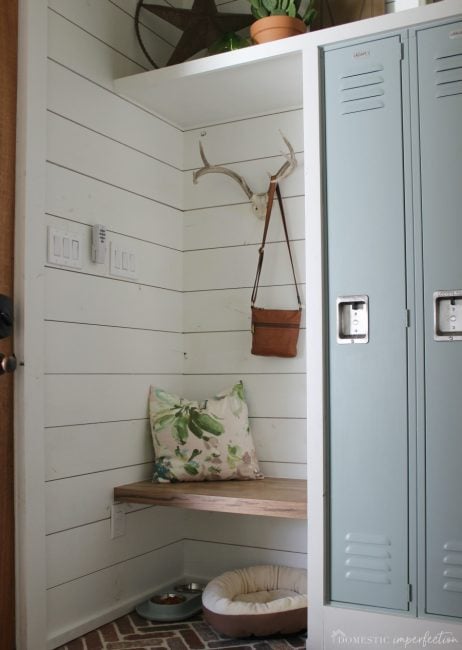
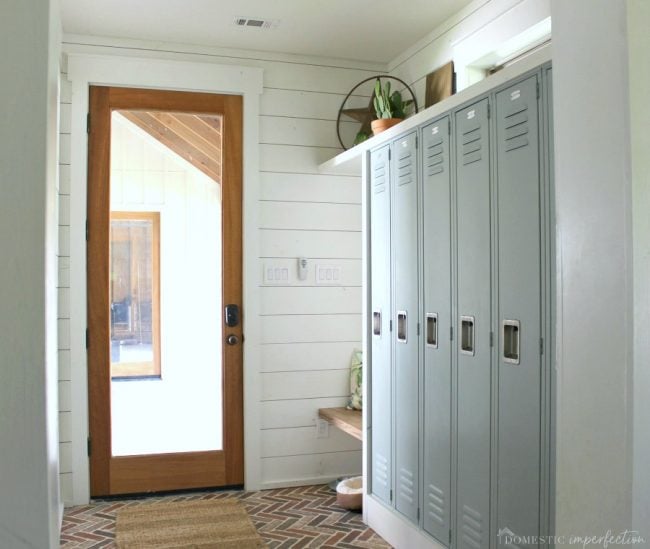
After that I just had to paint, caulk, and decorate. I didn’t spend any money on decorations, everything in here was something I already had (obviously, since the family photo is missing 3/4 of our kids).
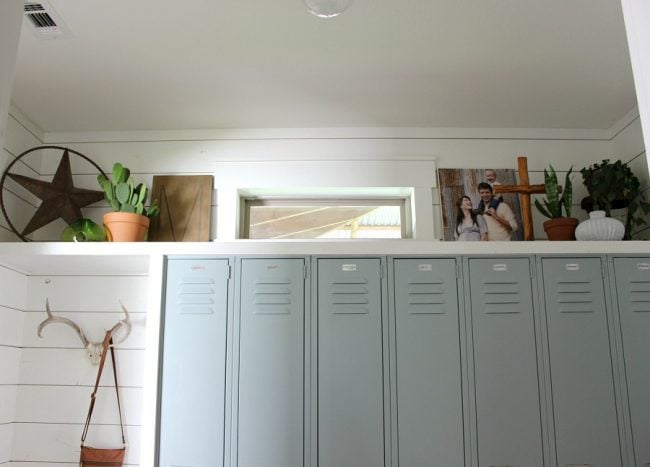
I also added a home base for the cat, and that bowl set…could the color BE any more perfect?!
I also customized the nameplates on each locker. Originally these said Lockers.com all over them, but I flipped them over and added our names with a sharpie.
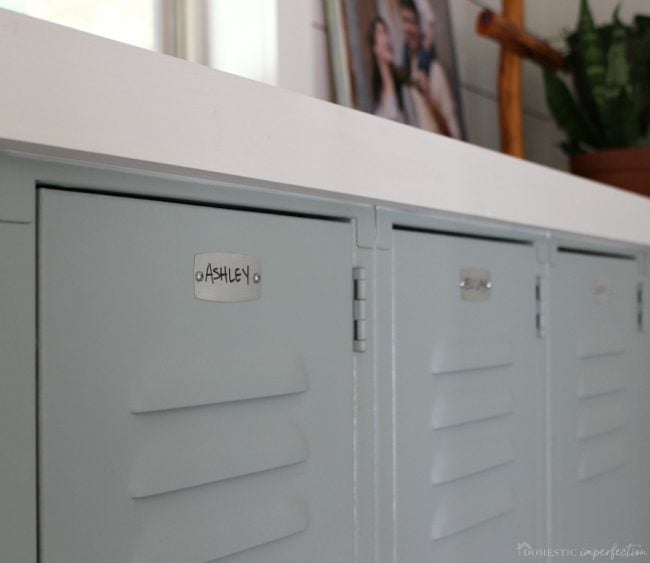
Also, I have to admit that I had a major internal debate with myself whether to put “Adam” and “Ashley” or “Mom” and “Dad” our lockers. In the end I put our real names, because there is so much more to me than being a mom, and I want my kids to see me as a whole person and not just the lady who gets them snacks. That’s pretty deep for a locker nameplate, huh?
Alright, let’s talk about the elephant in the room….price. So how much did this whole thing cost?
Mudroom Cost
- Shiplap – $200
- Brick floor – $990
- Lockers (7) – $600
- Paint and supplies – $75
- Wood for bench, trim, and shelf – $50
- Light fixture – $90
- Decor – $0
- Cat stuff – $30
- Jute runner – $45
Total – $2,080
Mudroom Source List
- Shiplap – McCoy’s
- Brick Floor – Home Depot
- Lockers – Home Depot
- Wall paint – SW Alabaster
- Locker paint – Behr Frozen Pond
- Wood for bench – Lumber Liquidators utility oak
- Pet dish – Amazon
- Pet bed – Amazon
- Jute Runner – Overstock
- Decor – really old, handmade or vintage
- Light fixture – 1-800Lighting
And this is repetitive, but people are skimmers, so…
Links to other Mudroom Posts
- The plan
- Shiplap, trim, and choosing brick pavers
- Painting shiplap – tips and tricks
- Brick paver floor
- Painted lockers
I can’t even tell you how good it feels to have this room finished! The laundry room is next on the list, and since most of the big elements of that room are already complete (walls and floor) it shouldn’t too hard to wrap up!
Omgoodness it’s amazing. My fave is the brick floors.
Stunning! Looks so beautiful and functional, too.
hahaha, the Jehovah Witness line is the best!!! Your mudroom looks amazing. We’re getting ready to start building our ‘real’ house (currently we’re living in a house we built that will later be converted into a garage/shop next to the real house), and I’m taking notes on tons of your details. Turns out the brick floor is gonna be a must, I love it so much!
Also, I totally get the name thing. I always use my name when keeping score during games with my kids, and seeing a ‘K’ instead of an ‘M’ throws them off every time. I can be more cutthroat during games if they see me as Katie and not as Mom, or at least I feel less guilty about it :)
Wow ! Beautiful and functional… love it !
I’ve been waiting to see this reveal, and it didn’t disappoint! It looks so nice, great job! I have the same internal debate about putting “Dad or Mom” vs “Willy or Megan” on stuff too! Every time I go to write an appointment for one of us on the calendar I struggle to write mom, because my mom is mom! Lol
I LOVE this! It’s so pretty and so functional! I’m hoping to build a house soon (and by soon, I mean in the next 5 years or so) and I’m definitely incorporating lockers into that house. And brick paver flooring. And probably a wood ceiling and stone wall. (Let’s be honest. I’m probably going to use a lot of the same elements because I see now how well they work together!)
I’m so excited it turned out so perfectly for you! I can’t wait to see the laundry room now!
Wow!!
I wasn’t sure about the brick but now that I see the whole picture it’s amazing.
Please PLEASE let us know how it holds up to the daily grime of all those boys. That’s the real test!
So happy for you – I’m sure this makes a huge difference in overall tidiness now that everyone has a place for their “stuff”!
I will definitely do a follow-up! So far so good though, I just sweep it and the sealer does an amazing job at beading up liquids.
Goodness only knows I’m getting a ridiculous feeling of satisfaction, so happy for you.
Where did you get that beautiful wood door? And your gorge interior wood doors?
All the doors in our house are from here (and most are from the clearance section) – https://www.etodoors.com
So nice! Love the beautiful brick floors and the little window at the top. Looks like the porch might block some light though? Saw your quick video on Instagram. I really love how you guys did your lawn and let the wild still be wild.
Thank you! The porch does block the light, but it’s not a bad thing. We actually designed the house so that all the windows and doors in the main part are covered by deep porches, to block the light (aka, the HEAT). Plus, we positioned the house to face north/south and not east/west for the same reason. Summers here are no joke!
You guys did a beautiful job on this! It sure comes together beautifully.
Lauren (aka….MOM)
Your mudroom looks amazing! Great job!
P.S. Whenever I click directly on the post on your website, I get a Bad Gateway error (I’m using Google Chrome). I have to go through the Linktree on your Instagram to get directly to the post.
Thank you!
I’ll alert my host to that bad gateway thing, thanks for letting me know.
I get the same error message whether I use Chrome or Safari, and can only pull it up through Facebook.
Looks great! You have wonderful taste and lots of patience. I always want projects to be completed in a day. :) Just a FYI: I’m not sure your math is right, the total should be $2080 (not $1915), but probably close enough to give us an idea of the cost should we want to attempt it.
You’re right, I totally jacked up that math. It’s fixed now…thanks for letting me know!
Love your blog! Have not read it in some time but it was so nice to come back and see all of the progress you have all made on the new house. You have such a wonderful spirit and personality and it radiates through what you write. Thanks for making me laugh and enjoy my bit of research I’m doing on successful blogs before I venture into my own blogging life. Any tips and advice you can share would be greatly appreciated. Lots of good wishes towards your next home project. Our current one is making bunk beds for our own boys room if the rain on the weekends would ever quit so we can get all of the boards cut. Oh, the many adventures of doing-it-yourself…
P.S.
The brick floors are amazing and worth every penny you spent.
Zentel Pills Nashville zoloft australia Kamagra Shop Erfahrungen Is Generic Levitra Legitimate Cipro Or Amoxicillin Bladder Infection
The mudroom looks fantastic! Everything works together. I also love your coat hook. Is that a real skull? I love the brick especially, and also the lockers and the built-in seat. The mirror is an excellent idea for a mudroom, and its reflection expands the view. Awesome!
I love the look you created and have always wanted to use old lockers in our house we are building but how functional do you find then for holding everything. Are they large enough for the back packs and sport bags etc? I have 6 kids from 3-20 and need functionality for sure ????
I absolutely love this !!! I do have a couple questions for you – I’m working on my own and want to know what you used to attach the trim board ? Glue ? Nail gun ? I’m stuck here …. thanks so much :)
What a super area! You are such an hilarious writer..had a good laugh about who uses which doors🤣🤣 didn’t realize how much this Nama missed your posts!
I’m hoping to build a house soon (and by soon, I mean in the next 5 years or so) and I’m definitely incorporating lockers into that house. And brick paver flooring!
I love your mudroom so much! Is the brick uncomfortable to stand on? So love the look.
Thank you! I don’t think it’s uncomfortable at all.