
Industrial Bathroom Hardware
It’s been awhile since we’ve visited my master bathroom. It’s pretty much complete besides a few finishing touches that I’ve been putting off. Well, some finishing touches AND the linen closet, which is still pink from when we bought our house. But that is for another post, today we are talking industrial bathroom hardware.
)
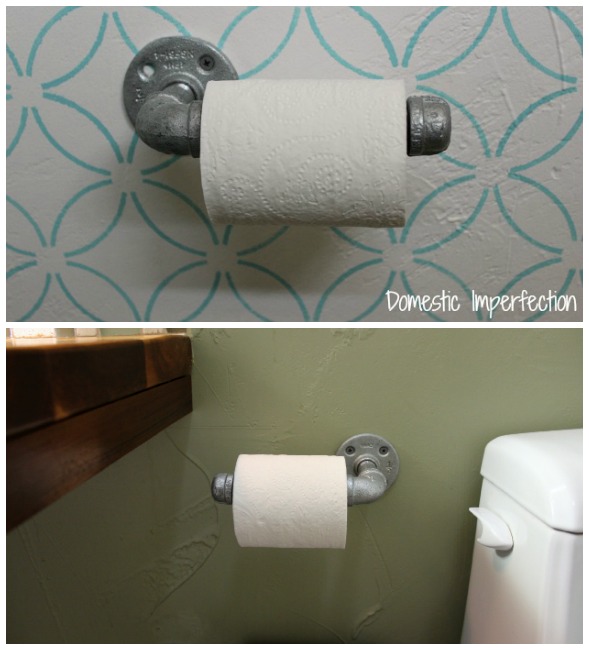
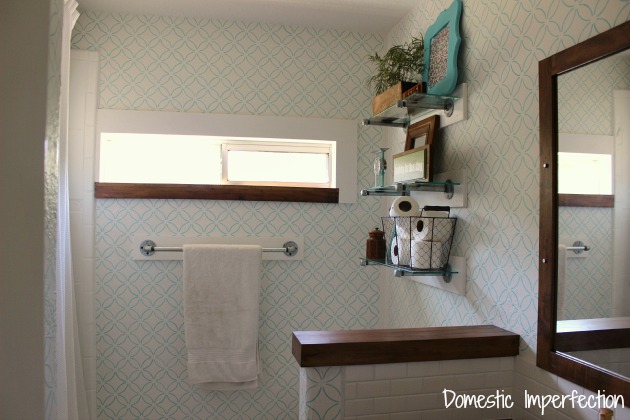
Believe it or not, we have never had toilet paper holders in either one of our bathrooms. The toilet paper just sits on random surfaces nearby the toilet, sometimes getting kidnapped by children and who unroll the whole thing while hiding in the pantry. Now that our TP has a home I have to say…it’s kinda nice. I like knowing that it will be there when I need it. Is this getting to be TMI? Let’s move on.
In both our bathrooms we have used industrial pipe (examples here and here), so it made sense to keep going with that theme. Now industrial pipe isn’t the cheapest thing out there…it’s kinda pricey. Though these DIY versions will still save you money over most non-cheesy bathroom hardware. Plus I really like this look, and look how perfectly the TP fits…
Making these is really easy…you don’t even need a tutorial, just a shopping list. (And you can always spray paint them if galvanized isn’t your thing.)
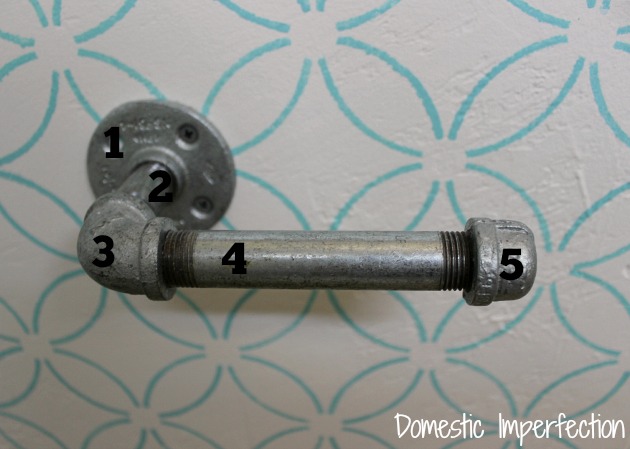
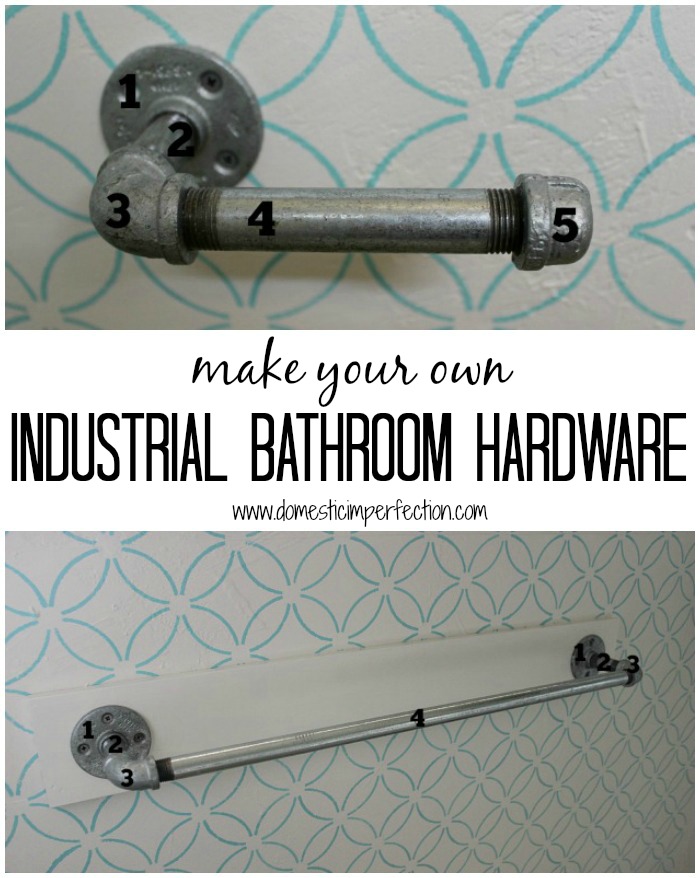
Here is what you will need, all of our pipes and fitting are 1/2 inch –
- Floor flange – $6.61
- 2.5 inch nipple – $1.33
- 90 degree elbow – $1.65
- 6 inch nipple – $2.50
- Cap – $1.65
Total – $13.74
Making a towel bar is almost the exact same process.
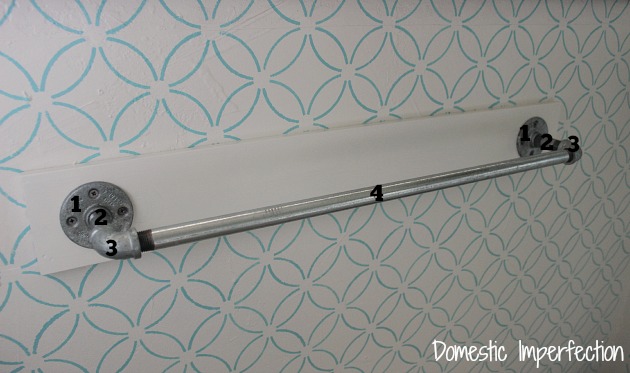
- Floor flange (2) – $13.22
- 2.5 inch nipple (2) – $2.66
- 90 degree elbow (2) – $3.30
- 1/2 inch by 72 inch pipe – $13.54 (the hardware store will cut this down for you for free, we made two towel bars from our one pipe)
Total – $32.72 ($54.12 for two)
While we were at it we replaced our adjustable shower curtain rod with something a little sturdier…

- Pole socket set – $5.57
- 3/4 inch 10 ft electrical conduit – $3.12 (this is different from the pipe we used for the towel bars) (also great for curtain rods)
Total – $8.12
That’s it…gotta love easy projects!


I don’t think those are too expensive, considering how sturdy they must be. Your children will not be yanking them out of the wall anytime soon! They look great, too.
Very effective!!! Would go well with this paper towel holder I saw on pinterest yesterday!
http://www.the36thavenue.com/2014/04/diy-industrial-paper-towel-holder.html
Hope you had a nice Easter :)
Where do you buy the pipe from? Home Depot?
Yup, Home Depot
I thought this was a cute idea so I made one with the help of my friendly guy at the hardware store.
First there is some kind of petroleum product on all the pieces so they don’t rust this has to be degreased before you make it , will this make it rust in the bathroom later I do not know. I brought my pieces back after my husband explained I could put a 300 lb roll of toilet paper on it. Because these are plumbing parts as you tighten them they do not back out so if you make a mistake you cannot loosen them once they are tight. My hardware guy said that it might be better to do it in copper. I am by no means an expert and I’m sure my hardware guy gets a few laughs when I show up but I think these are some key points to point out.
Thank you
“…there is some kind of petroleum product on all the pieces so they don’t rust this has to be degreased…”
The oil is residual “cutting oil” which protects the cutting teeth when the mfg is cutting the threads. It is not applied to the pipe as a rust inhibitor. The pipe is zinc galvanized which by nature is rust resistant but if you’re concerned about rust just spray the piece with a clear poly or other clear top coat. You can use gloss, satin or matte depending on your preference.
“…these are plumbing parts as you tighten them they do not back out so if you make a mistake you cannot loosen them once they are tight.”
This is completely false. All plumbing parts are threaded to National Pipe Thread (NPT) thread standards. The threads are tapered so as you tighten them they get tighter to form a seal. But they can be un-threaded the same way they went together as many times as you want. Just remember the old adage “righty tighty – lefty loosey” Copper on the other hand is a “slip fitting” in other words they just slide together and would normally be held together with solder which is applied tbrough a process called “sweating”. However, for your purpose they could be held in place with adbesive.
Hope this helps. I am an expert
Do you have any issues with rust due to the humidity in the bathroom?
Does any of the the pipe residue come off on towels? So, I was wondering…
Do you clean or prep the galvanized pipe before using it?
Thanks so much,
Gayle