
How to Build a TV Frame
Today I have a very simple and practical project for you. It’s something that you 100% can do yourself….even if you are new to DIY and your tool collection is nearly nonexistent.
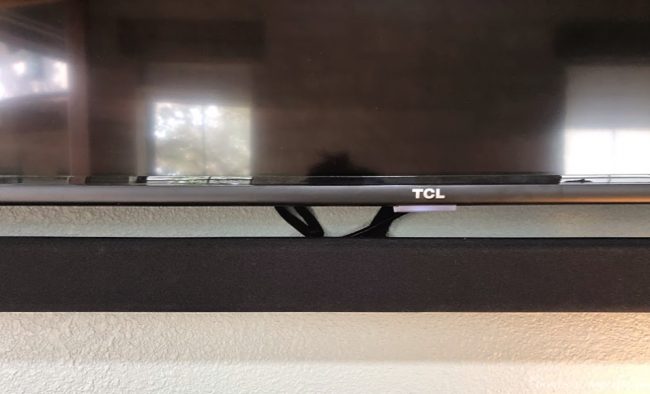
Why would you want to frame your TV? Well because of this…
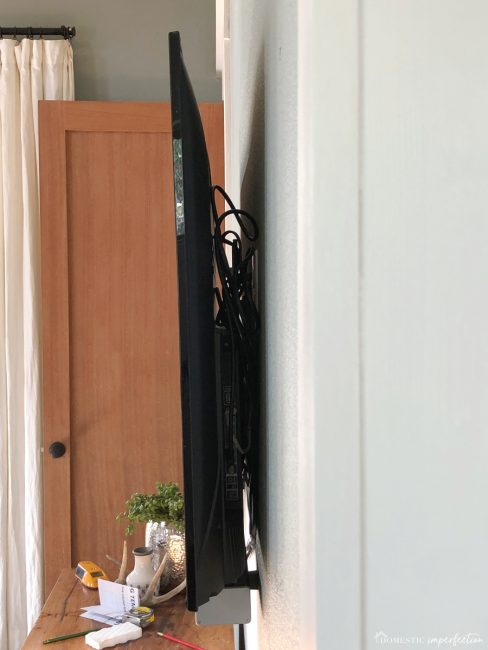
This giant gap full of cords isn’t exactly the prettiest sight, and I’m going to assume that if you have a flatscreen TV hung on the wall then you have the same issue. Fortunately there is a simple solution, and it only requires is a few dollars and about an hour.
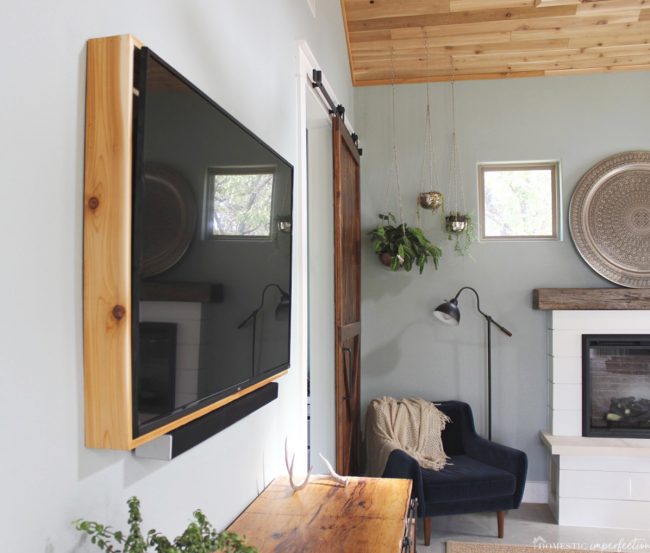
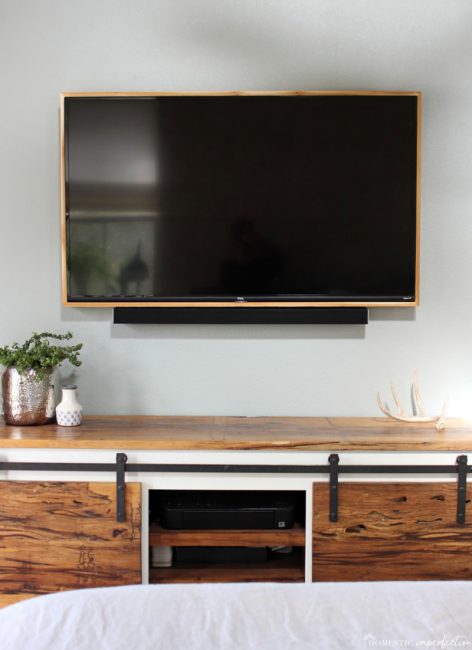
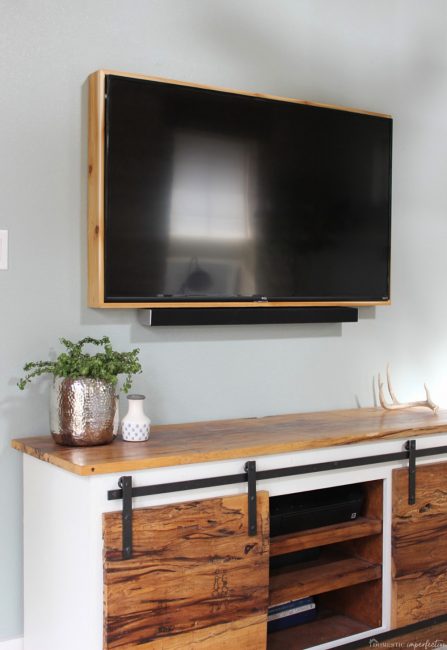
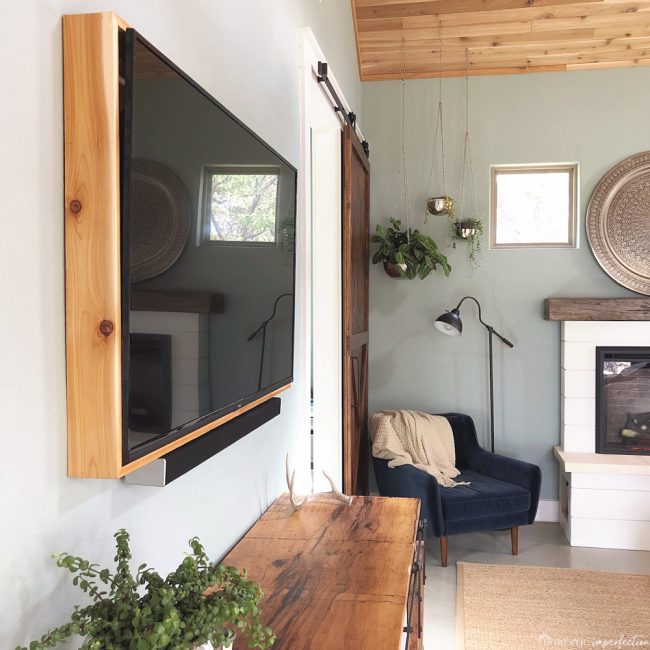
So much better, right?
MATERIALS NEEDED TO BUILD A TV FRAME
- two 1×4 boards, 8 foot long (for a 55-inch tv, longer if you have a bigger television to frame. We used cedar, but any type of wood will do)
- tape measure
- wood glue
- stud finder
- chop saw or miter box
- screws for mounting
- drill
- brad nailer (recommended but not necessary)
- Kreg jig (also recommended but not necessary)
HOW TO FRAME YOUR TELEVISION
MEASURE THE TV – Measure the overall dimensions of your mounted TV so you know how much wood to buy. Measure top to bottom and add 1/8”, side to side and add 1/8”, and the wall to the back of the tv (on the perimeter trim of the TV at the shallowest point).
BUY WOOD – Purchase at least 2 cedar 1×4’s (8 footers, more if the TV is bigger)
TRIM THE DEPTH (MAY NOT BE NEEDED) – You don’t want your frame to project past the front the TV, so you may need to trim off some of the excess depth. Use the table saw or skill saw to trim the boards to the smallest dimension (wall to the TV perimeter at the shallowest point). Our boards happened to be 3 1/2” so they didn’t need to be trimmed. You can purchase cedar in multiple widths so if you don’t have these tools just buy the closest you can to the appropriate size.
MAKE YOUR FIRST CUT – Cut the edge of your 1X4 at a 45-degree angle (table saw, skillsaw, chop saw, or miter box and handsaw). Each 8’ board should be cut to provide one vertical and one horizontal side (assuming your TV isn’t too big to accomplish this from one board).
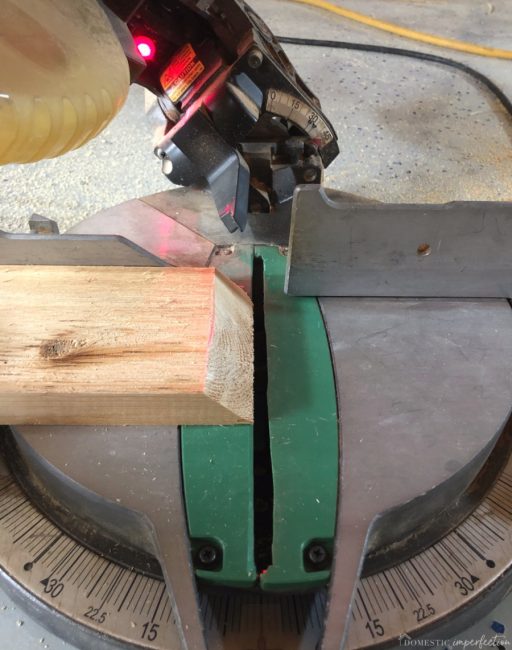
CUT TO LENGTH – The boards are then cut to size (actual tv measurement plus 1/8″) with the inside cut of your boards being the measured dimension. This means your boards will be longer than the measured dimension on the outside of the cut since we measured inside dimensions of the frame. This is the most common mistake, your boards should end up as isosceles trapezoids and not as a parallelogram. In other words…

CHECK YOUR MEASUREMENTS – Place the cut pieces together, verticals and horizontals to ensure they are the same length (more important for them to be the same than it is that they are the correct dimension which is why we gave ourselves the extra 1/8”), them dry fit the boards and check your measurements.
ASSEMBLE – Add wood glue to the corners and use brad nails (1 1/2” 18 gauge) to assemble. If you do not have a brad nailer use clamps, if you do not have clamps use ratchet straps. The glue is strong enough by itself, brad nails just speed along the assembly process and allow the frame to dry in place.
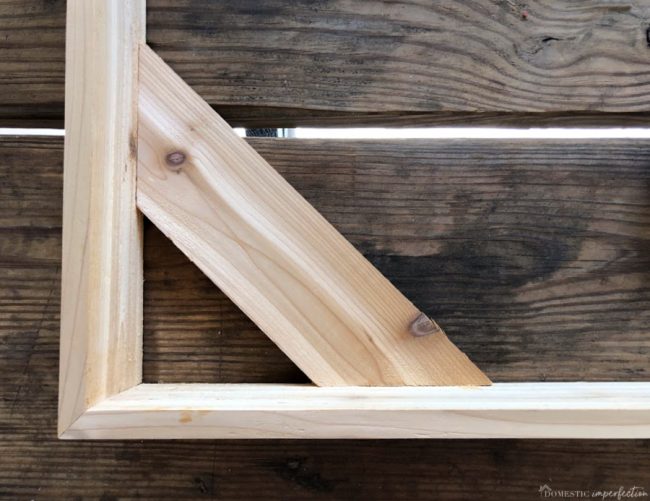
ADD STRENGTH – Use the leftover cedar to nail 45-degree braces into the top back of the frame. This just gives it rigidity and ensures the frame is square.
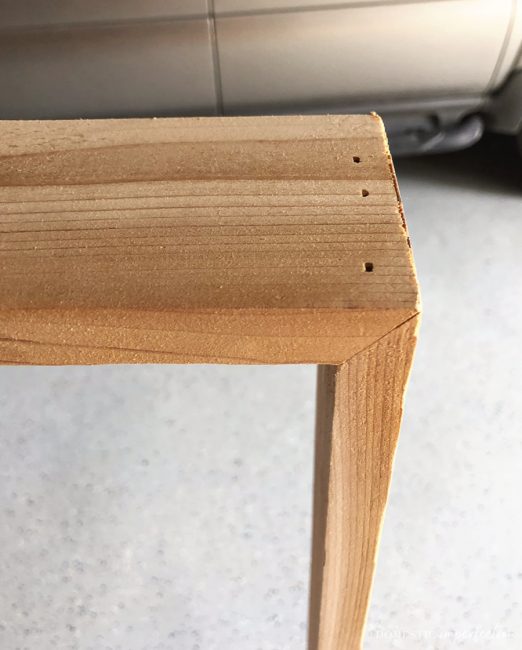
MARK THE STUDS – Place the frame over the tv to make sure it fits, then locate the wall studs and mark them on the frame before removing it from the wall. Use a Kreg Jig to drill some 45-degree holes at the stud point. The holes should be on the exposed top and bottom of the frame so they are accessible when mounted. If you don’t have a Kreg jig you can just eyeball it.
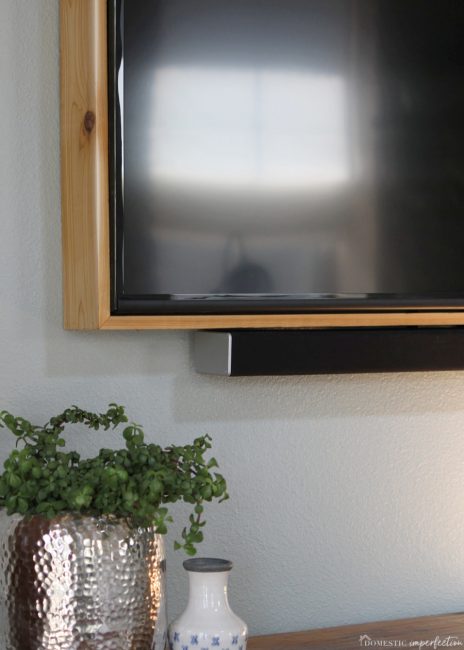
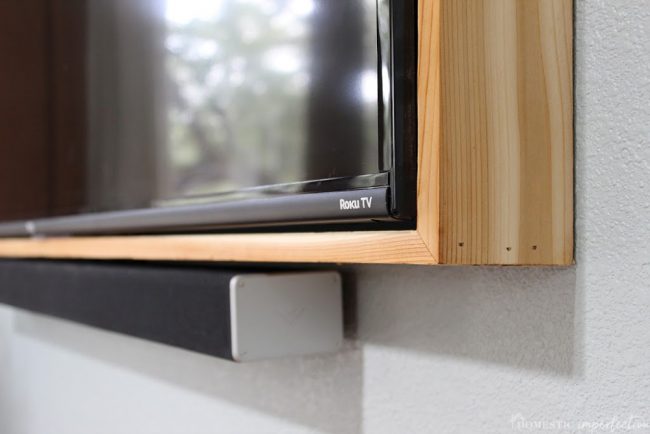
LEAVE ROOM FOR CORDS AND/OR VENTILATION – If you have wires traveling up the wall to the TV, notch out the bottom back of the frame to allow the cords to pass through the frame, this is also where you can add ventilation if you are concerned about heat from the TV (Use a drill with paddle bit, a jigsaw, or similar to make a notched area).
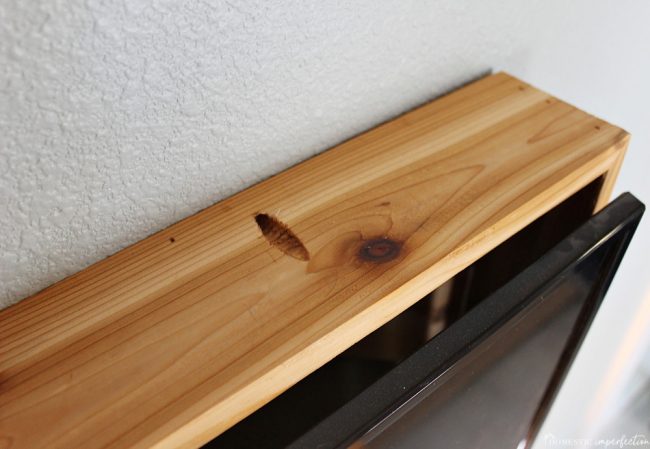
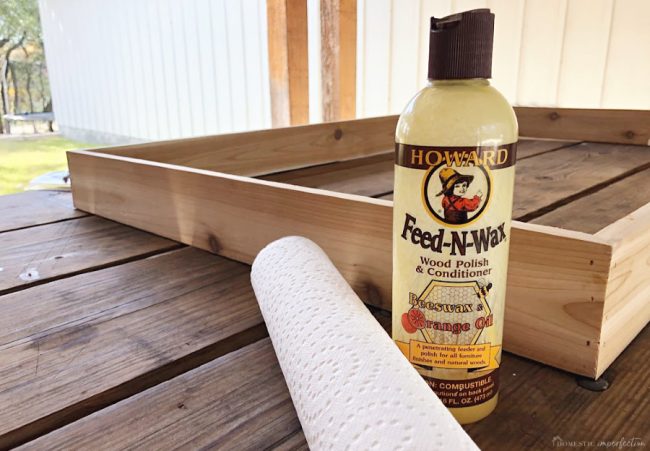
PAINT OR STAIN – if you want to paint or stain your frame, do it before mounting it. I used Howard Feed-N-Wax for a natural cedar look.
MOUNT THE FRAME – Place the frame over the TV and screw it into the studs using the predrilled holes 2” screws.
Most Tv mounts are designed to angle the TV downward slightly which allows decent ventilation at the top of the TV. Our TV has a protrusion on the bottom that gives the frame approximately 1/2” air gap in the bottom and 1” at the top. You could add a lot more ventilation with a drill, the bottom and top pieces of the frame are generally hidden from view anyway as most TVs are mounted at eye level.
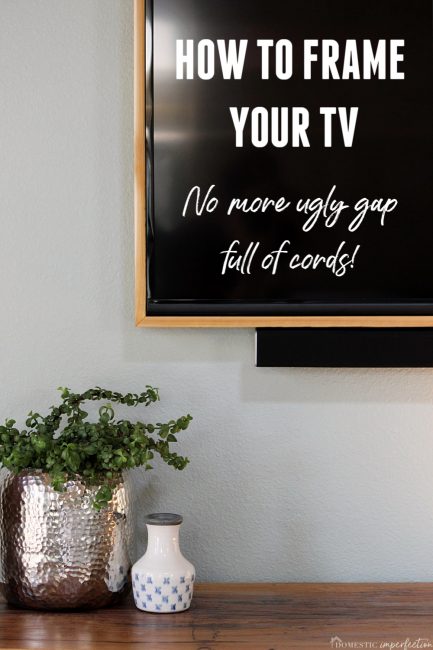
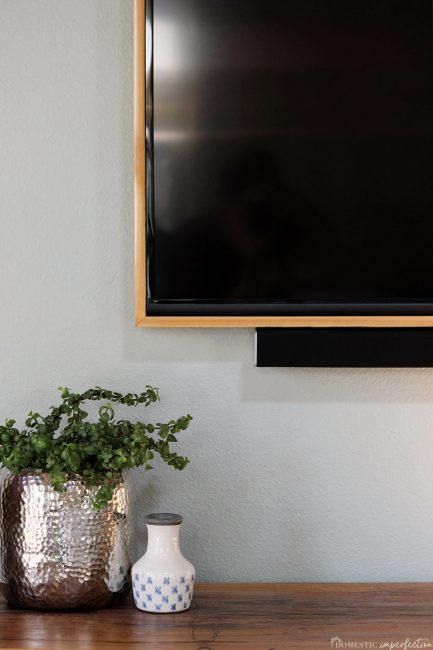
And there you have it! No gap, no cords, just a sleek framed TV!
Source list
- TV
- Soundar
- TV mount
- Media center (DIY)
- Hammered metal planter
- Small vase
- Wall color – Silvermist (SW)
Click the pictures below for more master bedroom projects!

It looks fantastic, well done!
Amazing idea! So much gorgeous wood in this room. But – is that a brand new fireplace i spy in the background?)
It is! It’s about 95% finished and should be up on the blog next week!
Brilliant! Thank you for sharing. :)
It just really makes the area around the TV look finished. Love it
Hey there,
Thanks for publishing this type of nice post.
I like your post very much. Your all of articles are very helpful for me.
I hope you keep posting this type of article…
Hi there,
I’m happy to read this blog post and come to know more about that.
It was wondering if I could use this write-up on my other website, I will link it back to your website though. Great Thanks.
You are more than welcome to use one unaltered photo and a link back on your website, but please do not repost my content.
This is stunning. And I love your media cabinet under your TV too! Great work!
Hi Ashley! This is such a great idea! A TV can often be an eyesore in a room, but you have created a way to make it look so inconspicuous. I have never seen one framed in like this before. Very creative!
Cords are a pet peeve for me, so I love this project! It looks so finished and not like all the technology is all up in your business. I also love the wood doors and top of the media cabinet. They’re beautiful! Is that the pecan wood you have used for other things?
Every DIY enthusiast should follow this! In this way of working wood glue is a vital issue.so need to be careful about when choosing wood glue.
I did this and it came out wonderful. Thanks for the inspiration!