DIY Concrete Countertops, Part II – The Pour
*Thank you to Z Counterform for sponsoring this post.
Alright, here it is…part II of my concrete countertop series! I know a lot of you have been patiently waiting for this post and I’m excited to share all the details. (Read part 1 here if you haven’t already.)
Before we get started on the tutorial, let me just tell you that neither Adam or I have ever worked with concrete, we are truly newbies at this. We spent a ton of time watching videos and reading tutorials online, but had no real life experience. We still felt fairly confident after doing all our research… but truth be told the pour went nothing like we thought it would. In each and every tutorial we watched or read the whole process seems so…I don’t know….calm. Slow. Like you have plenty of time to screed and trowel until the surface is perfect. Hours really. Our concrete didn’t act like that at all, so screeding and troweling was a frantic and rushed process that didn’t leave us a bit of time to work the concrete to perfection.
That’s the bad news.
The good news is that even though our finish is far from perfect, it still turned out well and we are happy… which means that if we can pour our own countertops and be pleased with the results, you can too.
Now Adam and I had planned to do this with just the two of us, but we have quite a bit of family that is wanting to do concrete counters in the future, so they decided to come, watch, and learn from our mistakes. We ended up having about eight extra people there, and I’m glad we did. I expected them to just be spectators (and babysitters), but it was pretty much all hands on deck.
Alright, let’s get to it.
You will need…
Concrete
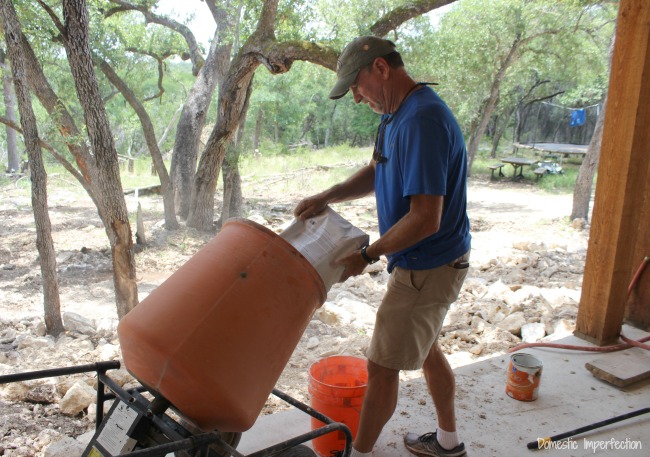
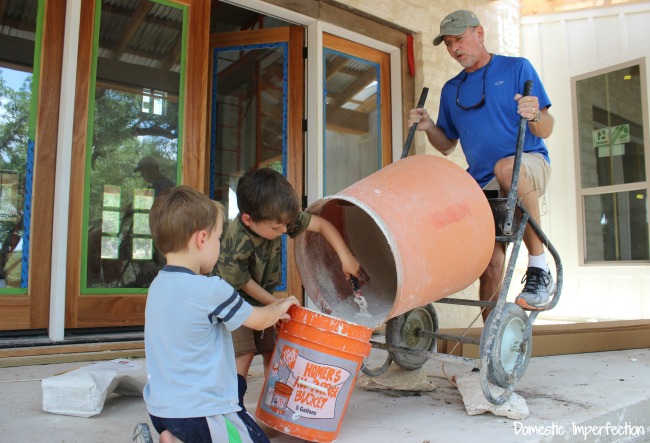
Some sort of concrete mixer (we rented one from Home Depot for $45)
Five gallon bucket
Small shovel or trowel
Screed (basically a scrap piece of wood)
Magnesium float
Steel trowel
Spray bottle of water
Electric sander
Sandpaper
Step one- Mix the concrete
We used the white concrete mix from Z Counterform. Not only is it white (the only concrete color I was interested in), but also has built-in Liqui-Crete, which is a mix of acrylic fibers and other additives that make the concrete easily workable and extra strong. You can use any concrete you would like for the countertops though (like the much cheaper Quickcrete) and add the Liqui-Crete separately. Or you can not add it at all, your choice.
The ratio we used was one bag (50 lbs) of concrete mix to a little less than a gallon of water. It’s important to know that the concrete will start to dry in the mixer fairly quickly, so only mix up as much as need for a section of countertop. At the same time, if you have a long section of countertop you want to pour it all together (not in sections) so you can work it at the same time. (This is where things start to get a little frantic and I was glad we had so many helpers).
Step two – Pour the concrete onto the counter and start screeding
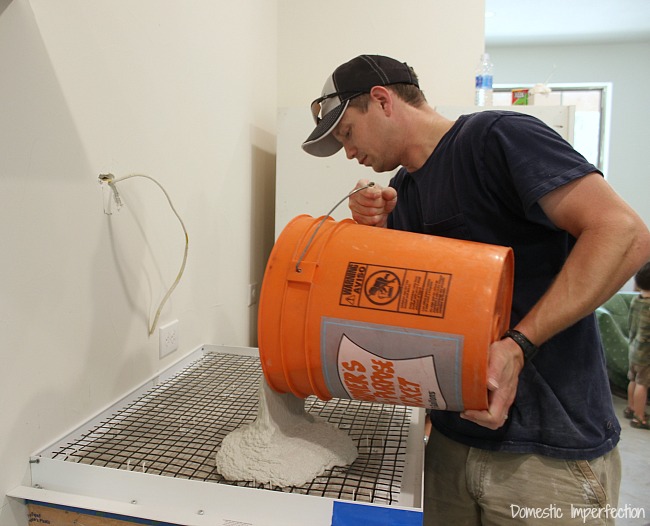
Here we go, no turning back now. We transferred the concrete from the mixer to a five gallon bucket and poured it onto the countertops.
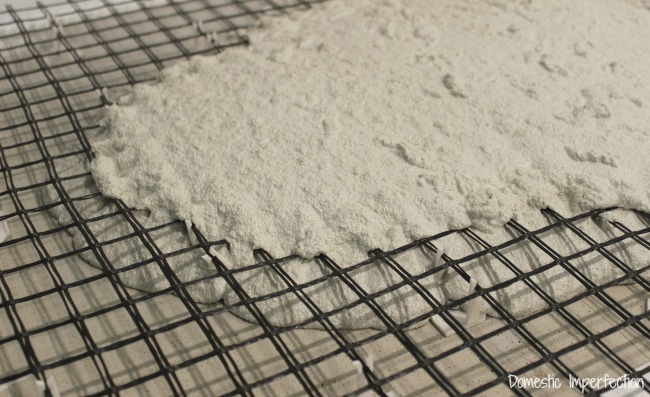
The concrete mix is thin enough that it flows easily through the mesh and isn’t hard to spread.
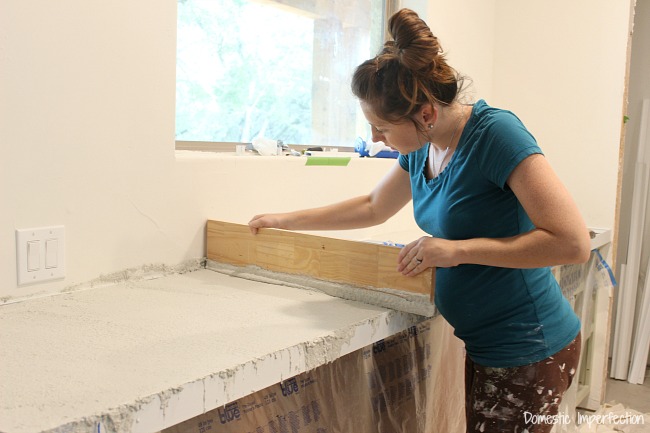
I used a small shovel to move it around where I needed it, making sure to work it into the corners. Then it was time to screed. The point of this is just to make it level (not particularly smooth) and work the concrete flat, making sure there are no high or low spots.
Now, when I watched the tutorials online this looked like it couldn’t be simpler. You just move the screed back and forth in a sawing motion to level the concrete. So easy a kid could do it. Except that it wasn’t.
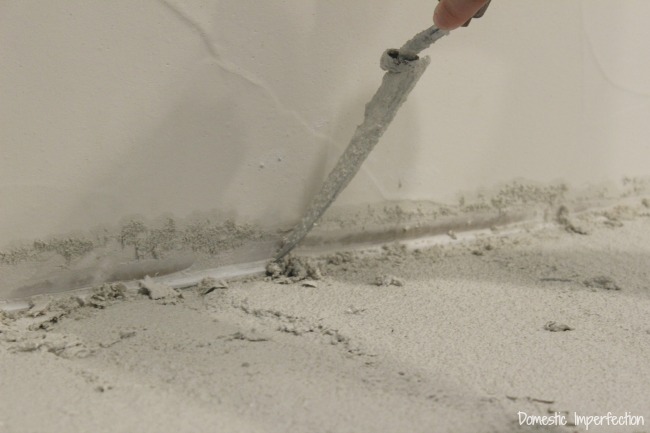
I moved the board back and forth just like I was supposed to, but the wall was in the way. The board was going “thump thump thump” against the wall and the back wasn’t getting all that level. To make matters worse the concrete was drying WAY faster than it should. I was expecting to have to have plenty of time for this part (like, hours) but in reality the concrete started drying within about ten minutes of pouring. It was building up on the wall and starting to clump and I was thinking “Good grief, why is it drying to freaking fast?!” (Well, that is the family friendly version of what I was actually thinking.)
It’s was about this time I realized that in every single tutorial video I had watched online to prepare they were pouring the concrete onto an island. As in, there were no walls to get in the way. Screeding would be way easy on an island, but you aren’t getting the cleaned up version of a tutorial here on Domestic Imperfection…no, here you get to see all the frustrating crappy parts too.
Step three – Remove the bubbles
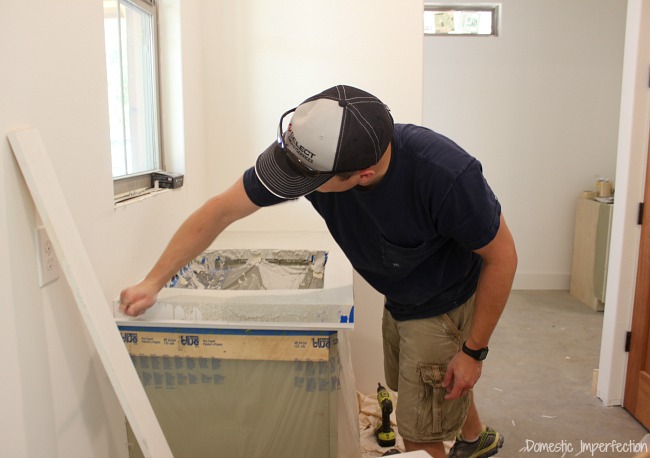
During the pour you will definitely get bubbles trapped underneath the surface, and you want to bring to the surface so they don’t show she you remove the forms. For this you will take an electric sander (with out the sandpaper) and gently run it along the edges of the form so the bubbles rise to the surface. We had fully planned on doing this, but in all the craziness of living in/working on two houses we couldn’t find the sander. The concrete was drying so fast that we didn’t have time to hunt it down, so instead we used the backside of a screwdriver to bang on the edges (which actually worked fairly well).
Even if you do everything correctly (like use a sander) you will probably still get some bubbles in the final product, which you can either embrace or fill with a patch.
Step four – Smooth with the magnesium float
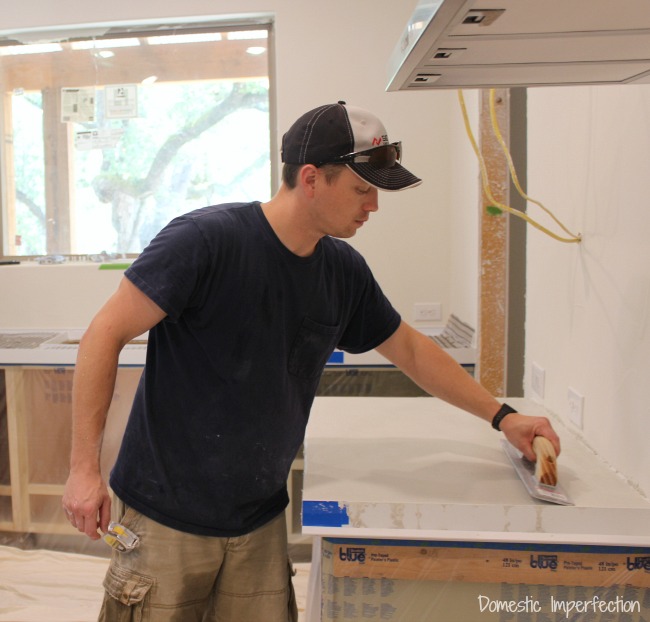
When the concrete has set a bit (where you can touch it and it will leave a light fingerprint) start to smooth with the magnesium float. I was under the impression that this would be hours after screening, but in reality is was almost immediately after. Your concrete may act completely differently, so pay attention and be flexible. Just gently glide over it in a random, organic fashion.
Step five – Smooth even more with the steel trowel
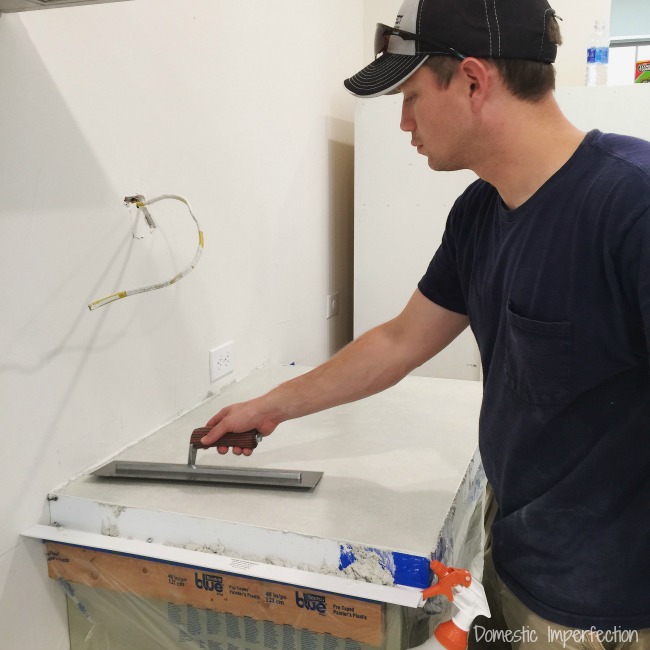
Once the concrete has set a little more, gently go over it with the steel trowel. If you need to add a little moisture use the spray bottle of water to add a bit and make it more workable. I’m not going to go into a ton of detail of the finishing process, because I’m no expert. I would recommend watching this video on YouTube to get a better idea of what all the finishing steps should look like.
Step six – Remove the forms
Wait at least 24 hours for the concrete to set, and then you can remove the forms. To do this you will gently sand the top edges of the form to remove any extra concrete (this prevents chipping). Then you just pry the form away from the concrete and break it off. There is no gentle way to do this. It is fast, loud, and a little scary. The ultimate moment of truth. Here is a four second clip of us breaking the forms off –
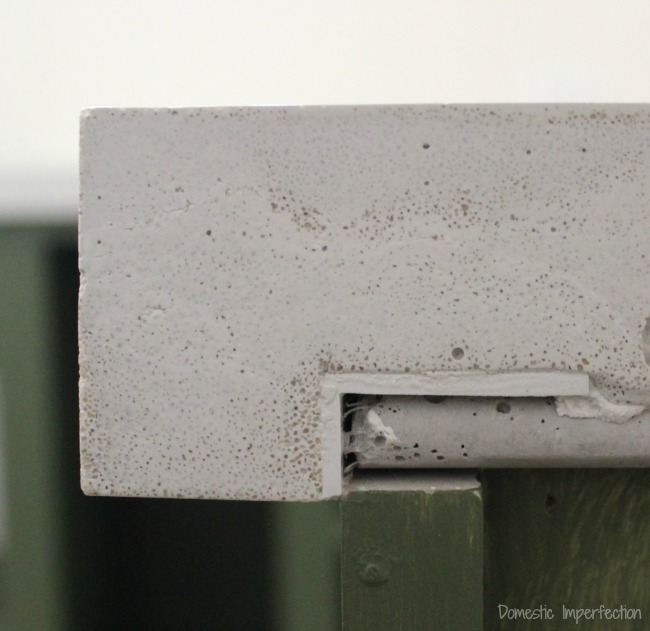
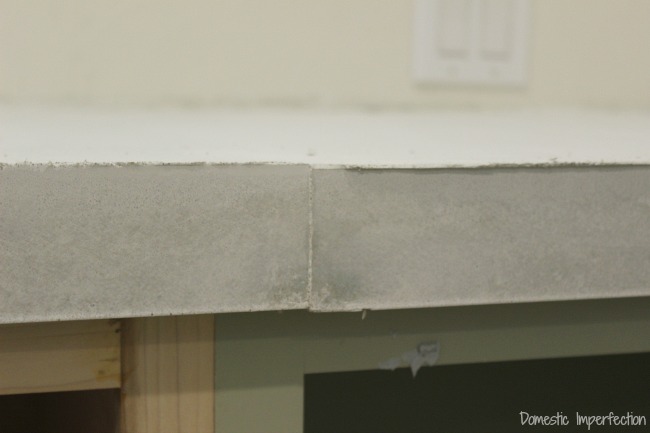
Here is what the forms look like after you break them off (this picture is from the side where the oven slides in, so it didn’t need a finished edge).
You can see the plastic part on the bottom that is intact and will stay forever, and the rest of it snaps off leaving you with a beautiful smooth edge.
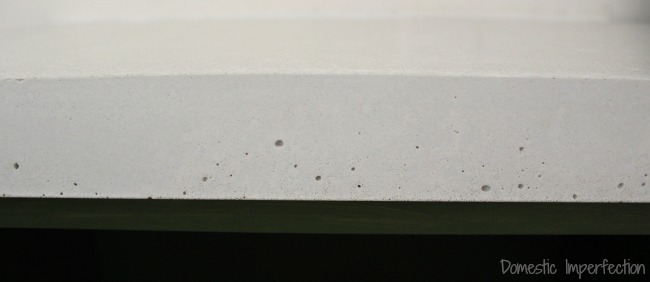
Some of the sections are completely perfect, while others have quite a few bubbles.
Honestly I thought the bubbles would drive me crazy, but I actually kinda like them. If you hate them Z Counterform sells a concrete patch so you can make them disappear.
We also have a seam where to pieces of the form came together.
I prepped the seam really well (or at least I thought I did) by gluing another form to the outside, taping it for extra strength, and caulking the inside…but I’m guessing the weight of the concrete shifted it a bit. I definitely do not feel the same fondness for the seam as I do the bubbles.
Step seven – Sand for a smooth finish
This step I really didn’t want to do. With the white concrete, the more you sand the grayer it becomes, since sanding exposes the aggregate. However, ours were not all that smooth when everything was said and done, so we decided to sand a bit.
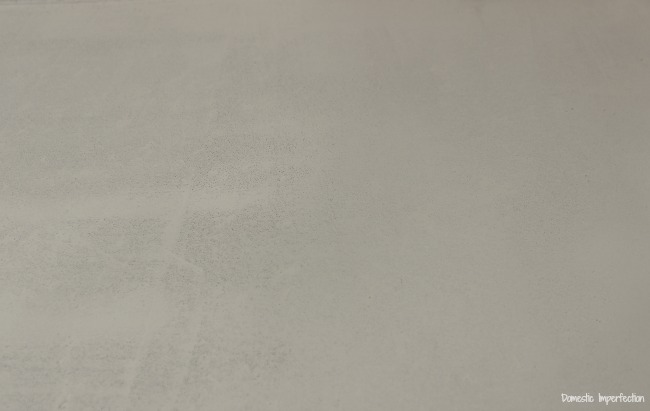
I was hoping we could lightly hand sand it and have it be white and smooth, but even an extremely light sanding exposed the aggregate. Here is a (pretty terrible) picture as an example, the left is lightly sanded and the right isn’t sanded at all.
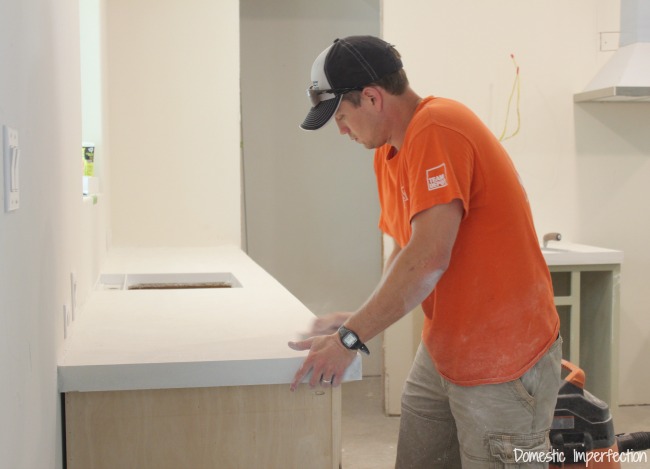
After I realized that there was no avoiding exposed aggregate, I let Adam loose and he went to town on it with the electric sander (which we finally found!). Also, you should be aware that sanding the concrete is a very messy, dusty process. If you are actually living in the house (we’re not) you should take measures to block off the area and keep the dust off all your stuff.
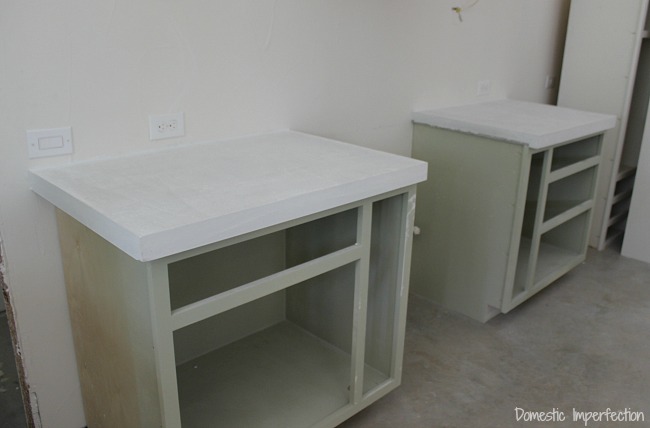
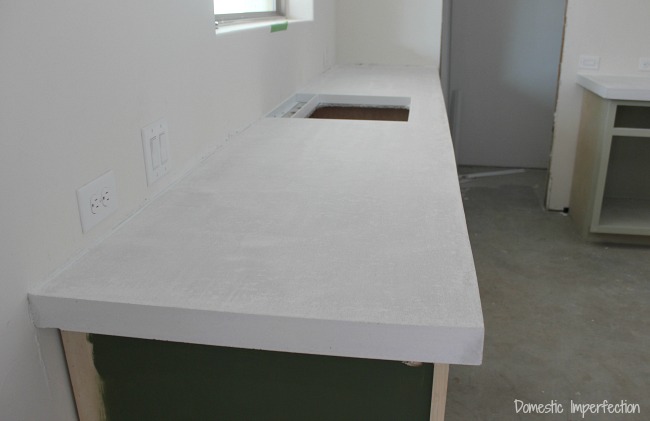
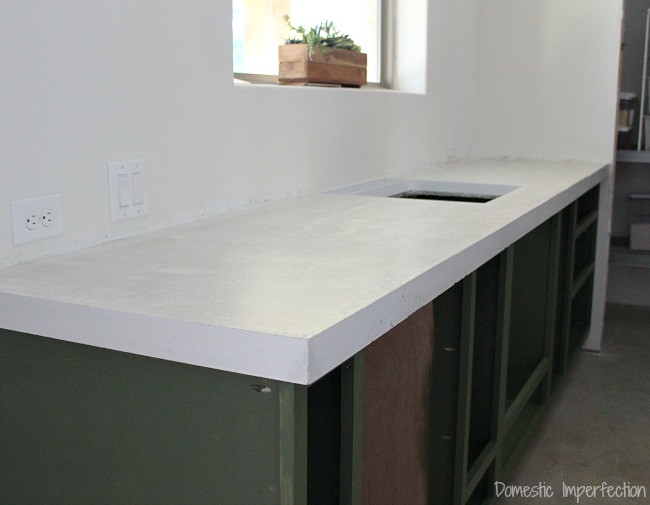
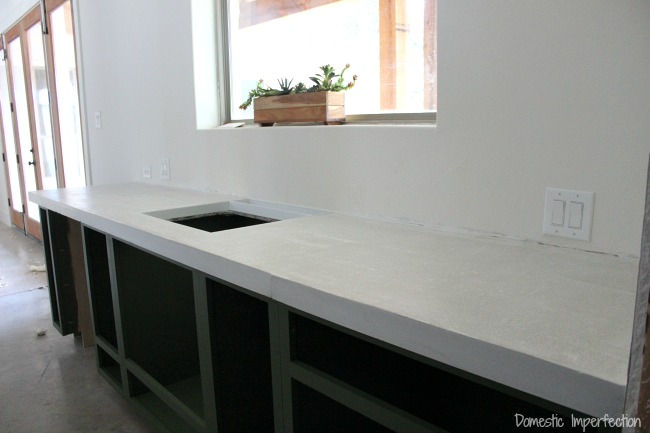
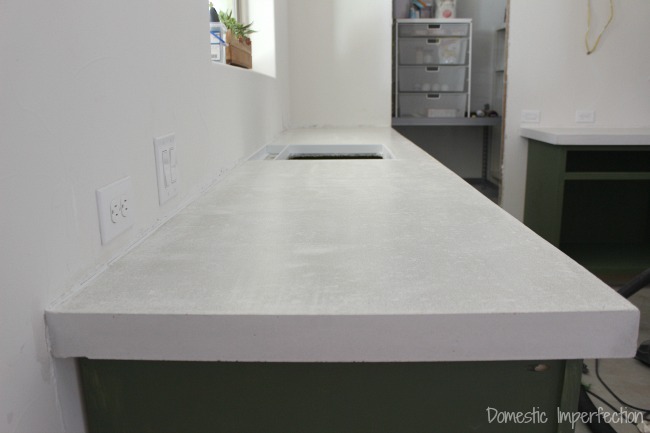
And so, here are some pictures of the final product…
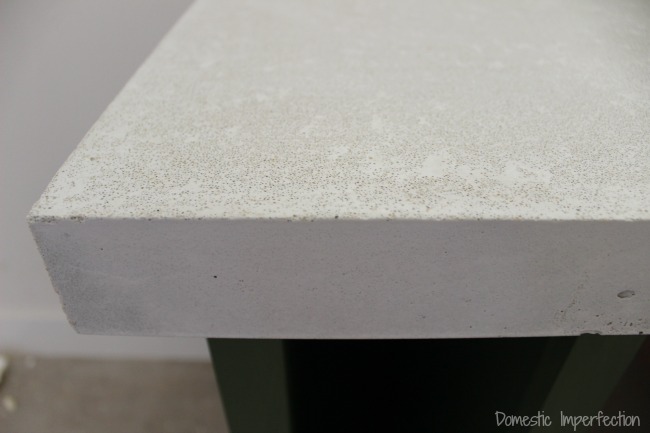
Here you can see the finish on the side versus the top…
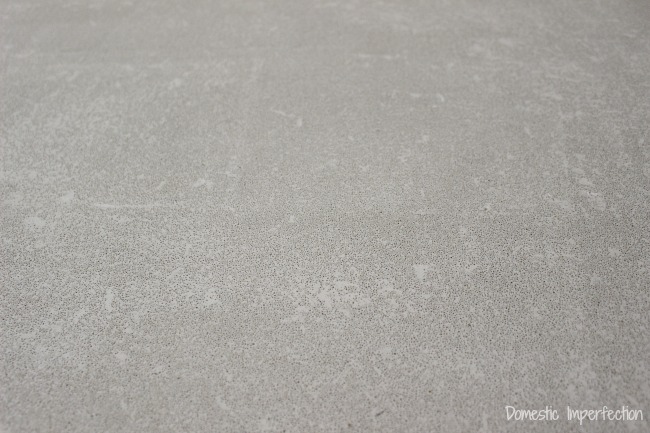
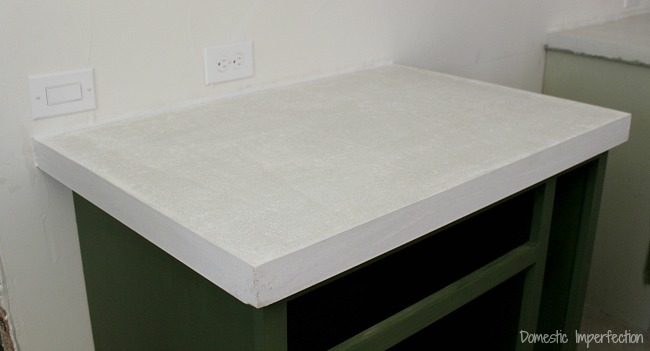
And here is a close up what the top looks like…
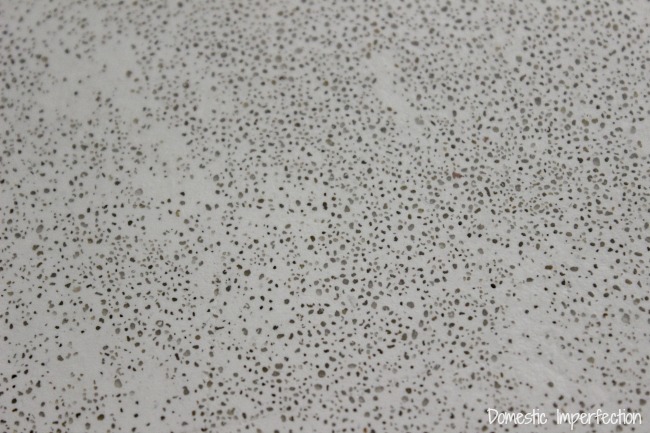
It’s not a pure white and it’s not uniform…the low spots are brighter and the high spots are grayer. Here it is even closer..
I’m not saying this is good or bad, I just want you to know that if you are planning to pour your own white concrete countertops you will probably not end up with pure white, slick smooth surface. It is definitely more of an organic looking countertop. The good news is that if you step back, overall it reads as very white.
Final Thoughts
Overall, I am very happy with the countertops. I think they look great and I would definitely do them again. That being said, I am not 100% thrilled with them either…they are not quite as smooth and white as I had hoped for. That’s not even the part that I think is bothering me though, I think I’m mainly disappointed because Adam and I learned so much during this process, and if we did it again the results would be much better. It’s kinda crappy that our first time to ever work with concrete is set in stone (literally) for forever.
So, if you are planning to pour your own countertops and don’t have any previous concrete experience, I have a couple of recommendations.
1. If you want a perfect finish, hire a concrete professional. I’m not saying to hire a professional to do the entire process for you (because that is $$$), but if you could bring someone in for an hour or two to do the finish work (last steps) I think it would make a huge difference. I can’t imagine it would be that expensive and you definitely won’t regret it.
And / or…
2. Do a test run. If you’ve never done concrete work before, buy a few extra bags, make a quick wooden form in your garage, and do a practice run before you jump right into pouring your (very permanent) countertops.
And that’s it! If you have any questions please leave them in the comments and I will answer them (or e-mail my contact at Z Counterform if I don’t know the answer).
Oh! I almost forgot the most important part…the price breakdown.
- Durock – $50
- Edge profile – $200
- Fiberglass Mesh – $50
- Z Clips – $20
- Concrete – $435 (15 bags at $29 each)
- Concrete mixer rental – $45
- Magnesium float – $27
- Steel trowel – $37
- Sandpaper – $40
- Other supplies (caulk, tape, screws, etc) – $30
Total – $934 + shipping
(Freight charges will vary depending on how much concrete you order and where you live, but plan on it being at least a couple hundred dollars.)

They look awesome, y’all did a great job!
Question…where did you get your front door?
I got a quote on what I wanted, and it was way, way, way, way more than I figured it to be. I can’t remember what yours looks like, but I feel like it was close to what I picked out.
I am anxious for part 3!!!
One day I will write a post on the doors, but we ordered all the doors in our house from a place online called ETO doors. I think the front doors were about $1,100 or so, they came pre hung and are mahogany. Check out their clearance section, we found the motherlode there and were able to score most of our interior doors (8 foot mahogany) for $99 bucks each.
Awesome, thanks! Well, fyi…apparently having an eyebrow arch in a door will cost you about 60% more. I had them give me the quote with a square top, it dramatically reduced the price. They are mahogany, so I am thinking if I used alder, it might be able to get in my price range…but I will for sure check out that site! Thanks!
I love it! The organic look with the bubbles and the aggregate give it personality rather than a super sterile plain white surface. I noticed you didn’t put the concrete on the island. What will its countertop be?
The island will be made from pecan, same as our previous dining room table (this one).
They look fantastic! I know you were hoping for a smooth, pure white finish but I love they way they turned out. The color reads bright and white for your overall look with the benefit of a rustic, organic finish from close up. And I have to tell you that one of the reasons I love your blog is that you are 100% real about the challenges that come with DIY projects. So many people gloss over the headaches or surprises that are inherent to the process, but not you. I’ve personally experienced the special hell that is concrete dust (or any kind of interior sanding, for that matter) and you have my respect doing this project…especially while pregnant. :)
Thanks for interesting posts and for sharing so much helpful information. You guys are so brave and fearless and I love your can-do attitudes, you are not afraid to dream big and you are an inspiration. Thank you for giving us such a lovely inside view of your very special home being built. Excited for you to meet your new daughter.
Love the countertops and love the new dark green paint! It’s all coming together stunningly, and now that I’ve seen this I really hope you go with white subway tiles up the wall your window is on. I really can’t wait to see the shelves you’re planning on next to the green paint.
They look great…but I get what you mean about not being exactly how you hoped. Don’t worry, if your family is anything like mine,those counters will be covered with random crap in no time.
Holy … action packed. ? They look amazin btw, your cabinets are awesome already.?
Hey, Ashley! I discovered your blog just in time because I’m considering concrete countertops for my tiny condominium kitchen. Um… yikes! How many running feet of countertop did you do for that money? Ordinary laminate countertops are looking a lot better to me now! I’m already devoted to your site and thank you for telling it like it is.
Hey Alita! I think it is about 18 -19 feet total.
Good grief! I am exhausted just reading all your efforts! Great job guys.
Do you need to seal them against stains? (Apologies if you already mentioned it in the post, I am not well today.)
Yes, we sealed them, post #3 will be all about the sealer. I should hopefully be able to get that post out by the end of the week.
Boy, can I relate to the concrete frustrations. We poured both our new footers and our foundation. Completely different experiences. The first was scary, but totally doable. The second we felt way more prepared for…but the outside temp was in the 80s instead of 60s and that made a HUGE difference on how fast things set up. Not. Fun. Super stressful and a whole new set of big problems. For interior work, I’d recommend cooling the house as much as you can to slow the setting of the concrete. When it’s cool, you really do have time to finish properly, etc.
I think the heat was a huge factor in how quickly it dried. Our house only has the A/C hooked up in the bedroom so far, so in the main living space it was probably at least 85 degrees. Dang hindsight!
Ashley, how heavy are these countertops?
Would you tell me the square footage of the area you covered? I really appreciate your thorough tutorial! I’m thinking about doing this for my outside kitchen. Thanks!
We did 40 square feet
I should have read the comments before I posted, I just asked about sq footage and here’s the answer…you can ignore my comment/question…
I like the organic look of the bubbles and the aggregate. I think they look terrific! And the fact that they’re a bit more on the rustic side seems to go with the style of your house. The only thing is that seam, I agree that would be irritating. Can you sand it smoother? Way to go for jumping in and trying such a huge project!
Somebody said your DAUGHTER. Is that really happening??
I agree that the more rustic concrete does go with our house. That’s the beauty of a rustic house I guess…flaws just make it better. Good thing I’m not into the clean modern look!
As for the daughter, I think she was just being hopeful :) We don’t know the gender, but I am almost certain it is boy #4 (though Adam thinks I’m just saying that for self-preservation). We will see in 10 (or 12, eek) weeks!
I see the cabinet colour and love it madly. I too am a huge fan of green. Looking through the photos it seems the mulga scrub outside is a similar colour way and is inspiration for the grays and greens. I follow you all the way from Australia so keep up the great work. I wish I was able to access so many of the things you can….
Good luck with the rest of your building project including the family members!
Jane
HI Ashley,
I read your notes on being dissatisfied with having to sand down the tops, which exposed the aggregate and removed the “WHITE” topping and overall white look. I had the same challenges.
After pouring my I found that the “Z” recommendations may be a little skewed with regard to mixing ratios and using the cement board as a base. I found that the cement board was sucking the water out of the cement so fast that it was curing extremely fast, even with soaking down the cement board. After the first bag, I was using around 3.25 qts of water and sometimes a bit more, and still finding the set time was very VERY rapid. This effects your to main points and left me with a little disdain as well, because I had little to no time to work the cream to the surface.
Im pouring a hearth in a few days and seal coated plywood and feel that by not using the cement board, the curing is going to be much improved.
Thank you for sharing this. I’ve been thinking about cement counter tops but I didn’t know anyone who made them. I appreciate the feedback.
I think your countertops look great. I like how they look organic and the color isn’t bad at all. You did an excellent job.
This definitely gives me something to think about when it comes time to do our countertops. Thanks for sharing at Merry Monday! :)
This is definitely a handy tutorial to have. I love this idea.
Thank you for sharing this with us on the #HomeMattersParty. We hope to see you next Fri. at 12 AM EST when we open our doors.
Im just going to come right out and say it. You should never use a dry sander on concrete. Not only is it very unhealthy for you (many concretes and concrete polymers contain lye and other deep lung embedding particles you breath in but they can cause human reproductive harm ). You have to use a wet sander. I think you are not to late to give your countertops a face lift even if there sealed.
Awesome how smooth it looks after it is sanded. I like the bubbles on the sides too! Give it character I usually say when something I do does not work as I planned, though your work is incredible! :)
It looks interesting and you must enjoy yourselves. It always makes people happy that they do something by themselves sucessfully.
Wow this looks awesome and so interesting! I love how it has more of an organic look to the counter top! You guys did a great jobs, thanks for sharing!
The Z website states:
:*Z Liqui-Crete should be combined with a concrete sand mix ( Quikrete Sand/Topping , Sakrete Sand Mix ) in a 5 or 10 gallon bucket using a paddle mixer. Concrete drum mixers will not produce consistent results.”
Did you see any issue with using a drum mixer? Sure would make it much easier than individual bags.
I’ve only ever done this with the drum mixer so I can’t really say. I do know that my concrete behaved a little differently than I was expecting (and different from what I had seen on the online tutorials) and the mixer may or may not have had something to do with it. If I were to do it again, knowing what I know now, I would probably use the the bucket and paddle mixer.
very nice
Great job Ashley and Adam.
Thank you for sharing your thoughts and suggestion for this project.
I am curious how are the countertops holding up after almost two years of use? Is there any discoloration, and you still happy with them? Any additional comments would be appreciated.
Thanks!
Thank you so much for this tutorial. I am trying to convince my husband that we can do concrete countertops, our price alternative is laminate and I just don’t want to cheap out on our new kitchen! Yours turned out beautiful and I think could help convince him…
My question is about square footage, do you have a rough idea of how many sq feet your counter tops were/are? I’m trying to get an idea on cost for us but with every kitchen being a different size I’m having a hard time figuring out concrete countertops per sq foot when people post how much it cost them they rarely post the size of counter tops they made…
Thanks for the tutorial and potential convincing of my husband…
Sand mix is what you used. Concrete mix has aggregate/rocks in the mix of Portland Cement, Sand, colorant, and water.
Sand mix is missing the rocks
What type of finish or sealer did you use? It looks great !
Nice work guys !
When the concrete is initialy leveled, it brings water at the top and with the water you add drops of pure white cement dry powder and use a steel float , u will get super smooth finish and plain whit that u need, altanatively jst cover your structures with porcelain tiles.
Thank you
Hi, I understand this post is from 3 years ago, so obviously you have had your baby,
Lol. But am doing my first concrete countertop also, but only in the bathroom, and
On either side of a pedestal sink. I know I am crazy, but I have reasons for it.
however I have some questions to ask, about concrete, so I am wondering if you
Are still around??
I am, ask away!
We purchased a concrete countertop for our bathroom instead of DIY- but I’m wondering about cleaning. Do you do anything different cleaning those types of countertops?
Hello where did you get the edge profile ? The countertops look amazing! I am going to try this out hopefully comes out like yours