
Sewing a Euro Sham Pillow with Flanges
Today I have a simple tutorial to share…
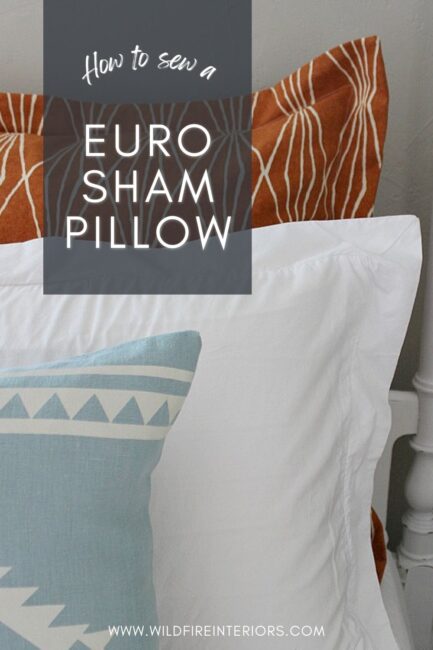
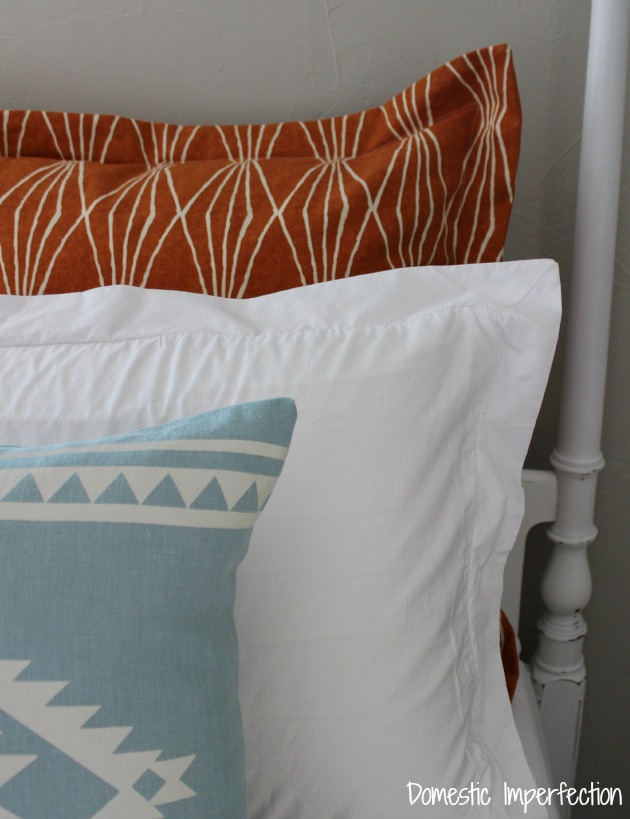
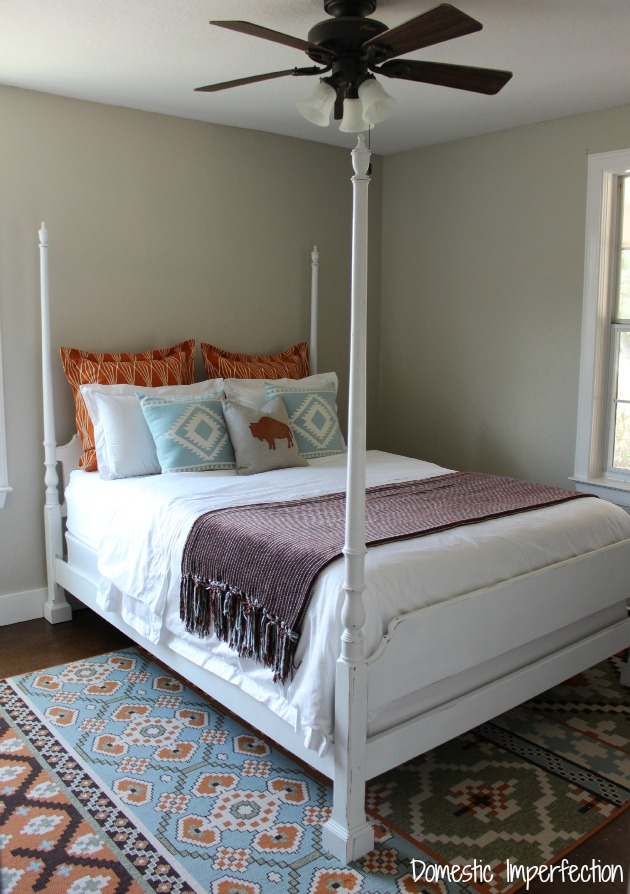
A couple of weeks ago I showed you the new bedding for my southwestern guest room, and today I’m going to show you how to make the euro sham pillows. (Those are the big orange ones in the back BTW, I know different people call them different things.)
Euro shams are generally large square pillows, usually 26 x 26 or 28 x 28. They are really simple to make, and if you’re a beginner you can totally do this. I know that because I’m a beginner…I’ve been sewing for years but can only sew things that are squares, like pillows and curtains. (Proof.)
How to Make a Euro Sham Pillow with Flanges
Supplies –
- Fabric of your choice, you will need 1 and 3/4 yards per pillow. (I prefer home decor fabric for projects like these, because it’s thicker.)
- Sewing machine
- Plastic collar stays
- Fabric glue
- 28×28 euro sham pillow inserts
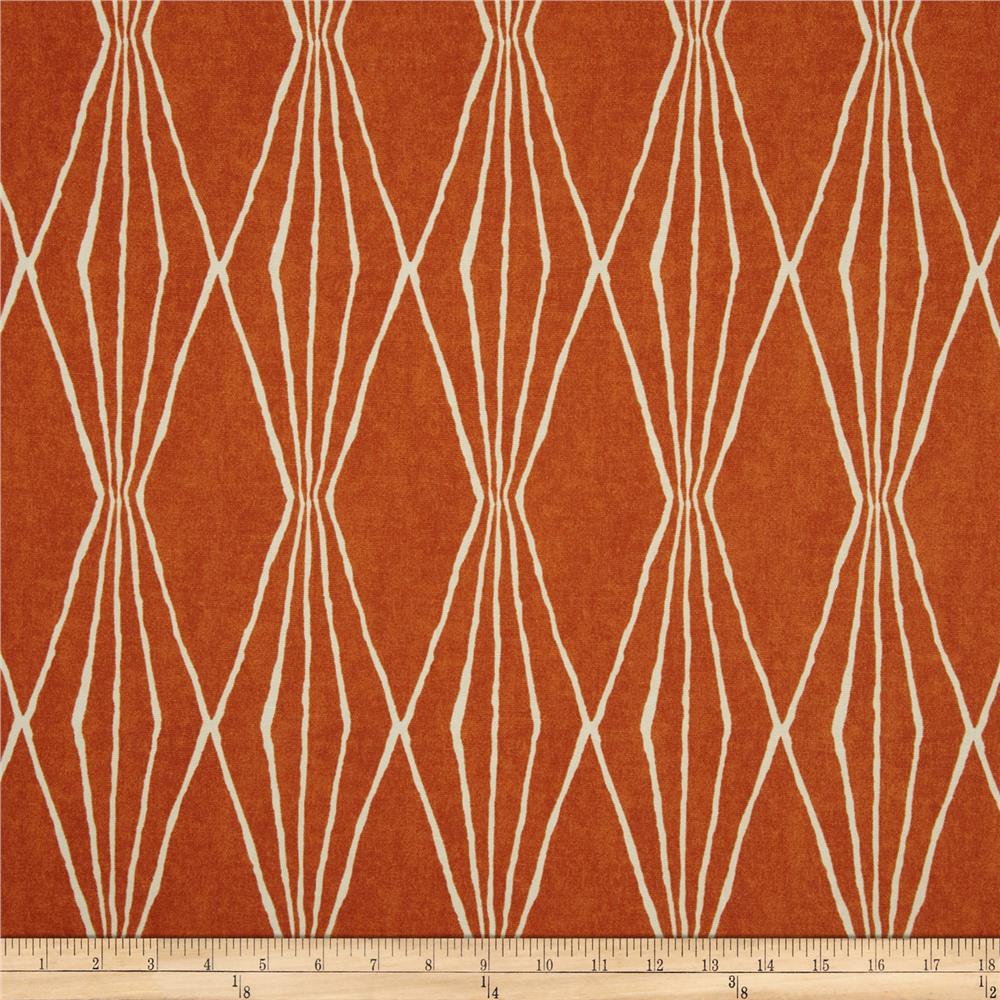
The first step is, of course, picking your fabric. I prefer home decor fabric for stuff like this because it’s thicker, but anything will work. The amount you will need to buy varies depending on how wide the fabric is that you choose. The fabric I bought is called Handcut Shapes buy Robert Allen and is 55 inches wide (paid $10.50 a yard) and I used nearly 3.5 yards for two pillows.
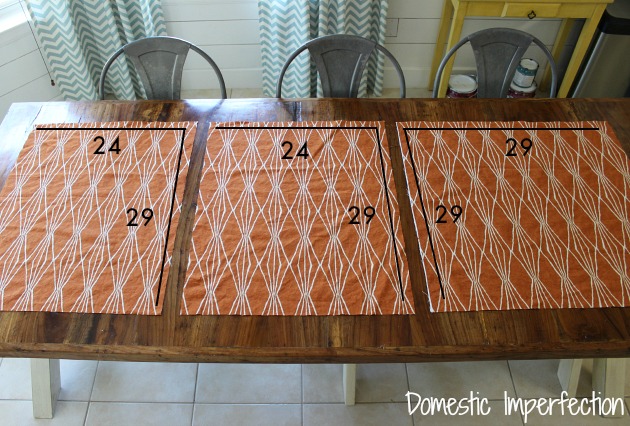
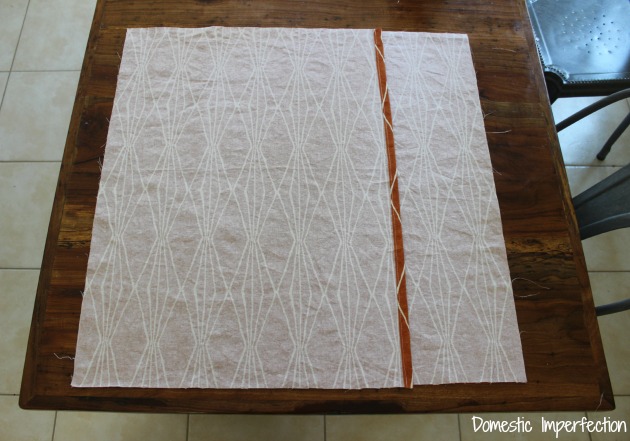
Once you have your fabric, lay it out and cut your pieces. I like to make my pillows with envelope closures (rather than zippers) because it is simple and requires less time and materials. To do this, you will need one 29 x 29-inch square and two 29 X 24-inch rectangles (per pillow).
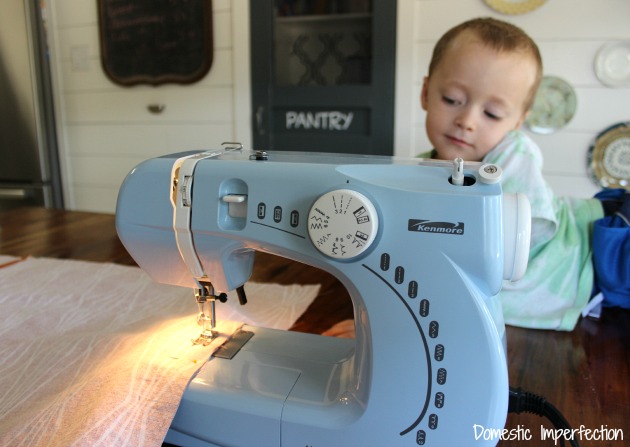
After all the pieces are cut, you will want to sew the edges of the envelope closure.
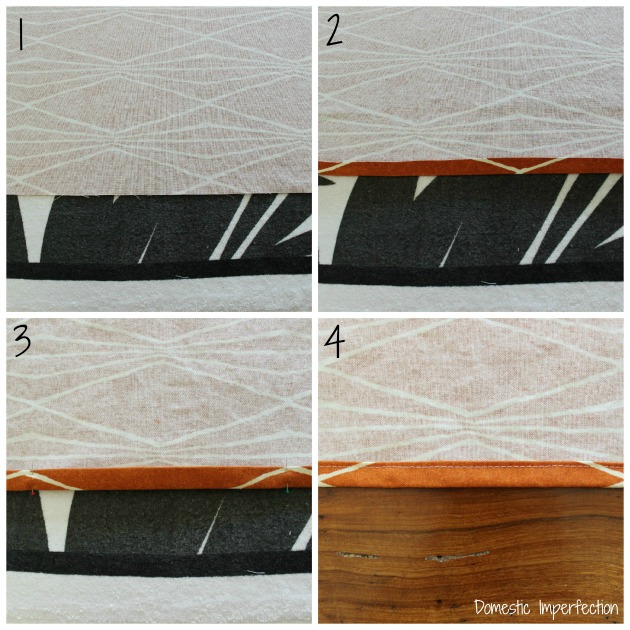
Take the two 29 x 24 pieces, fold over the long edge about half an inch to an inch, iron flat, repeat, and sew.
Next assemble all three pieces, placing the printed sides on the inside and the sewn edges of the envelope toward the center, like a fabric sandwich.
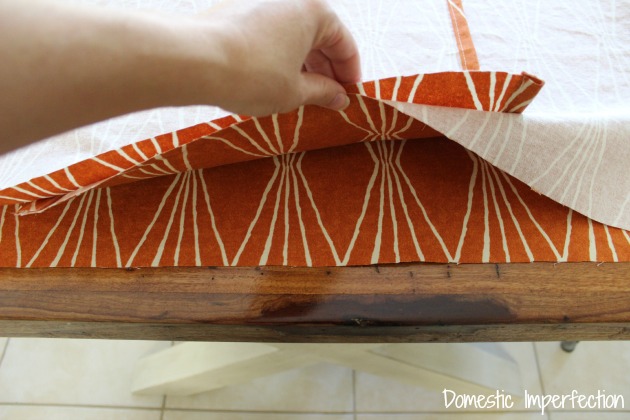
Then pin it in place and run a stitch around all four edges.
If you want a 28 x 28-inch euro sham without flanges, then turn the cover inside out and you are finished!
I’m going to share a secret with you though….you always need to use pillow inserts that are BIGGER than the pillow cover. After I added the flanges to my pillow cover it made a 26 x 26-inch cover, but I bought 28 x 28 inch down pillow inserts to stuff in my 26 x 26-inch pillows covers. Let me show you why…
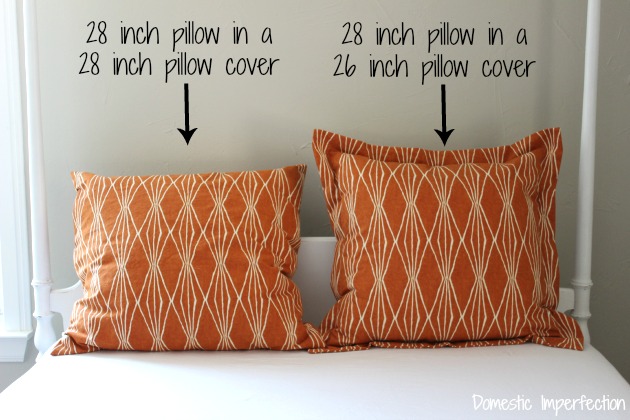
If you put the coordinating size insert in your pillow cover it doesn’t fill the space, and the pillow is sloppy and sad.
Putting a larger insert in a smaller cover fills and the empty space and gives you a nice perky pillow.
And if you buy a down insert instead of a polyester one they are still soft and squishy. Down inserts are more expensive, but for good reason….they are soft, and you can always fluff them up, whereas a polyfill insert turns into a pillow pancake and needs to be replaced every so often. I bought these down inserts, and they are great.
So, if you are making a 28 x 28-inch cover, you need to buy a 30 X 3o insert. A 16 x 16 pillow needs an 18 x 18 insert….and so on and so forth.
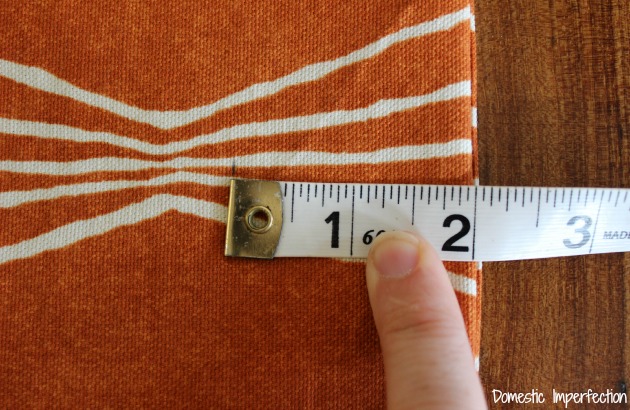
To make the 26-inch pillow with flanges, take the pillow cover and mark off two inches around the edges.
As I was doing this I was thinking of all the sad, floppy flanges I see on pillows and wondering how I could avoid that. I was running through solutions in my head when suddenly it hit me…collar stays!
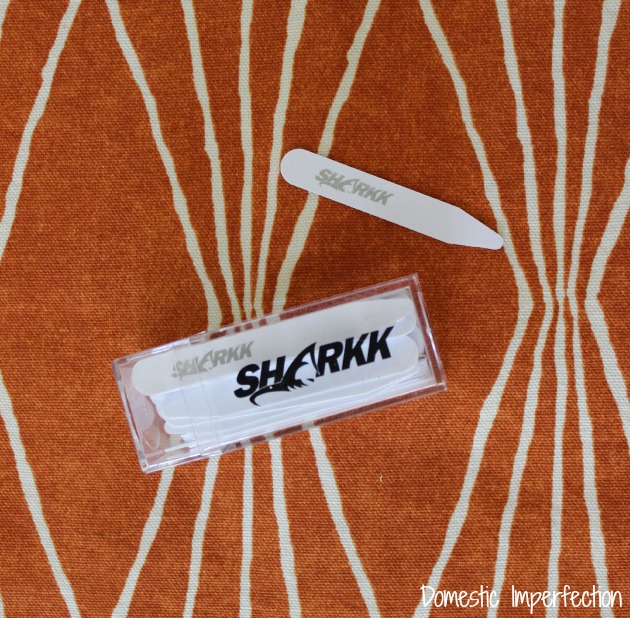
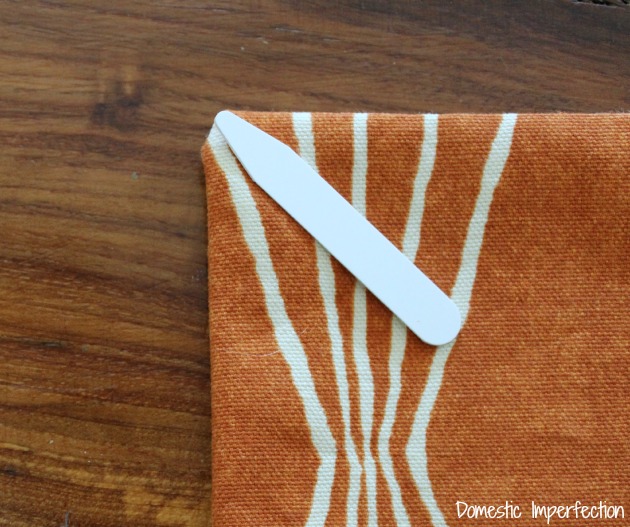
Adam has to wear them in his uniforms these days, and I had bought him a whole container of flexible plastic ones. They would be perfect for keeping my pillow flanges from looking wilted and depressed. I put fabric glue on both sides, situated it on the inside of the cover, and let them dry.
Then I sewed around the pillow right on the two-inch marks I have previously made.
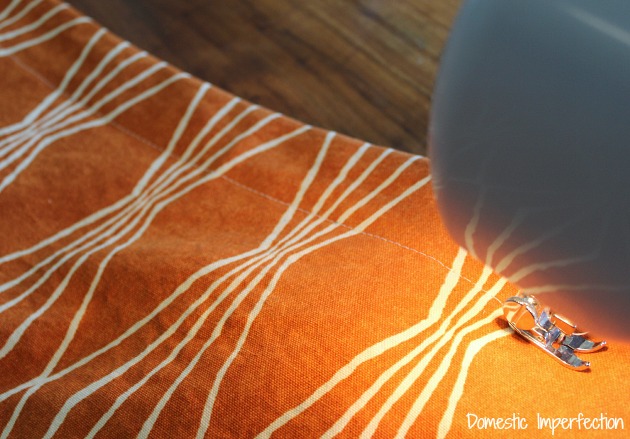
I thought about sewing the collar stays right into the seam to make sure they stay (the machine would go right through them), but decided to sew right up to the base instead to keep them from potentially snapping if laid on just the right way. They should be good with just the fabric glue though, that stuff works really well.
Then stuff in your oversized down pillow insert and enjoy! Easier than you thought, right?
Southwestern Guest Room Project Links –
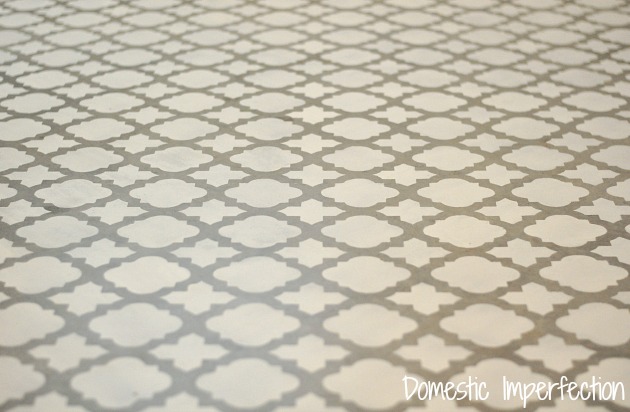
- Guest Room Paper Flooring
- DIY chalk Paint FAIL and the bed that almost killed me
- Shopping for Southwestern
- The Perfect Neutral Paint Color
- Modern Southwestern Guest Room Bedding
- How to Sew a Euro Sham Pillow with Flanges
- DIY Faux Stone Wall
- Giant Framed Map Decor for $30
- Double Sliding Barn Door FAIL
- Tomato Cage Tables
- Form + Function Storage and Organization
- DIY Gold Sunburst Mirror
- Mason Jar Pendant Light
- Southwestern Guest Room REVEAL!

Great idea about the collar stays–Thanks!
Thanks…I might be a little proud of that idea :)
Another sewing option for helping the flanges to hold their shape is to use a layer of stiff interfacing or quilt batting. I like using quilt batting because it helps the entire pillow look full and lush, even it I’m not using a pillow larger than the pillow cover. First step is to place front square of pillow face down, a layer of batting, then a layer of any prewashed scrap fabric down. Sew through all layers abt 1/4th inch from the edge all the way around the square. This seam never shows once you’ve sewn the entire pillow together and it adds to the structure strength of the flange. Then follow the rest of your steps, minus the collar stay, to build the pillow cover.
I know you mentioned a long time ago on this blog how you’re a morning person and how it drives your husband crazy, but it always seems like you post new things so early in the morning it’s basically at night! This one was 5 am central time, right? That’s nuts! How do you make such a schedule work?
No no, you’re backwards. I am not a morning person at all…I’m the night owl and my husband is the morning person. I posted this at last night at 830 or something, but new posts are scheduled to go out by e-mail at 4 am or something crazy. It happens automatically, you can rest assured that I am sound asleep at 5am…and 6am…and 7am…
Oh right sorry I totally did get that backwards. That online scheduling thing makes so much more sense… I had thought maybe the boys had woken you up with “mooooom I want breakfast!” at 5am or something! Do they ever wake up way before you? That would be so frustrating!
Asking for breakfast at 5am certainly isn’t unheard of, but they’ve learned not to bother asking for food if the sun isn’t up. Ain’t nobody getting breakfast at 5am. They do always wake up before me though. Levi is usually up creeping around my bedroom at at some ungodly hour, so I change him and put him in bed with me and he usually goes back to sleep. Elijah is sleeping in later these days, but if he’s up before me and Levi he just entertains himself by doing puzzles or coloring. Sometimes he will even make a bowl of cereal for himself and his brother. We’re slowly getting to self sufficiency! (Not that I sleep in late and ignore them, I’m up between 7-8 everyday.)
That’s adorable! Self sufficiency must be so great to take some of that burden off of your shoulders. I know it’s an old joke that having kids is worth it when they finally start mowing the lawn, but I’m not sure how much you get to make that joke! Is the grass still living on your yard? You’ll have to get the boys to wash dishes and take out the garbage to earn their keep instead :)
Haha, no, mowing lawns isn’t in their future…or really anyone’s future around here. I look forward to the day when I get to assign them a good portion of my to-do list though!
This tutorial is perfect for a project I want to do soon. Also, we have the same sewing machine! Fun! :) Thanks for the tutorial!
Great tutorial girl! Love this ;)
Hugs, Jamie
This is genius! I have been thinking lately, why on earth would shames not be made so that they don’t look all wilty!? But you did it! You figured out a way to fix that! Way to go girl! You’re my hero!
Wow, I love the shams, and collar stays? Um, hullo…GENIUS!!!
Excellent ideas, both the collar stays and using bigger inserts than covers. I don’t know why, but I just never thought of that, only cursed all my saggy cushions… definitely need to work on my thinking-outside-the-box skills! I think the guest room looks fab. :)
Great tut Ashley and smart ideas! Your room is coming together nicely! ;)
Thanks for the tips Ashley! I’m just about to make some of these. :0)
Blessings,
Beth
When completing the flanges, what do you do about the opening?
The envelope closure part? I just sew right over it (making the opening smaller).
Thanks for the easy-to-follow tutorial! But I am confused about one thing. If you add a 2″ flange all the way around a 28″ pillow cover, then don’t you end up with a 24″ pillow cover, not 26″? Not sure what size insert to buy, 26″ or 28″ since you said to go up by 2″.
Construct using a 2″ seam allowance all around the perimeter. Turn right side out and top stitch your flange 2. The added bulk from the inside 2″ seems will give your flange the thicker bulk it needs to hold its shape.
The collar stays are an interesting idea. I use batting instead for the front piece. It helps shape the entire pillow and keep the flanges “perky” without shifting. A cheap lining fabric or muslin can be used so you don’t need to worry about batting getting pulled out of place while stitching.
I add 4 inches to my total square measurement. using larger pillow forms is a great idea. If they are hard to find, it’s easy enough to use fiberfill stuffing and make your own. Foam by the yard is even better if the pillows are for decorative purposes and not to actually sleep on.
Collar stays can be used for terrific placemats, and curtain stays also. I use a leather punch and stitch it to the fabric rather than glue.
Where di you find your 28×28 inserts?
I bought them from Amazon, here is the link. They’re kinda pricey, but great quality.
HI – I’m also confused by the measurements. Wouldn’t a 29″ square for the front = a 24″ pillow (after subtracting the 1/2″ seam allowance on top and bottom and then 2″ on the top and 2″ on the bottom for the flange)?
You are right. I did in fact cut the fabric to the specs in this blog before I realized. I adjusted my seam allowance to 1/4″ and still wanted a 2″ flange which comes out to 25″ but my 28″ feather/down pillow inserts fit in nicely for plump pillows. If I did it again, I would definitely add more length to have a 1/2″ seam allowance. If you were to have the1/2″ seam allowance and wanted a 26″ sham, the raw measure should be 31″. 31 – 1 – 4 = 26. BTW, on the open side, I folded under a 1″ then made a 3″ hem and the opening works great and overlaps nicely.
Ok so Im backwards, I already got the 26×26 pillows and need to make the shams! Im so excited, but what are the measurements if I want to make slightly smaller? Will that work with regular Euro pillows instead of the down? Thanks!
If you’re making a 26 x 26 sham with added 2″ flanges and using 1/2″ seams, you will need to cut the front piece at 31 x 31, and the backs at 27 x 31. Also, pay attention to patterns repeats, might require more fabric to make all the fronts and backs look the same.
26″
+ 4″ for flanges (2″ on ea side)
+ 1″ for seams ( 1/2″ on ea side)
= 31″
This turned out great!!! What a perfect place for it too! Love the last pic. My kiddos always looked like that in the summer :) I am your newest follower. Hope you can visit me sometime too :)
Great tutorial! I wanted to know though if I was making euro covers for a pillow that is 26×26, what measurements would I need to take?
Thank you!