
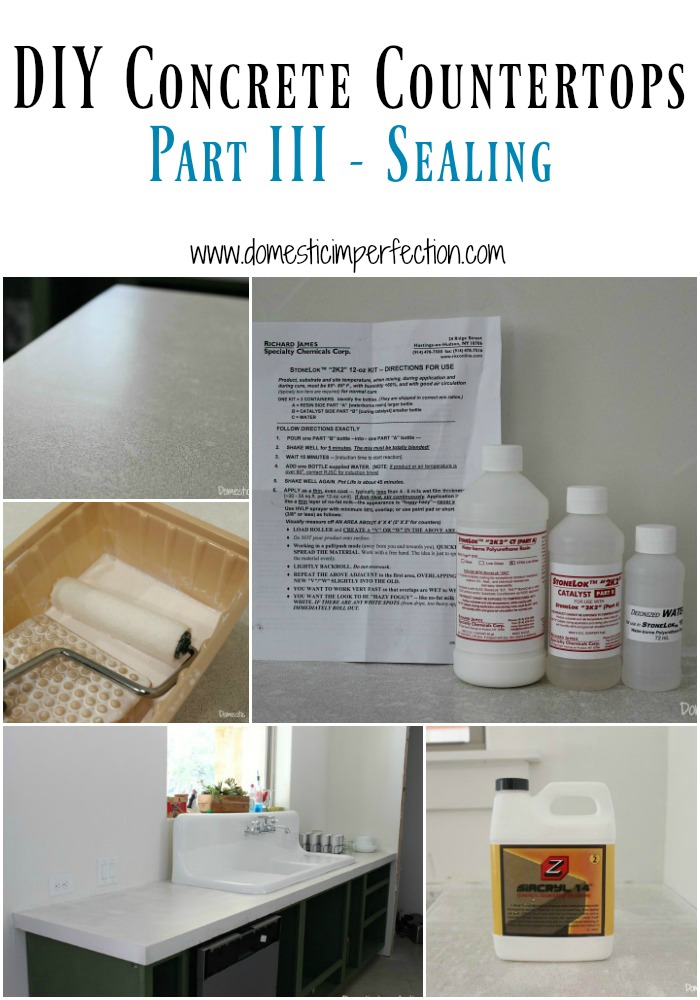
DIY Concrete Countertops, Part III – Sealing
If I’ve learned anything about DIY in the last 5.5 years of writing this blog, it’s that it’s all about the sealer. You could do the most awesome job ever on a project, and if you don’t seal it correctly it’s all for naught.
I knew I needed an amazing sealer for my concrete countertops, for three reasons….
- Concrete is a porous material, so it’s susceptible to stains
- Not only are our countertops concrete, but they are also white
- I’m messy
So even though Z Counterform sent me a sealer along with the countertop supplies (which has awesome reviews), I still researched sealers on my own to find the best one ever. My research lead me to a very complicated, very expensive, three-part epoxy sealer called Stonelok. This is supposed to be THE ONE, which I believed mainly because of the word “epoxy” in the description. I covered my penny countertop in epoxy, and my painted shower used epoxy paint, and both of those things were bulletproof…I couldn’t believe the abuse they held up to. And so, I bought a kit from a website called V-Seal for about $160 total.
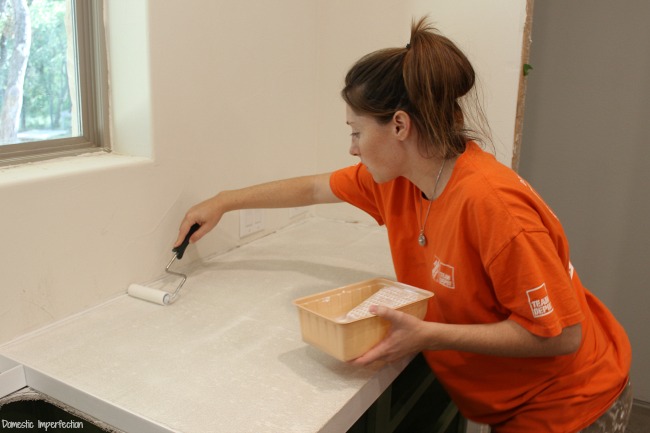
I let the countertops cure for about a week before putting on the sealer. They were extremely chalky to the touch, so I wiped them down with a dry cloth and then gathered up my supplies. Like I said, this sealer was really complicated…just looking at all the steps and instructions made me anxious.
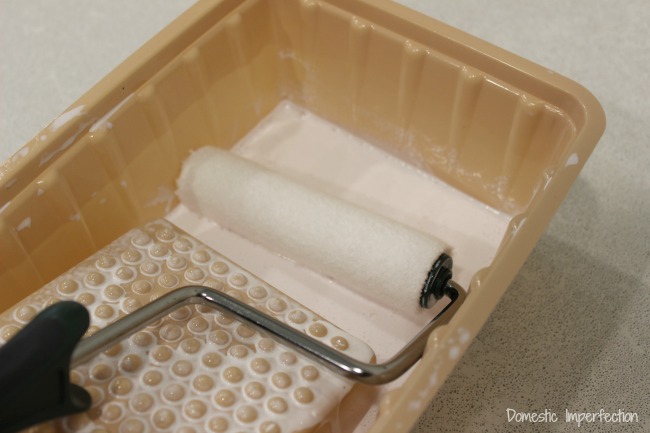
In addition to the sealer you will also need a small low nap roller and tray. Here is a brief overview of the steps…I’m not going to go into a ton of detail here since that’s would make for a crazy long (not to mention boring) post.
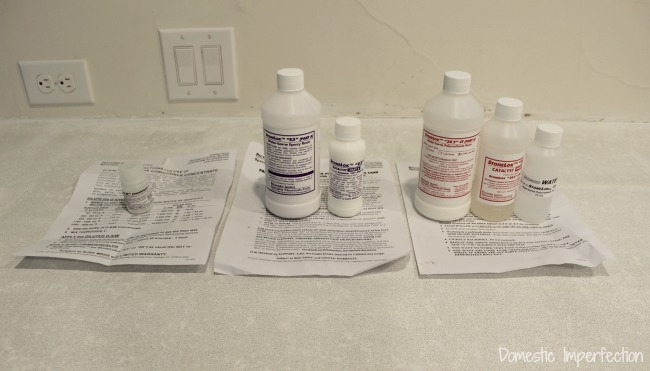
Step One – Concrete Conditioner
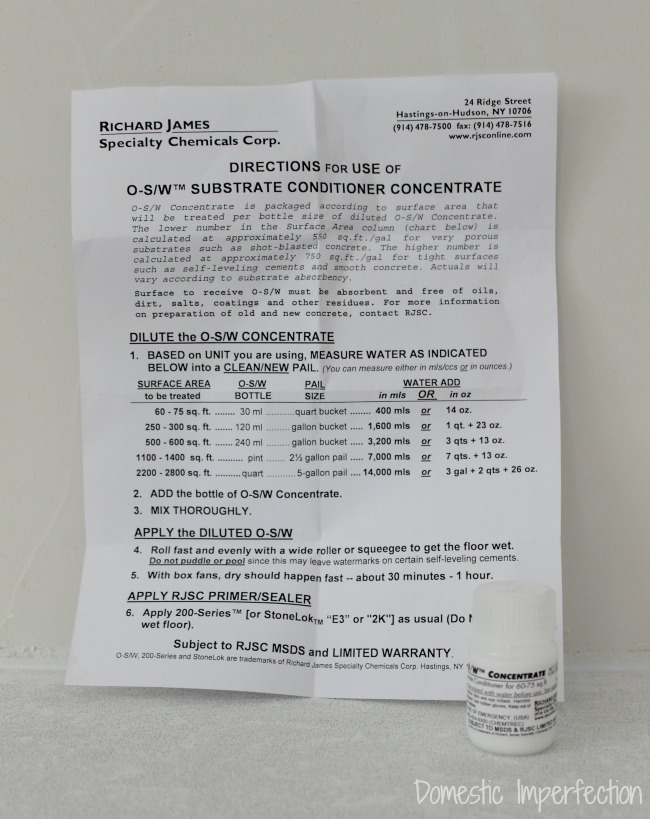
This one was easy, just mix with water and roll it on. Not scary.
Step Two – “E3″
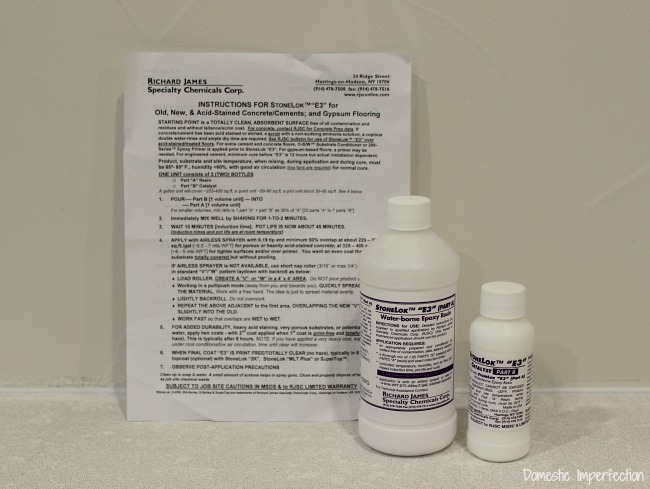
For this one you mix the two bottles and wait a certain amount of time for the reaction, then roll on. The instructions made the rolling part sound a little scary (they made me worried about roller marks and lines), but it went on just like anything else and there are no roller marks. Also, each step in the process looks like a milky substance.
After the E3 was dry it felt smooth…but I knew it could be smoother, so I sanded it.
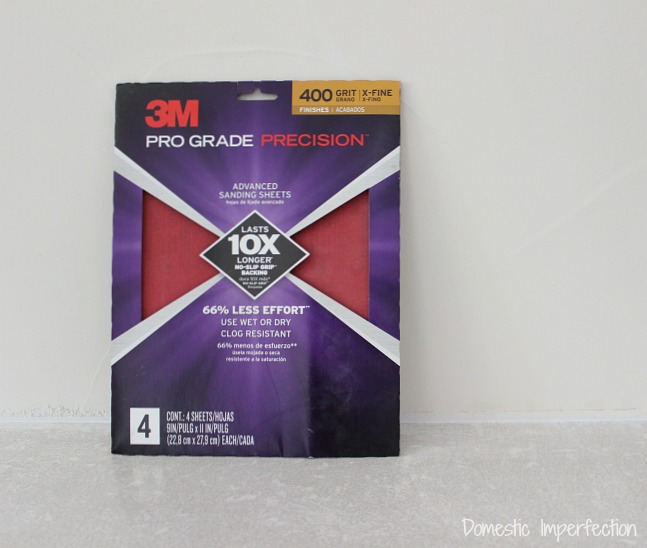
The instructions didn’t say anything about sanding between coats, but it was definitely much smoother after I sanded and I’m glad I did. Just make sure you use a fine grit sandpaper (like 400) and sand very lightly.
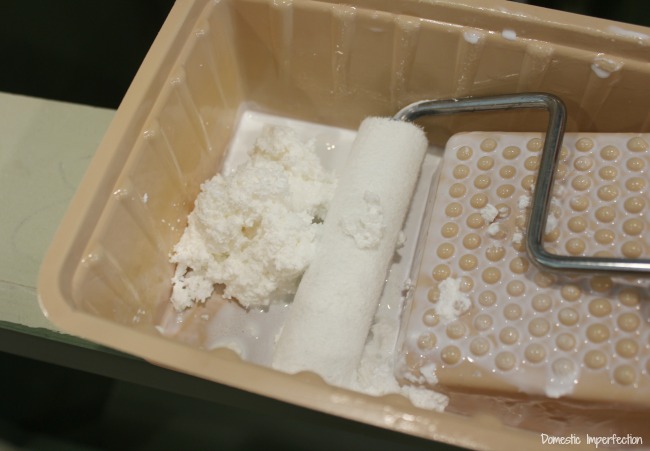
Step Three – “2K2″
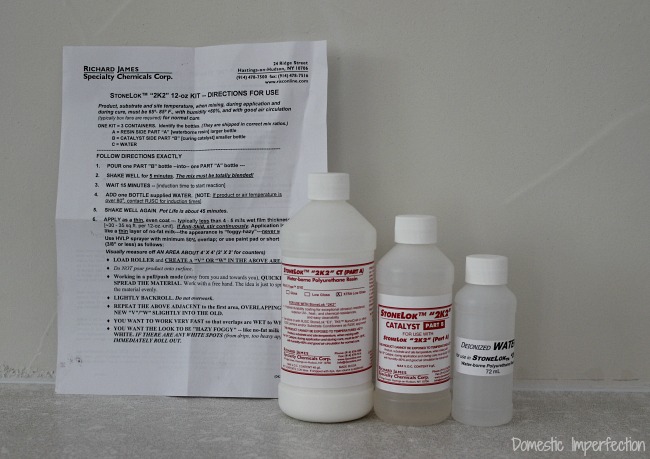
This one was like the previous step in that you mix multiple bottles together. I followed the instructions perfectly – mixing the first two bottles, shaking for five minutes, and then letting it sit for 15 minutes before adding the water and rolling on. Except that I didn’t even make it to the “let it sit” part before things went awry. Near the end of my shaking the bottle started to get very hot, and very hard. I put it down to let it sit thinking it was just part of the reaction, but then decided to remove the lid and see what was going on in there.
And what was going on was the final coat of my sealer was busy exploding into a rock hard foam inside the bottle…
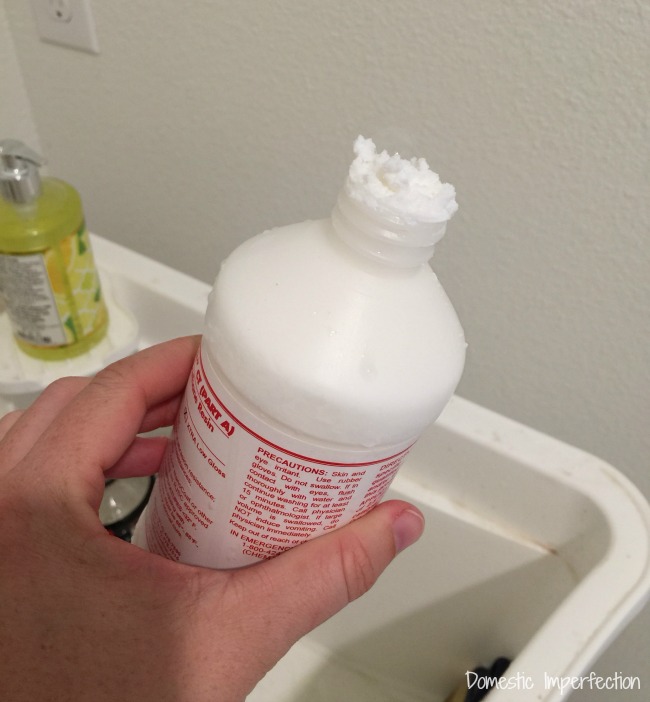
…which left me both confused and disappointed. First, I had followed the instructions perfectly. Second, I was on a tight timeline and need the countertops sealed that day so that it could cure for a week before we installed sinks and moved in.
So I got on the phone and called the company to ask what happened. They were very helpful and came to the conclusion that it was too hot in my house and the heat had caused the reaction. The instructions said to make sure the sealer was kept between 60-80 degrees and my AC was set at 78, so I don’t know…but either way they sent me another set of the 2K2 to try again.
So when it arrived a few days later I set out for try #2. I set my AC for about 74 to make sure it wasn’t too hot, and had my mom and Adam carefully read the instructions to make sure I wasn’t misunderstanding anything. Then I mixed…and it worked.
(Here I am looking like a magnificent pumpkin at 30 weeks pregnant in my husbands oversized shirt)
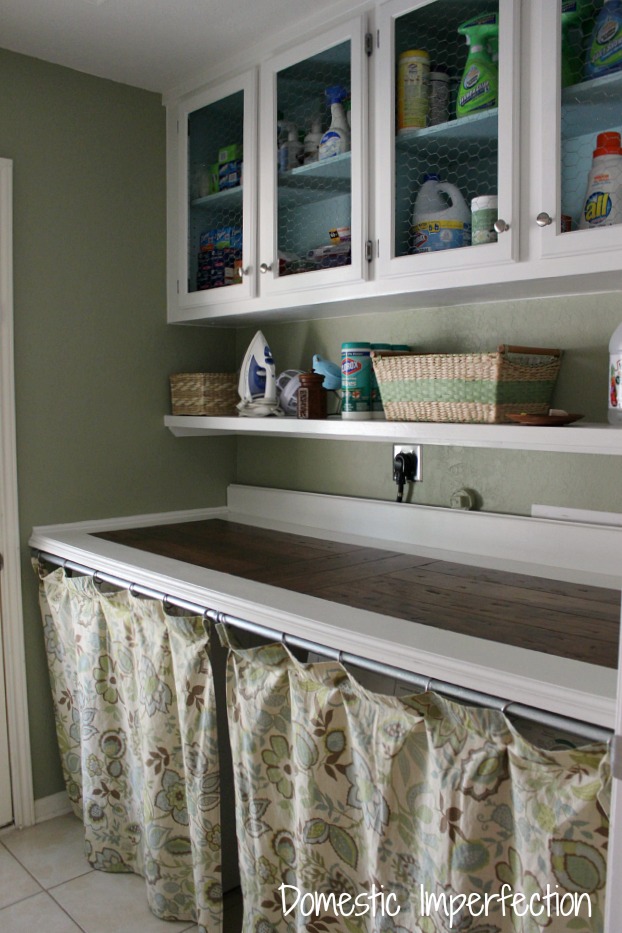
I sealed all three sections of my kitchen countertop, then I went to pour more mix into my tray to seal the small countertop we poured in the laundry room. I went to dump out the rest of the bottle, and….foam.
It was wet sloppy foam (unlike the last time) but still foam and still unusable. Pot life is supposed to be 45 minutes after you mix it, but it had only taken me about ten to roll all the kitchen. My only guess is that it was hotter in the bottle than out and I should have poured it all into my tray at once…but DANG, this stuff is fickle.
So I grabbed the sealer from Z Counterform to do the final coat in the laundry room. No mixing, no pot life…just roll it on for as many coats as you want and go ahead and whistle while you work, because it’s not going to explode in your hand.
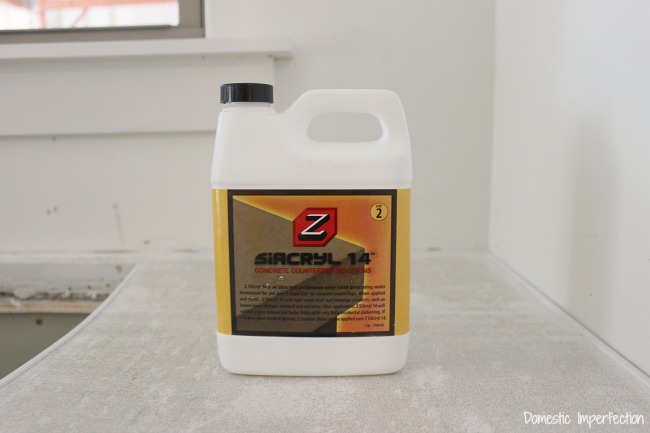
It was way more watery than the Stonelok and doesn’t feel like it would hold up as well (pure speculation), but it’s also not a gamble when it come to the application process.
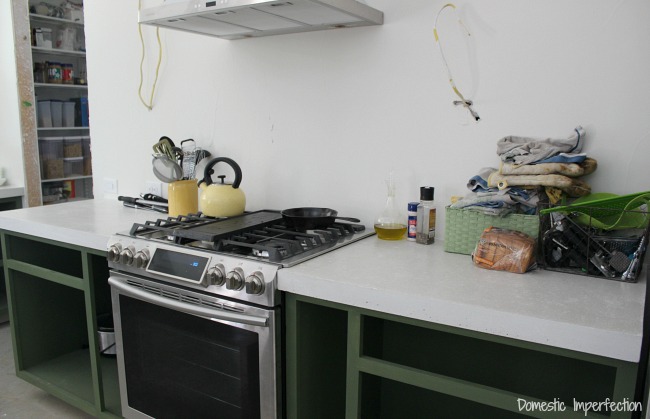
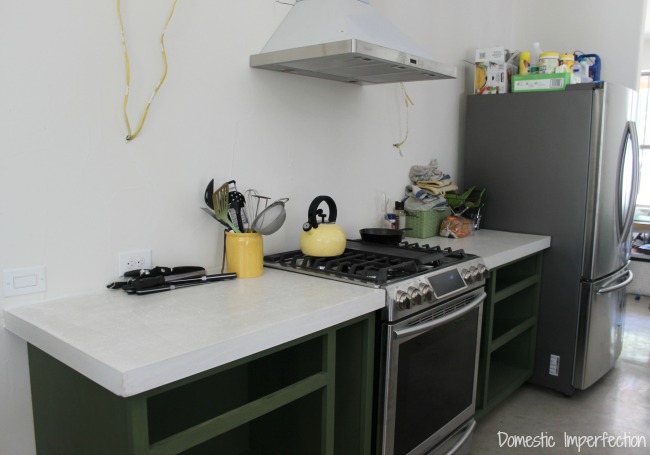
Anyway, here are the finished countertops…
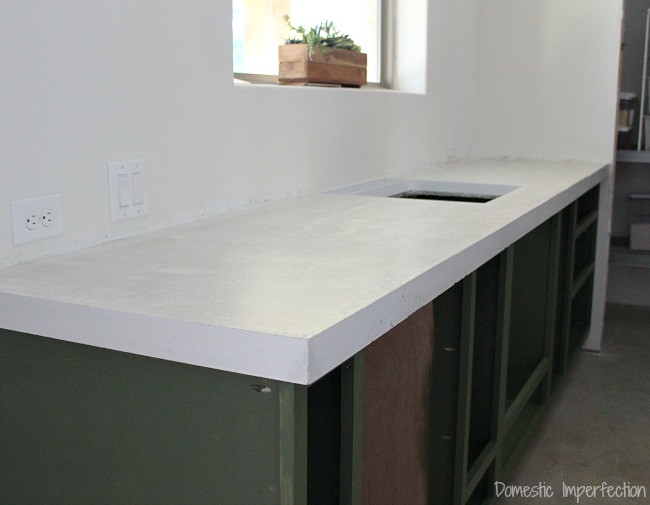
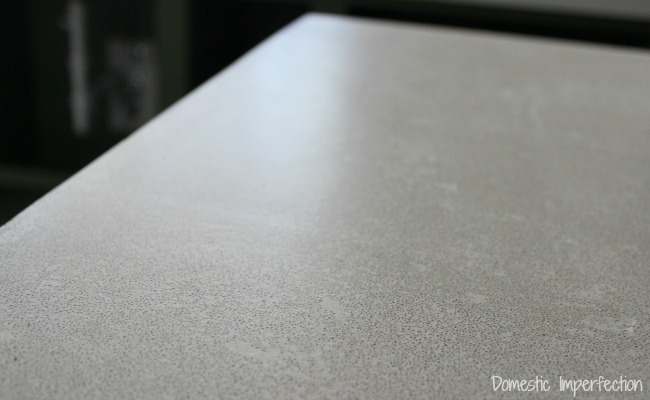
I ordered the “Extra Low Gloss” Stonelok because I didn’t want shiny countertops, and I have to say I’m pleased with the finish. Here is a (fuzzy) picture of it catching sunlight to show you the sheen.
We have now been moved into our construction project house for a week now, and the countertops wipe up beautifully. I definitely don’t foresee a problem with stains, the epoxy finish seems pretty bulletproof.
I would recommend the Stonelok sealer… just be aware that the application process can be kinda a beast and a gamble. It’s important to follow the instructions perfectly and make sure your house is COLD when doing it. Making sure your house is cold is probably a good idea for both this process and the actual pour, since I think the heat also affected how quickly our concrete dried.
Anyway, that wraps up my series on DIY concrete countertops! Hopefully you found it helpful and interesting, and if you missed anything you can read the other parts by clicking below…


What a process! Did the counters cure in time for the sinks to go in? They look gorgeous. I love how thick the edges are.
No, I had to push back the plumber. Actually the sinks still aren’t installed, they are just kinda sitting on top. And thank you about the countertops, I like them more and more each day we live here :)
Is it safe doing this with fumes while pregnant?
The sealer didn’t really have fumes or smell at all, but yes, I probably should have been wearing a mask either way. I honestly didn’t even think about it because I was so busy trying to follow all the instructions.
Do you really love the counter tops, or is it too late now and you are talking yourself into them?? I think they turned out great, but definitely not what you had in mind. From what I have read, if you don’t love it, you rip it out and do it again.
Good question. I do really like them and wouldn’t rip them out, but you are right in that they aren’t EXACTLY what I had pictured. But they are close and the more I live in the house and use them the more I like them. That being said, the little laundry room countertop I mentioned turned out really terrible and I would love to go at it with a sledgehammer. We were so concerned with the kitchen countertops and tying to get them smooth before they dried that the laundry room got a bit forgotten, and it shows. I’m honestly not sure how you would even get the concrete countertop off without destroying the cabinet. I aim to find out though when we get around to actually ding the laundry room.
Jesus. ☺
It looks great! That was quite the project :) Not sure if I would be able to pull it off. haha
Your countertops look great! They certainly look like they are bulletproof. I also love, love , love the color of you cabinets. The color is just gorgeous. I think I would have had a full fledged anxiety attack trying to put that epoxy on. I probably would have just turned into a whimpering puddle. You are very brave.
That’s a whole load of faring. But geez that killed then is looking good!
Good lord! I clearly can’t type on the iPad! I meant to say, that’s a whole lot of faring and geez that kitchen is looking good! Aye card Back!
BLOODY AUTO CORRECT!
Hahaha…bloody auto correct is right! My mac auto corrects my blog posts and proofreading them is like reading another language.
Hi Ashley, maybe you can install tiles on top of your laundry room counter tops?
It will also be easy to clean and you can choose whatever tiles you like? Also very easy to install.
love that sheen. Looks awesome, Ashley.
We just poured our countertops last weekend and I ordered the sealer from z counterform however after reading your post I decided to bite the bullet and order the stonelok kit…Our process went very similar to yours we intended on vibrating the edges with a sander and never got to it and our countertops are not as smooth as I would have liked in some areas so my question is did you fill pinholes after sanding and prior to sealing the countertops? I don’t mind the holes but just wondering if the sealer fills these so bacteria can’t form. By the way kudos on doing this while prego there is no way my body and emotions could have handled this while I was pregnant. ?
I very much enjoyed reading your countertop adventure and especially appreciate your afterthoughts/recommendations. I love white concrete, and your countertops look fab!
I’d like to show you images of my kitchen island top that I used an epoxy finish, from home depot. (2 part epoxy) Is there any way I can show you the images? I used instead of an expensive additive to the epoxy, or metallic enhancer…I used mineral makeup, color..’dragons eye’ which is a light teal with a hint of green. Marble effect, with a perfect finish. It started off as a floor sample for the concrete floors, but it was so perfectly beautiful that I had to use it for something..So it became an island top. Awesome! I’ve we seen a concrete countertop done before. Thank you for that. Very beautifully done. Please let me know if there’s any way to send you images.
Thank you very much….and p.s. I LOVE your site.
*I’ve never* seen a concrete countertop done before.
[Auto text correction]
I would LOVE to see pics! You can e-mail them to me at [email protected]
Well done. It looks amazing. A lot of work, right?
Ashley, I appreciate the time you took to document the process of dong the cement counter tops. My husband and I live in an older modular and need to redo our counter tops. The people owning it before us used floor tile on them and they are not holding up. I would like to do cement and the instillation in place would be great as it has some turns around the sink area. My husband is worried about the weight of the cement. Do you find it any heavier than any other stone type counter top?
I think yours look great, your whole build is amazing. I love the stone and wood together. You and your husband have done a great job. Thanks again for all of the documentation and teaching that you are doing.
I noted that you used the SiAcryl14 from Z Counterforms as the “final” coat in the laundry room… Did you use the Stonelok initially and finish with the SiAcryl14? They are both water based sealers, so I am contemplating buying/using both for my white concrete countertops, but am not sure how “compatible” they will be.
Yes, that is correct. I didn’t intend in doing it that way, but the StoneLok dried up before I got to that room. The two sealers seem completely compatible though, I haven’t had any trouble with peeling, staining, chipping or discoloration.
I’m thinking about doing a concrete counter top. What were your thoughts a few months/year after you lived with the counters?
I have mixed feelings. I do like them, they look nice, wipe up well and have a unique organic look and feel to them … but I”m not sure concrete is what I would pick if we were to do it again. I wish we would have either practiced before we did our countertops or hired someone to come out for an hour and do the finish work (making it smooth) or just gone with quartz or perhaps a solid leathered granite. There is also a stained spot near the stove where I accidentally caught an egg carton on fire (seriously), and even though it cleaned up better than I thought it still stained…I believe the heat of the flame made the sealer change color. I’m sure if we ground it down it would look new again, but I don’t see us doing that anytime soon.
thanks for the reply! One more quick question :) we are on the fence on concrete or butcherblock. If you had to pick to install one again, which would you choose?
Ohh, that’s a tough one. I like the combo I have now, wood on the island and concrete on the other counters. Butcher block is easier to install for sure, and I liked it in my last house… but I wouldn’t do it around an undermount sink again. The concrete is a cool look but installation feels like a gamble, it may turn out great or it may not. I don’t know, it’s a toss up. Sorry!
Hi Ashley! We just did our Zform white countertops yesterday! We had the same exact experience as you! It dried so fast we were not able to work with it, and it’s very chalky and rough. We are planning to sand it tomorrow but I am wondering if you got yours smooth? Smooth like the sides where the z form was attached? If so any tips on sanding equipment? I am really bummed with our results. Ours is very white blotchy and grey lines. Thank you!!! Ps your house is to die for!!!
Hi Krystal, I just saw your comment! You’ve probably already sanded by now, but the answers no, we never did get it smooth. It’s smooth enough but nothing like the sides and is also kinda blotchy…plus the more you sand the less white it becomes. Sorry you are bummed, I totally get where you are coming from.
Thank you so much for your info!
Can you direct me to staining the concrete?
Thanks.
Janis
Eeeek…almost a grand for cement countertops? They do look really beautiful, though, and you got the color you wanted. I like the grey/natural look of the cheap cement, so that wasn’t an issue for me. I’m also considering painting them to look like a grey soapstone, and then using a 2 part epoxy to seal them. I’ve worked with epoxy before, so that’s a plus, as it’s not as easy as 123 either.
I paid about 4 dollars a bag at Lowes (without aggregate) and we did our kitchen and bathroom countertops. The only problem I had was my husband didn’t listen to me. He made the countertops over 3 inches thick (he says due to the kids, he wanted them strong…wtf)! And they hung over the cabinets about 2 inches too far out! I was devastated when he took the mold off (he made our mold with lumber). I couldn’t believe it. But, I have lived with it for 5 months now…and today, I busted those counterops out in the bathroom! Now I’m looking to make sure I don’t make any mistakes doing them over…and yes, “I’m” doing them this time. haha
At any rate, I love the way your cement countertops look…I just hope I can pull this off myself! lol
Thank you so much for this amazing post I love reading about the experience you went through. We went with the white quartz for our kitchen and love it but am thinking about projects that could use concrete counters (outside kitchen being planned) and this was a great read – and all while pregnant. wow congrats on that also…
Hi There. Thanks for this!! I”m wondering if you figured out what the cost per square foot ended up being?
Thank you, Karen
Did you follow Stone Lon instructions about the 200-300 grit sand prior to install. I used some higher grits to get my concrete counter shinier but have recently purchased this sealer and didn’t know if I needed to sand them down again.
Hi Ashley. It’s Ana from Spain. I think they look awesome. I want to put concrete countertops in my kitchen. I have been talking with come construction companies and they don’t recommend me to put them because they do not guarantee that the surface is not scratched and that the grease stains are not marked. Could you tell me your experience?
I would like doing these concrete countertops. I’m based in South Africa. Who can help me to acquire the knowledge?
Hello, l love the article. But have a couple questions about stains and heat. Doesn’t it hold up ok with either ?
It held up ok, but I wouldn’t do this project again. I would buy regular countertops instead.