
Open Kitchen Shelving
So one night I got home from dinner, shopping, and a movie with a friend. I said hello to Adam and the boys and moseyed into the kitchen for a delicious glass of water. That’s when I saw them, sitting on the countertops…the kitchen shelves that I had been nagging politely asking Adam to build for nearly a year.
My eyes got big and I stared at them excitedly. Then I heard something….it was the shelves, they were speaking to me. They said “Ashley! Look how much your husband loves you! He listens when you talk. He would do anything for you. He thinks you look great in baggy old pajamas and drool soaked t-shirts. In fact, he thinks your hotter than Kate Beckensale and Heidi Klum combined. And he’s sorry about leaving dirty diapers all over the house and feeding the kids frozen pizza for dinner.”
Man, those shelves really know how to talk to women.
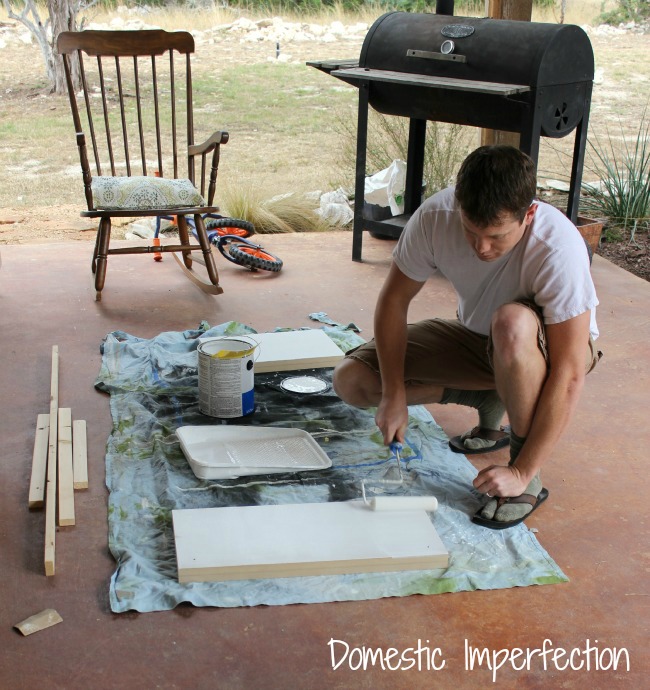
But the awesomeness didn’t stop there. The next day Adam put on his sexiest socks and sandals combo and got to painting.
Then he installed the rear supports…
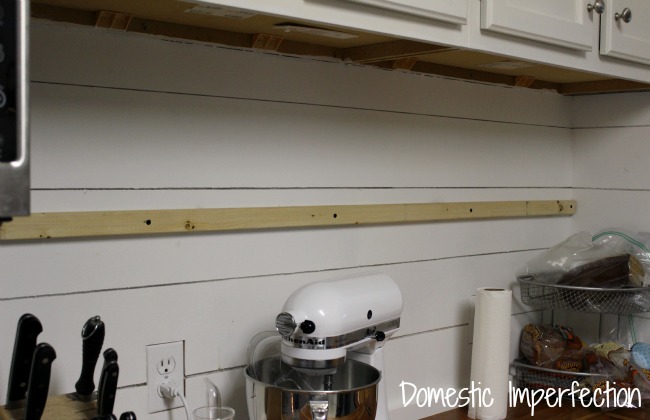
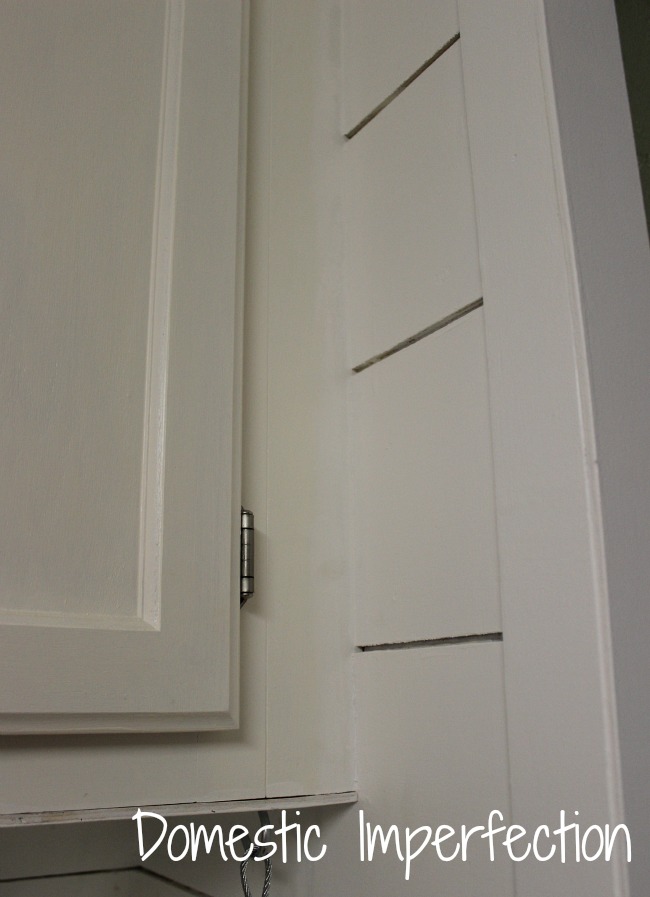
…and made skins to cover the ugly cabinet undersides.
And then he even put another coat on the cabinets, since they were looking a little yellow.
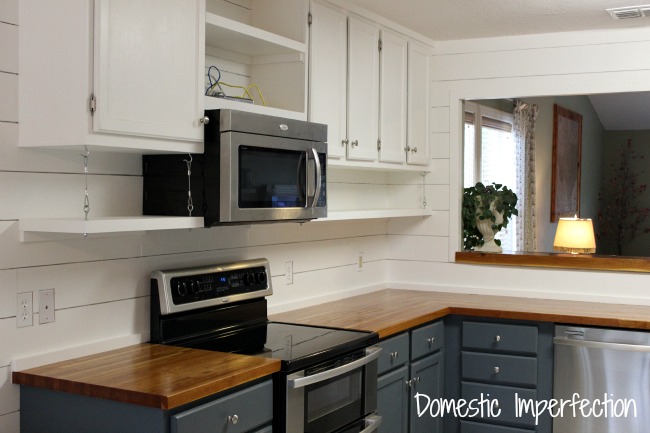
Next came a ton of sanding, caulking, and touch up paint, and then…shelves! YAY! I love them!

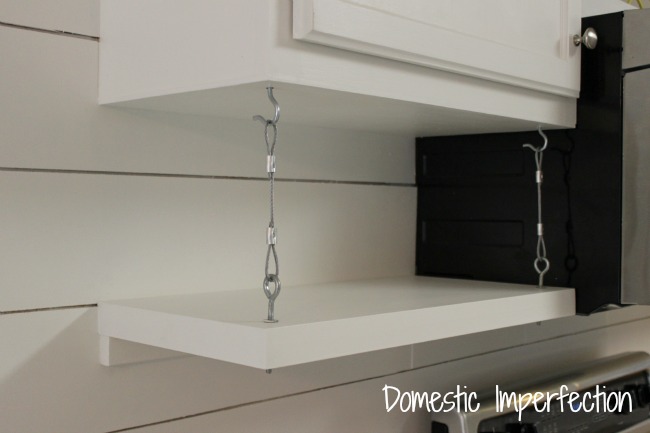
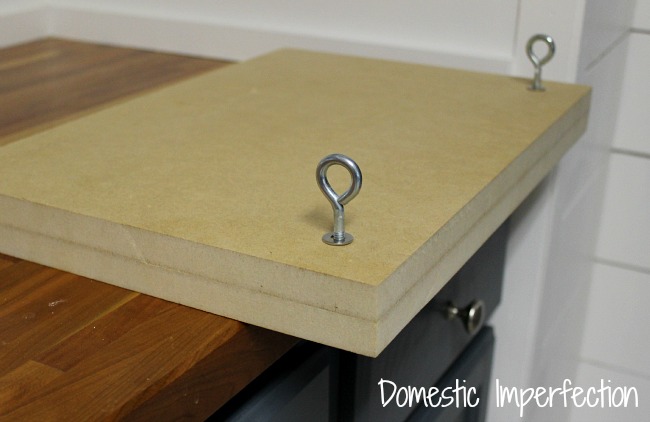
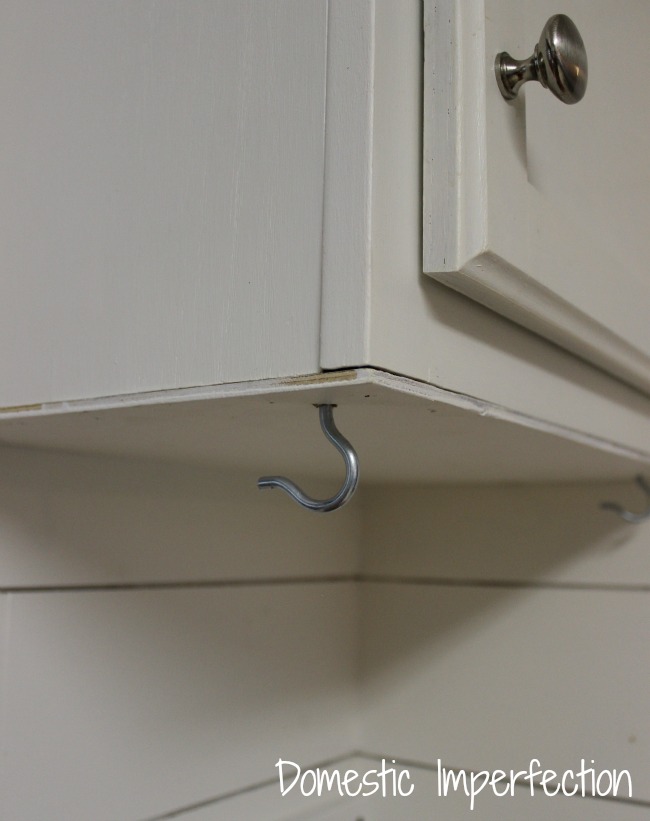
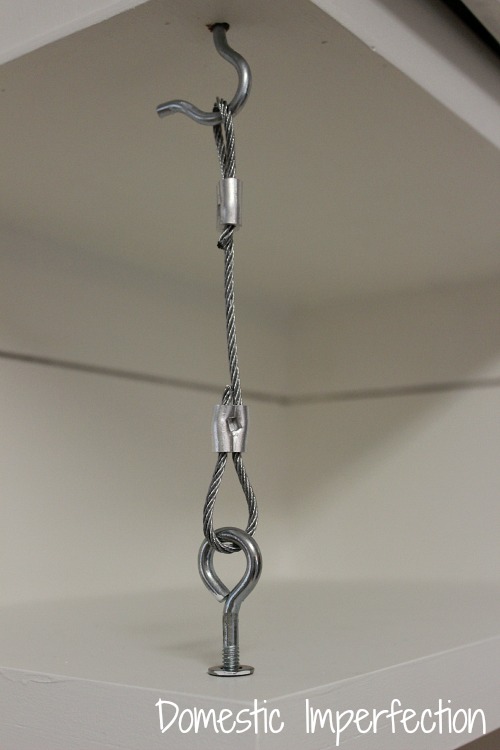
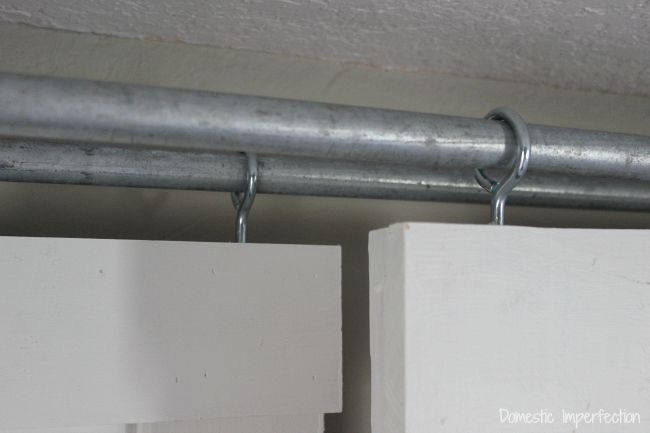
They are attached with eye bolts, hooks, 1/8 inch cable, and aluminum ferrules. To “squish” the aluminum ferrules you will need a swaging tool, (I prefer to call it a “squisher tool”) to see what the heck that is, go HERE (This is the same method we used on our living room shelves). Oh, and I forgot to mention that the shelves are just made if two pieces of 3/4 inch MDF held together by wood glue and brad nails.
Do you love them? I love them. I can’t wait to start decorating and make it a fun, colorful, functional kitchen. And you know what else? I don’t have to climb on top of my counters to get my dishes anymore. Whoop! Unfortunately this means I may have to actually start exercising.
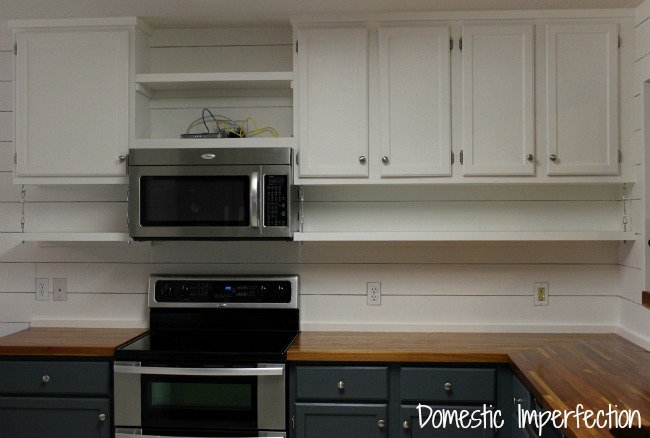
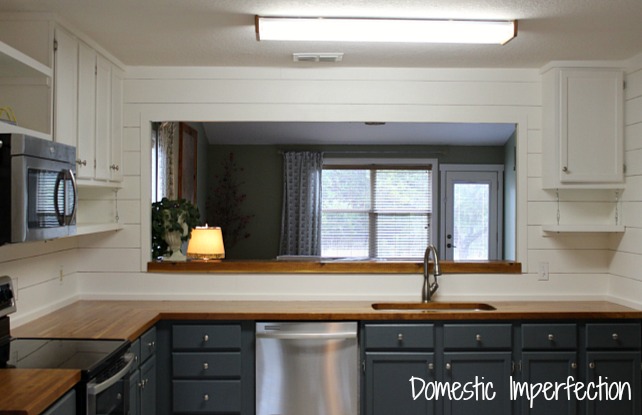
Here is a quick before and after(ish) pic to refresh everyone’s memory about what we started with…

…and now!
If your new around here and want to catch up on all the kitchen posts, here are links to the highlights…
Kitchen Remodel Links
Shop the Look


Love love the shelves !! Oh yeah – only in Texas can you wear socks and sandals and be rockin !!
Great job Adam !!
Karen in Texas
Ashley, your whole kitchen looks amazing–you guys have been very creative in making things happen with not much money! I can’t wait to see how you decorate your new shelves!
Oh my gosh, I haven’t been by in awhile and shame on me! I LOVE your kitchen! It looks awesome with the two different colored cabinets and the shelves are perfect =)
I think you and I have the same love language, because those are exactly the kinds of things I hear when Andy does projects for me. These shelves are ALL kinds of cool. I can’t even stand it. I bet you’re going to have a blast styling them!
Love your new shelving Ashley! Your kitchen is so beautiful, love the white cabinets combined with the butcher block counters! Pinned!
As I’ve told you before, I love your writing style. Makes me laugh! Adam did a great job and the kitchen looks amazing.
Thanks Cindy, that is really the best complement. I try to keep it fun and entertaining around here :)
Brilliant idea!
The cabinets look fantastic (as does the whole kitchen)! And Adam looks very stylish in his socks and sandals. ;)
Lol, I remember when Adam was getting out of the Army and he said “its going to be so nice not to have to wear green socks everyday”. But guess what? Yup, he wears them almost every day!
Seriously love your whole kitchen. Are your counters always that clean?!
Oh goodness no….times a thousand. The only reason the counters look like that is cause we had just finished installing the shelves and had moved the piles of crap from the counters to the dining room table!
Looks amazing!!
Love love LOVE those shelves!! What a great hubby!
Rear supports? I NEED some! Though that would be a bit too personal to ask your sweet hubs to provide, more like something a bazillion more squats and a bit of cosmetic surgery (NOT!) might help with, though. :-)
Sorry, couldn’t resist.
Bless the hub’s sweet little ole Texas heart. I’m betting he’s lookin’ a lot more Tim Riggins-ish lately, huh?
Kitchen is lovely – so very sweet and cheery and ORGANIZED – congrats to all of you. I hope to get there one of these days myself. Til then I’ll keep living vicariously through your great posts – they make my day every time. :-)
Lol, thanks so much Carla! If I could get Adam to grow out his hair and stroll around in boots and pearl snap shirts then we probably wouldn’t get any projects done ;)
I LOVE LOVE those! Can’t wait to see how you style them!
What a change! It is looking beautiful!
Love those shelves!! can’t wait to see the once you’ve added your finishing touches – are you going to be using them for storing your everyday dishes and glasses?
Yup, they are meant to be totally functional. Except for above the microwave, that’s for pretties :)
Ash, that’s so cool! Good job, Adam! Brownie points for you! I love that idea of open storage. Is it for functional items or decorational? A mix probably?
It’s going to be entirely functional, except for above the microwave.
WOW this is beautiful, love the shelves!!!
I think he might be a keeper, huh? ;) The kitchen looks wonderful! I especially like those planked walls AND the new shelves.
wow- thats a neat idea – i like it- the colors too
Seriously, I am in love with the shelves! They look fantastic!
Wow, it looks great! The before and after is just amazing!
As prateleiras disseram tudo!
E deram ainda mais charme à sua cozinha.
Beijos
I love this idea! Looks marvelous!!!
Wow, I love how the shelves are “hanging”. What a unique look. :)
I love those shelves, I love the whole kitchen! The contrast of the white on top and the darker color on the lower shelves is beautiful, something I always wanted to try. So much better than the original look of your kitchen, it now has personality
I’m loving how it is coming along, though I have to admit it now really what I had in mind when we started to years ago. It’s just developed along the way and I’m loving it. The kitchen before was terrible, I’m sure it’s the main reason that our house sat on the market for forever and no one was interested. It needed lots of work (which is the reason I bought it!)
It never does turn out the way you first think it will, unless of course you hire a contractor and do the entire job at once. I too like to look for a place that needs love, it’s cheaper first, but also I want to be able to put my own touch on the space. Like they say find the worst house in the best neighborhood.
Ashley, that just looks so good! What impresses me the most is that you raised the cupboards to the ceiling and got an expensive, designer look for a teeny tiny fraction of the cost. That kind of thing (and thinking) impresses me!
I really like how Adam finished off the bottoms of the cupboard. They went from something that wasn’t meant to be seen, to seamless perfection!
You must be really happy with how this turned out. It was worth waiting for! :)
Thanks Jan! I love it. The best part is that the actual process of raising the cabinets and adding a shelf cost something stupid cheap, like $50 or so…and totally changed the look of the kitchen. Thats DIY at it’s finest :) If only replacing the floors was that easy and cheap!
I’ve recently been considering butcher-block countertops. Day-to-day how practical have they been? Are they holding up well? I LOVE the look – but also want something that can handle kitchen tasks!
My butcher block counters are actually holding up great. I am pretty careful with them though, I always use hot pads and cutting boards and don’t let water sit on them. They have a few dents where my kids have dropped things while “helping” me, but they aren’t noticeable. For the price they are fantastic and I love the look, though I don’t think I will do them again in our next (forever) house.
Super cool!
So cute! Love the rustic/industrial look of the connectors. They are fun!! Those shelves had quite a lot to say. hehe. That’s how my hubby shows he loves me too. And it’s better then diamonds!!
Lovely! I love the white and the dark gray-blue cabinets. I love LOVE the open shelving underneath. What a clever way to add storage!
Hello!
I found you from the Mop it up Mondays link up. I would love to have you come share your post with my readers over at Sassy Little Lady’s Show and Tell Saturday. Hope to see you there!
Kathie
http://www.sassylittlelady.com/blog/show-and-tell-saturday/show-and-tell-saturday
And once again positive thinking works! I love your shelves. Who would have thought of hanging them! Wow!
What a wonderful kitchen transformation. I have been toying with the idea of raising my cabinets. My only problem is the bulk head. Who know’s what lurking behind there. I love your color choices, gray on bottom and white on top. You have given me a lot to think about as I have been putting off my DIY kitchen renovation far too long.
I absolutely love what you have done to your kitchen. Amazing! Love the shelving too! I am featuring this at somedaycrafts.blogspot.com
Ashley, your kitchen is looking gorgeous!! Love the 2 toned cabinets and these neat shelves your hubby built. You are totally going to have a custom kitchen and wow, how far has it come! Lovely.
Thank you so much Rhonda! I love the way it has turned out…now if only the floors and lighting would magically redo themselves we could call it a wrap!
Great tute… I love the industrial touch of the front support things. Little Bit from http://www.DecorateWithaLittleBit.com
Love your writing style! (and I had to laugh as I share your paint clothes style — and we handle paint drips the same, as well!)
This is exactly what I was thinking of doing, regarding adding shelves. In our case we have soffits that need to come down first before we raise the cabinets. Plus our older home has ceilings that are a bit higher than normal and may cause problems. May I ask you a few things?
•How many inches between the countertop and the shelf bottom?
•How many inches between the countertop and the cabinet bottom?
I’m thinking I’d need a step stool to reach the upper, and possibly the middle shelves in the cabinets once they are raised. Do you find that an issue? I imagine the things you use on a daily basis are handily stored on those easily assessable shelves.
One last question:
•Do you find that a grease glaze settles on the shelf items, especially near the stove? I read that once as a con to having open shelves. Personally the improved look and added storage will make up for any need to pre-wash.
The shelf is the standard 18 inches above the counter, and it is 10.5 inches from the bottom of the shelf to the bottom of the cabinet. I’m only 5’3″ and I can reach the top shelf on my tippy toes, but usually I just climb up on the counter. If I was just a couple inches taller I wouldn’t have a problem! I very rarely need anything on the top shelf though, so it’s fine. I haven’t had a problems with grease (or dust even)…we use everything on the shelf so frequently that stuff doesn’t have much opportunity to settle. Hope that helps and good luck, you will love it!
Hi, Ashley. Your kitchen reno is amazing. I’m just wondering if/how you attached the floating shelves to the wall support? Glue? Nails? Both? Thanks!
The shelf is resting on strip of wood below and we added a little wood glue, a few brad nails, and then I caulked the cracks. Those suckers arent’ going anywhere!
I love your kitchen!! We are using it as a template to redo our own. I must ask, why the double layer of MDF? My longest span is 30″. Do I need to double it up for strength? Thanks!
I asked Adam and he said he made it that thickness to match face frames on the cabinets, and he used MDF in general just because it’s cheap and doesn’t bow like plywood. He said if you are only going up to 30 inches then you should be fine using one. Good luck with your kitchen, you’re going to love it!
Love your kitchen reveal!
1. How tall are your ceilings?
2. What did you do with the cabinet above your refrigerator? Did you install a shelf there too? Do you have any photos?
We have standard 8 foot ceilings in the kitchen. As far as the cabinet above the fridge, I have been super stuck on that. We removed it completely and it’s just an empty space, but the fridge looks kinda lonely…like an afterthought. I was thinking of adding a wooden wine rack above it or something…if you have any brilliant ideas let me know!
I love this kitchen! We are shamelessly going to copy your cabinets on top/open shelf on the bottom concept. I love open shelving but couldn’t get my husband on board until he saw this photo. Thanks for the inspiration!
I came across your transformation quite some time ago and LOVED the idea you had for bumping the cabinets up and adding open shelving underneath. Your new kitchen is gorgeous! I took your genius idea and, with some help from Young House Love, created a similar look in my kitchen. Thanks for the inspiration! If you want to check it out come visit http://www.simplyputsincerelyus.com
We are doing this as we speak! I just have one question: How did you adequately support the open shelving above the microwave? My husband is worried that the cabinets to the side aren’t strong enough to screw into. Thanks!
The microwave isn’t screwed into the side cabinets at all, it has a bracket that holds it against the wall (which came with the microwave), but it is also bolted to the shelf above it just like it would be to a cabinet. The shelf above is sitting on a little lip that is attached to studs in the wall and also on the side cabinets, then we added a face frame around it so you wouldn’t see the gap/bolts/side supports. Does that make sense?
I Love what you have done with your kitchen. The kitchen you started with is similar to mine and your remodel is exactly what I want to do with my kitchen. I also live in Central Texas, an hour from Austin. I showed my husband and he is curious if your microwave is a microwave/vent hood combo and if so, what did you do with your vent hood ducting, when you put the shelves above the microwave? Thank you so much for sharing. My husband and I are seriously considering everything you have done in your kitchen…really is impressive. laura and bill
Thanks Laura! Our microwave is a vent a hood also, but there isn’t any ductwork. The microwave sticks out in front of the cabinet above it by a few inches, and the vent is there. It works and made for an easy install, though it’s obviously not the best vent hood.
Hi Ashley! I’ve been a stealth reader here for a few months now.. You inspired me to start my kitchen-renovation-on-a-budget almost 2 months ago now and I have to admit that I’ve used your kitchen as a bit of a template :) I still have to do the backsplash but I’m thinking ahead to the open shelving and I have a question.. Did Adam just use latex paint on the MDF? Or did he have to prime with oil-based? I hate using oil-based but sometimes it is the only thing that will adhere to non-wood. I want my shelves to be functional and I’m afraid that latex on MDF may chip/peel with heavy use. What do you think? P.S. Congrats on your 3rd pregnancy!
Hey Brit! Thank you about the pregnancy and yay for kitchen remodels! To answer your question….I hate oil based paint and avoid using it at all cost too. That stuff is just nasty. For the shelves we primed with Kilz and painted with regualr latex paint. I didn’t seal them and I haven’t had any problems, but I would recommend sealing them anyway. You could use polycrylic or varathane (water based or it will yellow) or you could even just give them a quick coat with clear spray paint (rustoleum is my favorite).
I love your kitchen so much! It is absolutely what I want mine to look like once I’m finished but I have struggled to get started because it seems so daunting. How difficult was it for you to raise your cabinets up to the ceiling? It seems like that is the first step for me.
Love the look. I can’t tell, but did he finish off the edges of the underlining? Think I’d make it one solid shelf all the way across, but love what you’ve done. Gotta love a guy in sandals and sox. Especially when he’s willing to do the diy stuff.
Didn’t you have a vent from the microwave? What did you do with that?
No, we didn’t have a vent. I mean, it’s a it’s a combo microwave/hood vent, but it’s vents out the top front so we didn’t have to do anything special.
what did you do about hiding the power wires for the microwave? If you raised the cabinets that means that the upper shelves in them are harder to get to , which means that the new shelves above the micro may be easier to get to!!
I’m seeing this 4 years later as I remodel my kitchen so chances are you probably won’t even see this or reply. I’m curious where your microwave vent is. I don’t see it and I’m really wanting some shelves but worried the vent will show.
Hi…I really hope you get this request. I have been living in a condo I renovated 3 years ago and for the life of me I cannot figure out how to install my microwave. The photos of your renovation showing the way you suspended the microwave is exactly what I want to do. Please, will you share with me how you did this? Thanks so much. Teresa
Love the work on the cabinets! Quick question: About how much weight do they hold?