
Crazy Easy Placemat Pillows (and Napkin Pillows and Dropcloth Pillows)
So pillows. We all love them and use them. We like them for comfort, we like them for decoration, we like them to add color to our neutral couches. The more the merrier really…except for one little problem.
Throw pillows are freakin expensive.
Not like Rolex and Mercedes expensive, but even cheap pillows are $20-$30 a pop. I’ve seen plenty a pillow go for well over a hundred bucks and that is insane….especially in my house where they are just going to get peanut butter and boogers wiped all over them.
Well I have a solution. A looong time ago I showed you how to make your own envelope closure pillow, but this tutorial makes that one look like a rubix cube. Did you know you can make one in about 10 minutes, without a showing machine, for under $5? Sounds too good to be true doesn’t it? It’s not…please allow me to blow your mind.
It all starts with a placemat (or two). I found these beauties at World Market for about $4 a pop.

The key is to get a placemat that has two layers…not all placemats have this, but many do. The layers will be sewn together all beautifully on about 90% of the border, but there will be one little section where you can see the stitching. All you do is open that up with a seam ripper (or whatever you have that works, I may or may not have used a steak knife before).

Then you stuff it. You can buy pillow stuffing at craft stores, the bag below was $1.50 at Hobby Lobby (it was on sale for 50% off) and I used one bag for two placemat pillows.

Then just stitch up the hole and BAM, you have a beautiful pillow that looks like it cost you way more than four dollars and change.


That’s it! I have never before and may never again do a tutorial that is so easy. Now if you’re anything like me (and I’m assuming you are since you’re here) you will be double checking placemats for double layerness everywhere you go. It’s okay, embrace it.
I’m far from done with this post though, this is actually an update on my lonely built-in bench.

It needs a lot of pillows, so a lot of pillows it will get.
So, next up we have napkin pillows. These are just cheap single layer napkins, they are pretty much just a square of raw fabric except that the edges are already hemmed.

If you want a large pillow you can just sew them together, I wanted smaller lumbar pillows so I sewed then in half (all but one short edge), stuffed them, and sewed then closed.

My pillows are going outside, so a gave them a few good coats of waterproofing fabric protector. I cannot vouch for how well this stuff actually works, but I had it lying around so I figured what the heck. (I’ve since found that THIS STUFF works even better).

Lastly we have dropcloth pillows (made with leftovers from this project). These are NOT ten minute pillows because there is nothing “premade” about them…but fear not, they are still simple and totally doable. To make these I followed my own envelope closure tutorial. I’m not going to give you another full tutorial, so if you want to know your going to have to click on the link above (after you finish reading this post of course).
I thought big bold stripes would look nice paired with the above pattern, so I grabbed some masking tape and spray paint and went to town. This was my first time spray painting fabric and I have to tell you, it works really really well. I got really crisp lines…no bleeding, no smearing, dries fast, looks great. It’s also cheap, easy and quick. I’m pretty sure I’ll be painting more fabric in my future.

Since these pillows were getting an envelope closure they can’t just be stuffed, they need a pillow form. Do you know how much they want for a large pillow form at Hobby Lobby? Almost twelve bucks! Ummm, NO….so I made my own for about $1.50 a piece.

I painted a few more dropcloth pillows and tried to copy some of the elements in the placemat design.

Here they are adding some life to my bench! For all eight of them (including the two napkin ones not pictured) I spent right around twenty bucks. Not too shabby.


We are making progress!

In fact, the only real similarity in the pictures above is that they both include a pantsless toddler. Go ahead, I’ll wait.


Super-cute and great idea for the placemat pillows! I will keep my eye out for them next time I’m out shopping…..
Looks great Ashley! I made pillows from World Market napkins and curtains not long ago-they have such pretty prints! Love the spray painted dropcloth too. And I had no idea that fabric protector existed, I’m going to get some of that before I make new things for my patio next Spring!
I was just about to buy pillow forms to go in some odd size (24×24 inches) shams that came with my king size bedding. Thank you for bringing this idea to my attention just in time! Love the bench and the pillows!
Making pillow forms is really easy (and cheap!), but I’m just going to warn you…buy more stuffing then you think you will need. I thought I bought more than enough but my pillows could still use quite a bit more. Good luck!
Okay, thank you!
this inspires me to make floor sized pillows for the grandkids. I love those pet bed pads and always thought that it’s a great idea for children to sit/lay on the floor to read or play but they cost a fortune and I couldn’t out a DIY that’s cheap and sturdy but now i see the way!! thanks!
Looks very nice! Thanks for the waterproof spray info.
Looks great Ashley. I agree with the cost of pillows! I have been putting off buying some for the past year (we have not a one except on the bed) but now I will be looking for placemats when I go shopping tonight :) Hope y’all have a wonderful Christmas!
I hope you find some you love!
Oh, first of all I have a weakness for stripes and yours turned out beautiful! I like the patterned pillows too, I struggle with pattern more often than not – unlike how you can coordinate, that’s a talent!
Thanks Heather :) I’ve been loving stripes lately too, and it doesn’t hurt that they are the easiest thing ever to do! I’m realy usually not the best coordinator, but I think big bold stripes would look good paired with almost anything.
I flipping LOVE this! And I’m in such dire need of new and pretty throw pillows (inherited 3 god-awful ones from mom & MIL)…I see a project in my New Year – because really, who has much time left at this time of year?!
Oh my gosh I know, December is nuts. I’m struggling just to get a few posts out this month.
Ashley…these are awesome. I love your “fabric” pick!!! XO, Aimee
great ideas and love your helper….
Oh my! I love, love, love that! I am heading to World Market today to get some two sided placemats. I can do this. I don’t sew…so I’ll just finish up that little area with Steam a Seam!
Wow, great tutorial. Thanks!!!
Oh yay, they have so many beautiful ones to choose from. I’ve never tried Steam and Seam…I’m afraid if I used it I would never touch my sewing machine again, lol.
Well isn’t that just the smartest idea I ever did see! Even I could handle those pillowcases and not have them turn out all wonky and not-square. Brilliant idea! (Sharing on FB right this second.)
These are so easy you could probably just have Weston make them for you, lol. Thanks for the share!
It’s looking good! Such an inviting place to sit and chat! Pantsless toddler and all… haha
Haha, he works himself out of his pants and into my pics every dang time :)
Great minds think alike!! I did the EXACT same thing, with the EXACT same placemats from world market. I love the chartreuse green in that print. I have one on my couch and I kept one as a placemat and put it on my coffee table.
Haha, you have great taste! I love that print, I bought the shower curtain too :)
ACK! I’ve never thought of that before!!! Placemats?! And you are totally right…I’ll be checkin’ the backs of those puppies from now on!!! :)
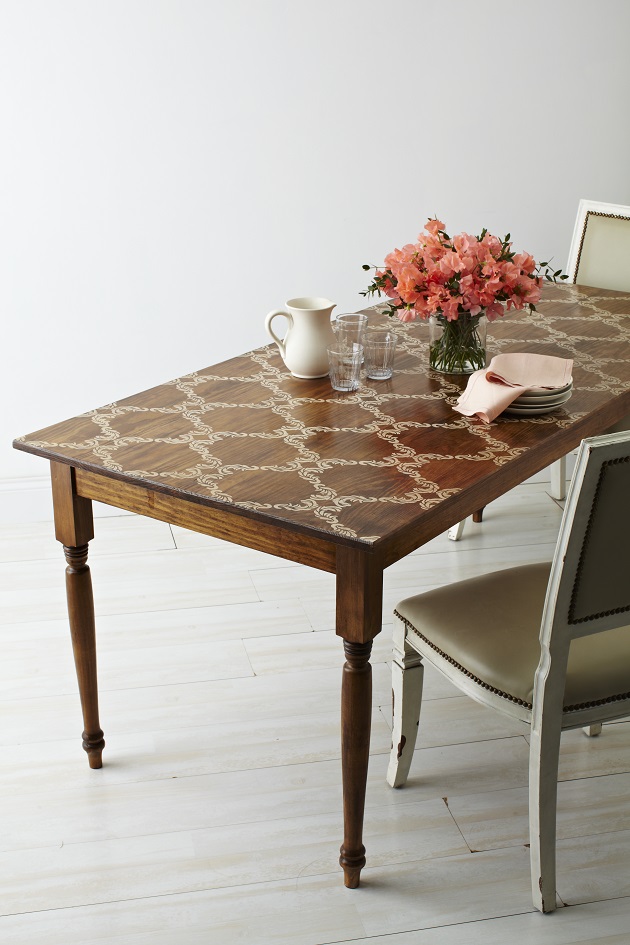
This literally made me smile and say “wow!” out loud! So clever! I have been following your blog for the last few months after seeing your Paisley stencil table on Pinterest and I just love everything you do! My boyfriend and I are buying a house and close in January so I plan to start a blog to document all my projects (many of them will be inspired from yours!) I hope once I get that going you will follow me! :) Thanks for this awesome idea!
Oh, placemat pillows, I just love you. A good 1/3 of all pillows currently on display in my house are actually placemats. I love a good pillow loophole! Great post with three easy ideas for them!
Like your pillows! I’ve never tried painting fabric either, but come spring, I’m going to give it a try too (can’t spray paint in the snow!)
Looks great!!! Love the ‘bench’….and the pillows add just the right touch. Love the barn star too!
Awesome! Really creative.
I have done this before and loved the results because the placemats are stiffer and make great statements, I love the Bench, saw it on another post, saved the pic to show my son who is a Carpenter Artist, I would love one, I love the statement. Love your post, even though you use a Showing machine, I need one of those fabulous machines.. Merry Christmas
They look fabulous! Placemat pillows INGENIOUS and fabulously FAST! I also need some outdoor pillows and I will be finding that outdoor waterproofing spray!
Genius!!
I love your pillows. I have used placemats in the past, but never thought to buy double layer ones I could just open up. I thought about spray paint on fabric but never wanted to ruin it so I have to thank you for trying it for me. As for drop cloths, they are perfect for so much, I started making curtains out of them first and now have reusable bags for groceries, napkins, and pillows. And they are so much cheaper than fabric in the fabric stores.
Fantastic job! The strips on the canvas came out great! I hand painted some last year that didn’t do too well but I’m going to try this! Thanks for sharing!
I love this idea! I used the same print but bought the napkins…should have gone for the placemats, so much easier, next time :) Thanks for sharing with us and linking up.
XO
Kristin
You did a great job on the pillows. I love making placemats pillows too. Thanks for sharing at DIYbyDesign.
Wow, Ashley, the whole area looks fantastic! I love the pillows on the bench. Do they stay there or do the kids pull them down?
I’m also going to try that waterproofing spray. Let us know if yours works, kk?
Cheers! Jan
The kids mostly leave them alone actually (YAY) and I’ll let you know about the spray, so far it seems to be doing it’s job!
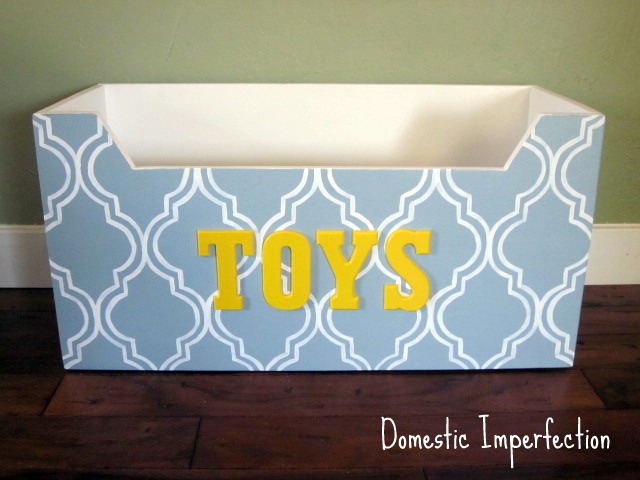
Did you make the table on your patio?? If so, how did you make it?? All of your projects are fabulous!! I am in the process of doing the stenciled table right now. I just got my stencil in the mail the other day. I hope it turns out as good as youurs did!!
We actually didn’t make that table, I bought it at a garage sale a long time ago. It would be really easy to make though, it’s just a box made out of plywood with old fence posts nailed to it. And YAY for stenciled tables! When you are finished feel free to e-mail me a few pics, I’m collecting reader projects for a post and would love to include yours!
Buying stuffing and pillow forms from fabric or upholstery shops can be silly expensive. But buying decorator pillows from clearance places like Marshall’s, Ross, TJ Max or anywhere else that sells off household goods at cut rate prices is usually much cheaper. It’s the same stuffing just in a nice fabric bag rather than a plastic one.
Great post! I LOVE the placemat pillows. They look so nice and the best part of them is the cost. I can’t stand how expensive nice pillow are! Thanks for sharing.
Love, love, love the spray painted pillows! I need to get sewing or male some for my porch.
I LOVE YOU! Thank you for sharing these pillow ideas! I have a new home (my first and it will be my last too :) ) and I so want to make it look nice, but as you say, pillows can cost some $. THANK YOU for these great tips!! xoxoxoxox!!!! :D You have made my day!! :D
Be well… Shal :)
Looks like a real cozy place to sit outside. And it’s a big improvement over how it looked before.
I stumbled on your blog through Pinterest, and I have to say Im addicted haha :) Im not very crafty but I love looking at Diy stuff and your blogs are so simply put that Im gonna finally do some diy for my ugly apartment lol So not only have you given me some faith I can do this but your blogs put a smile on my face with your lil comedic comments THANK U :)
Glad you find it helpful (and entertaining)! If you’re just getting started with DIY placement pillows are a perfect place to start.
Where did you find the waterproof paint?
I don’t remember..probably Home Depot. If not, Amazon has everything.
Okay, I must be incredibly stupid, but I can’t find this info in your post. When you were making the dropcloth pillows, you stated that they have an envelope closure so they can’t be stuffed, and that you ended up making your own pillow forms. How did you make them?
Love these place at pillows! What a fabulous idea. So glad I came across this for my patio makeover I’m working on. I saw recently to stuff outdoor pillows with a bunch of plastic bags stuffed into a bigger plastic to make them more waterproof. That along with that spray would be great too. Oh and I love the painted canvas! Thanks so much for the great ideas!
Love your choice of fabrics lots of luck with everything mgj
Wow…..the idea is really great.It is also cheap and very easy.Thanks for sharing such an idea.
Where can you buy the rust oleum fabric waterproofer? Ive searched several sites and can’t find it. You have super cute ideas.
I think they stopped selling it, here is the updated product – http://amzn.to/2uEI2GI
I LOVE this post!! Thank you for so much inspiration!! I’m moving into a new rental, our budget is skin tight, and we want nice things (of course) so I’ll be using these ideas for our outdoor furniture (that I’ll be finding for free from Craigslist)
Awesome Idea…love it!
Love, love you keeping it real! Such great ideas and your writing makes me feel like I could actually DO these projects!
To save even more money stuff them with those plastic bags you’ve been hoarding in every corner!