DIY Farmhouse Table and Bench
Look what now resides happily in my dining room…
Yeah, I’m pretty much in love with it.
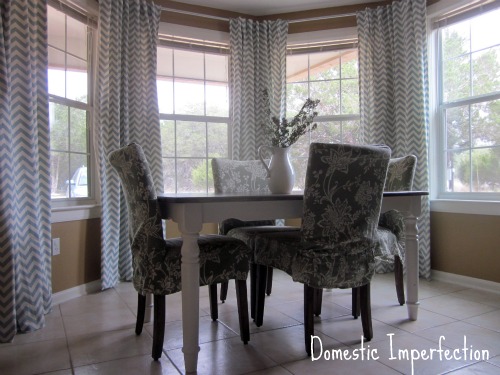
Here is how the dining room has looked for a while now.
Okay, that’s not totally true – it’s rarely that clean and usually includes a particularly messy high chair. I bought that table for $50 about seven years ago. It even came with chairs, but we had to leave those in New York when we moved, since we ran out of room in the moving van. I’m sure your familiar with it, it’s pretty much the backdrop to all my craft projects…my dining room serves double duty as my craft room as well. Ahh, the beauty of small houses. Anywhoo, we’ve need a bigger table for a while but didn’t want to spend a ton of money on one.
Thats when I found it. An awesome tutorial for a farmhouse table…beautiful, simple, and best of all…cheap!
Unlike most of my blog posts, this one isn’t going to be a tutorial. There really isn’t a need for me to write one, since the one we used was awesome. I wasn’t involved enough to write up a decent tutorial anyway, and Adam didn’t want to write up a “guest post”…trust me, I asked. So go HERE if you are interested in building one yourself. It’s awesome, really…way better than I could write. I did take a lot of pictures of the progress though, so I’ll show you all those. Also, we finished it differently than they did in the tutorial, mostly because we have kids and need it to be bulletproof.
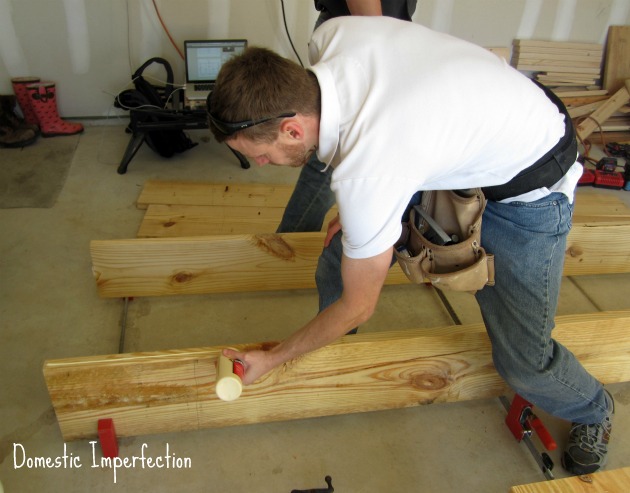
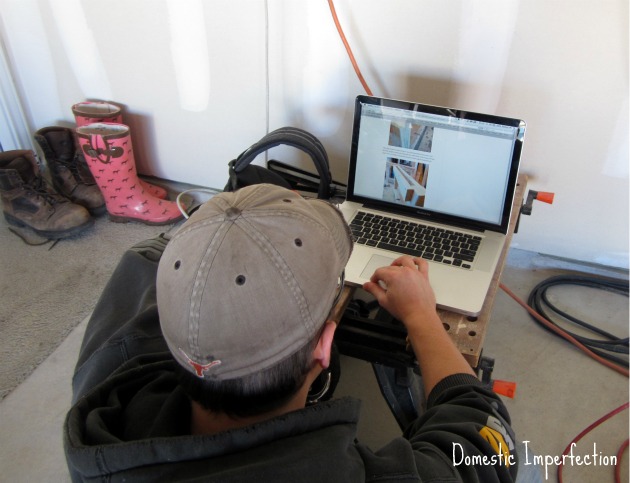
Before we begin, I think it’s time to formally introduce you to Keith. You’ve met him before, he is Adams older brother and is part of pretty much every wood related project that we do. So this is Keith…
and sorry ladies, he’s taken.
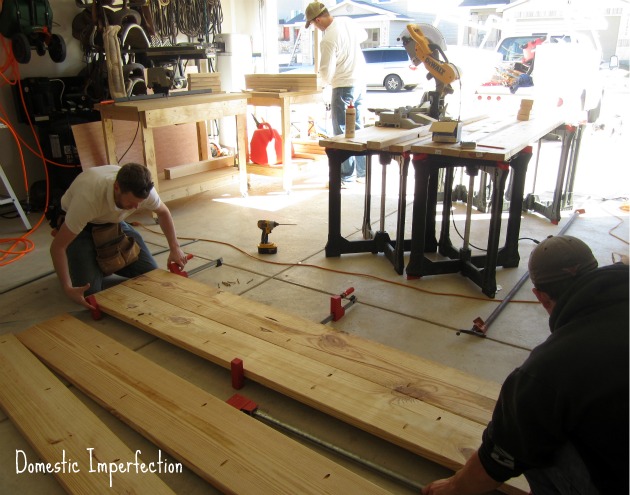
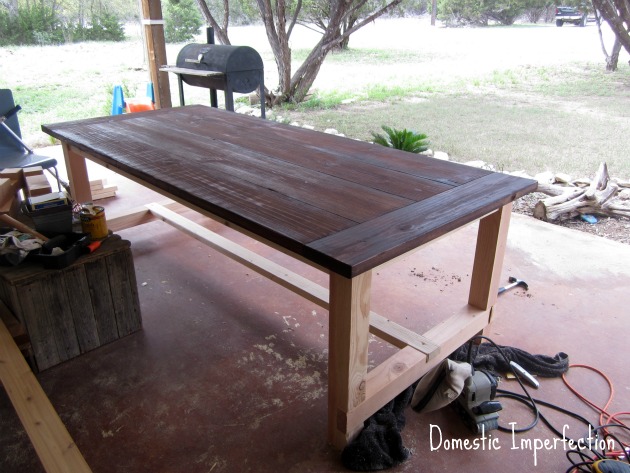
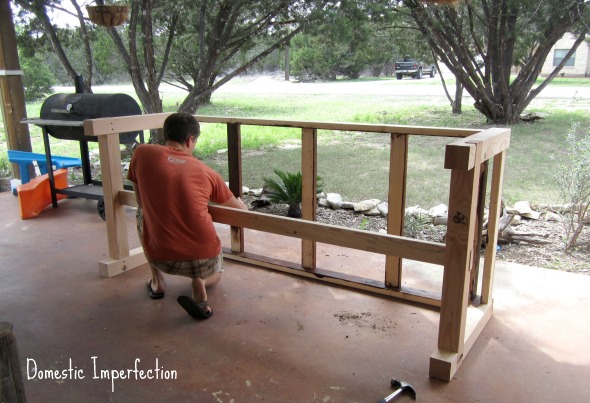
So here is Keith, starting work on the top. This table is really very simple (well, in relation to other tables) and is just pine planks from Home Depot. The top is 2X10’s and 2X12’s and is held together by wood glue and pocket screws. I know Keith is reading this and rolling his eyes at my description…I’m not claiming this is a tutorial. And I’m just a girl. (ladies, have you ever used that excuse? It works awesome :D)
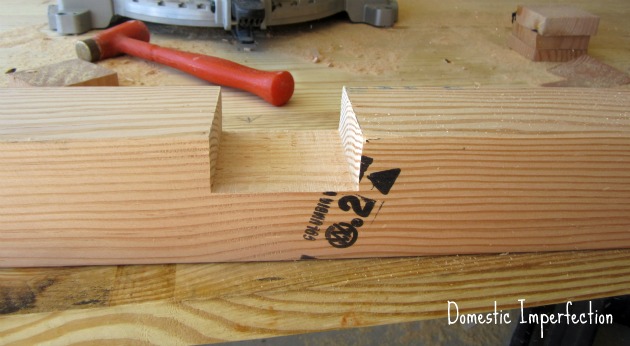
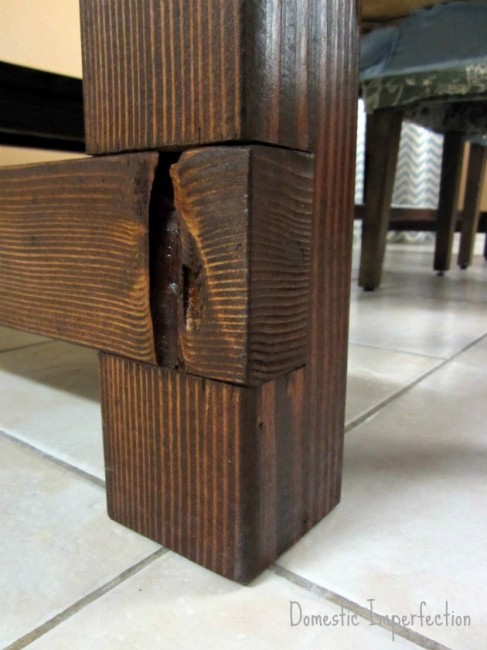
The legs are 4X4’s and are notched out (to look awesome).
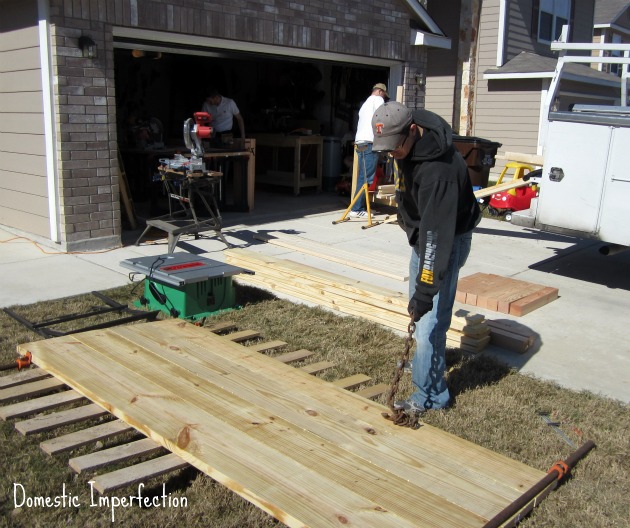
Here is Adam (my husband, for all you newbies) distressing it. I wanted the table distressed so that I won’t have to freak out when the kids abuse it. He used all kinds of stuff to distress it, chains, chisels, a hammer…he even hammered in different items like screws to add character.
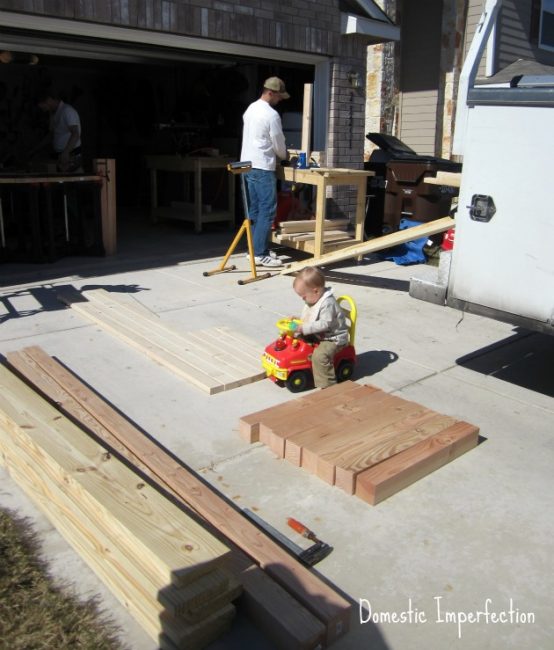
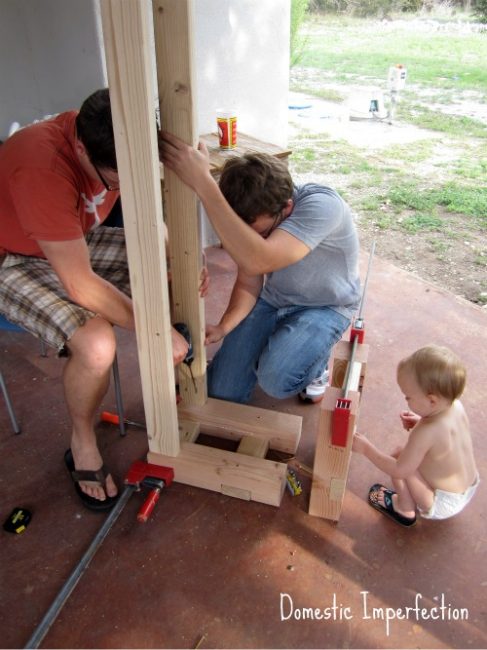
And you know I can’t show y’all a project without showing you what Elijah was up too. Even when we’re not at home he’s part of the action.
Here is proof that we do projects just like the rest of y’all…by getting ideas from(or straight up copying) someone else!
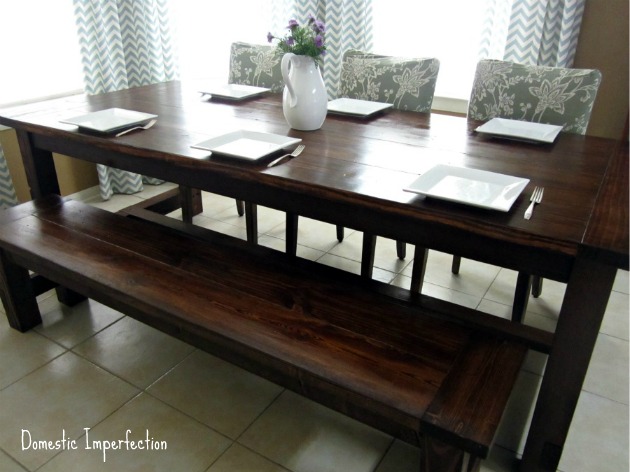
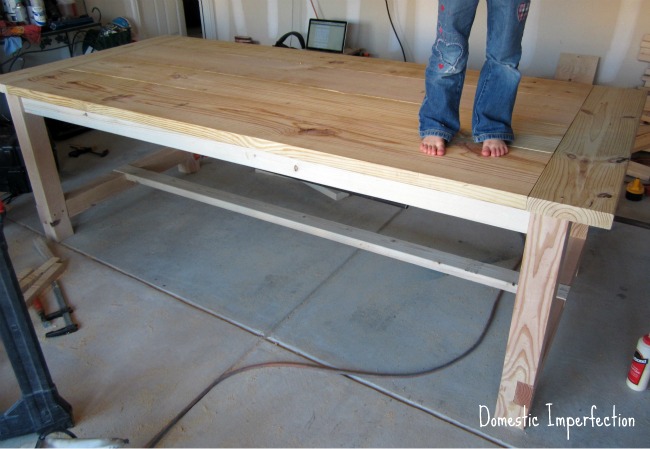
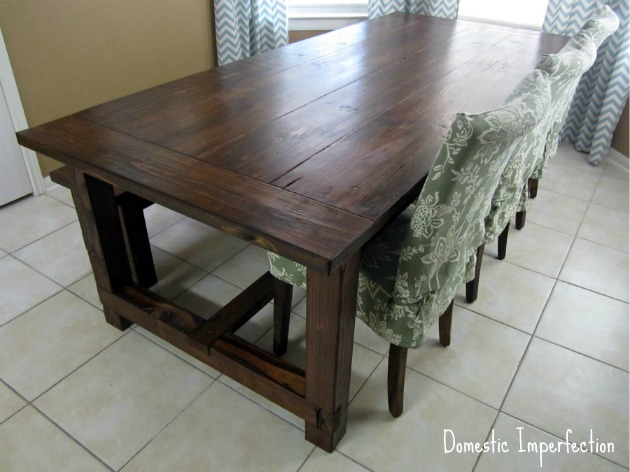
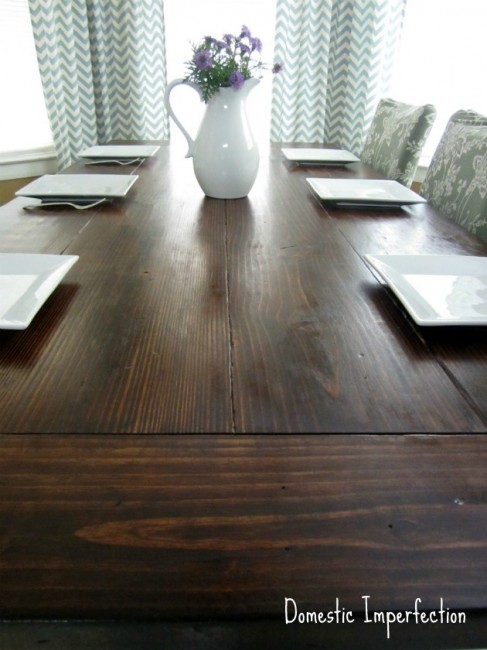
Here she is all put together!
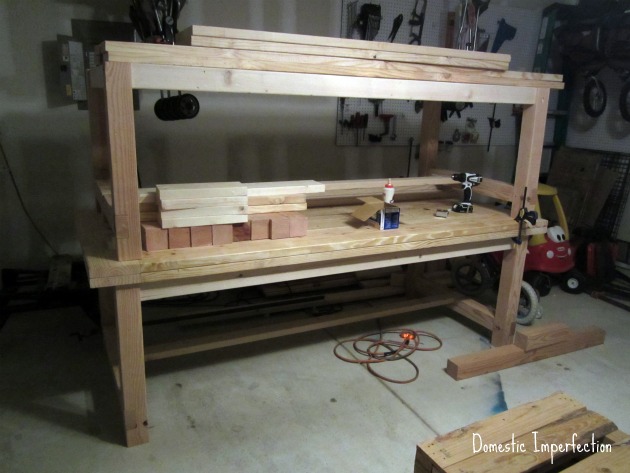
But wait, it gets better… here are BOTH tables, packed away for the night. That’s right, we built two. The second one was done by our friend Darin (whose garage and tools we used to build them) and is up for sale. So if you’re in the San Antonio area and want to purchase an awesome farmhouse table and bench, please e-mail me! (UPDATE: the table has sold.)
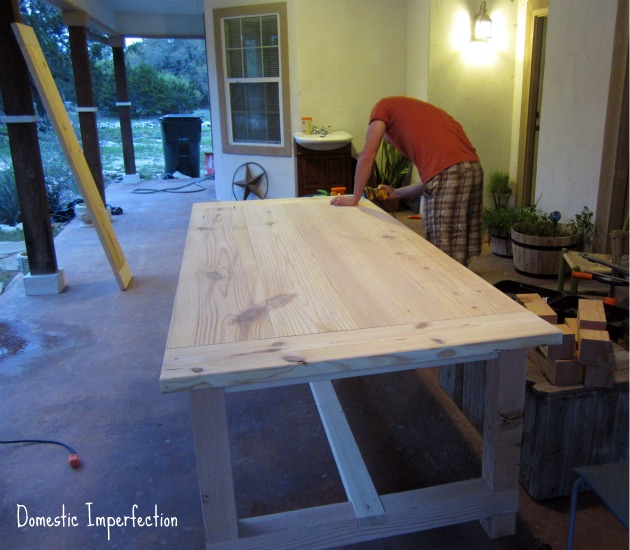
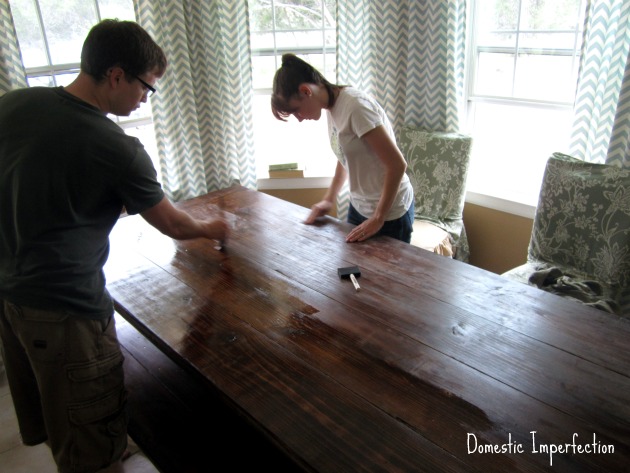
Then we brought the table back to our “garage” for finishing. Here is Adam sanding it…
( In the background is a hint to another project we are working on…and no, the project isn’t decrapifying our front porch, lol)
After sanding came the staining. Pine soaks up stain, on my test strip I had to do four coats to get it to the color I wanted. Adam said “heck no!” to doing four coats and I don’t blame him…one coat seemed to take all day. He did One REALLY thick coat and never wiped it off…it looks just like my four coats did. The stain we used is English Chestnut by Minwax.
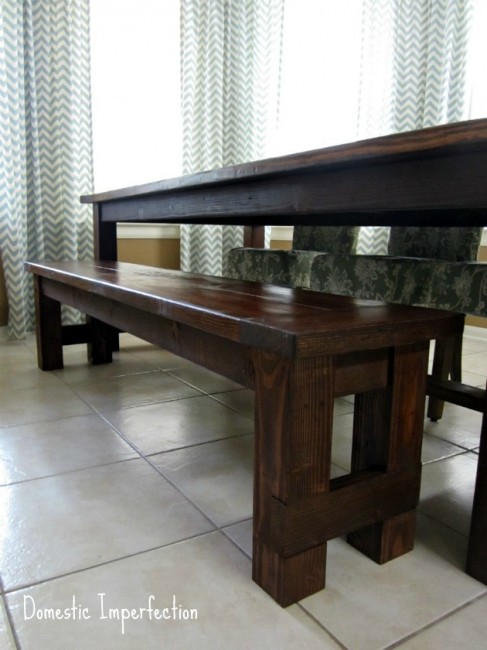
Here is Adam and his brother Taylor putting the bench together.
Since I introduced you to Keith I guess I should introduce you to Taylor, Adams younger brother (Adam has four siblings). I’ve mentioned him a few times, he has at least some part in most of our projects. Literally the only decent headshot I can find of Taylor is his Marine photo from 2007, lol. So here is a very young Taylor…and yes ladies, he is available :)
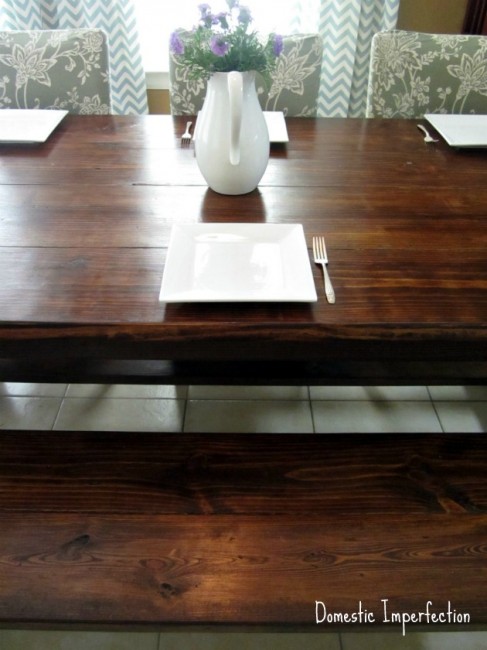
I did a bunch or research on what kind of finish to use, but after all that we ended up just using polyurethane. We already had it on hand and we could finish it in a day (instead of weeks like a lot of other products that were recommended). We used gloss, sanding with 400 grit sandpaper between each coat and then finished it with a satin poly.
The table is about 8 feet long and 3.5 feet wide. Last weekend we fit eleven adults and two babies around it, and that’s without the extensions (which we haven’t built yet). Sooo much better than dragging in card tables like we usually do! Despite being so large it doesn’t look cramped in our little dining room, which I was a little worried about.
Total cost was about $150 and three full days of work.







WOW! it looks amazing! i love the finish you gave it!!!
That looks fantastic! I love how the wood contrasts with the light blue chairs and your curtains. Great job :)
Tempting. They turned out great!
So…either you have a sink permanently installed on your porch (smart — you don’t have to go inside in the middle of a project to wash your hands!), or your other project is a bathroom redo?
Dingdingding…although a sink on the front porch is an excellent idea!
Would you happen to have a supply and cut list for the table? I think I’ve seen a very similar one on the website Ana white, But I do not have a supply list to get started.
This is very similar to the one on Ana White, but we used a different tutorial. Here is the link and it has everything you need http://tommyandellie.com/?p=2582
Thank you so much. I’m moving in to my new house and can’t wait to get started!!!
Can you give me the exact name of the stains you used for this table? Also, where were the curtains purchased? I’m wondering if they have any tan chevron.
This is GORGEOUS!! Love, love, love the color!
What a beautiful job you guys did. I’m so impressed! And the bench really streamlines the look of it – maybe why it doesn’t look huge in your dining room. Did you cover the chairs yourself?
Funny that you ask, I’m actually writing a post about my slipcovers right now, it should be the next thing I post. But no, I didn’t make them.
They’re very pretty.
The table is stunning! I am hopeful that I can make one for my kitchen. In reference to the slipcovers, if you didn’t make them, would you mind telling where you got them, or what the fabric is? I love them! I have never thought of pairing slipcovered chairs with a rustic table and bench. All I can say is WOW. They compliment each other well. Good job and your room is inspirational to me!!!
Ashley…I found the slipcovers!! At one of my favorite stores, Home Decorators. Wow. Two lucky finds in one day. Thanks again for sharing your lovely table. (wish they sold the slips in other colors!)
Thanks Jenn! I bought the slipcovers at Target a couple years ago. Target.com actually, not sure they sold them in the store.
It looks great and gave the room a whole new look! (Side note: I’m from SA too!)
Wow! Gorgeous! I wish I lived near you! That table would be at least $2000 at Pottery Barn. I am drooling right now. Just LOVE LOVE it. All your hard work really paid off.
OH my goodness!!! I LOVE IT!!! It looks great in your dining room! Love the darker finish!
Oh my gosh!! I love that table! I’ve been eyeballing some farmhouse tutorials for a while, it turned out amazing! Great job! And the chairs and curtains are so adorable! Oh, as I’m writing this comment I realized I never wrote you back! You are very welcome for the tie and I do sale them on Etsy. I’m going to have to go back to the email and write the rest. Sorry! My sister just left today after visiting for a week, I don’t think I was on the computer once while she was here :)
I love it! I just inherited a new (old) dining table, but if I hadn’t, I would’ve made one like that one. Y’all did a great job!
Looks like a labor of love! It looks amazing and you should all be very proud of the craftsmanship that was put into this! It should last for over 100 years.
This table is so gorgeous! Definitely “pinning” this to save for the future…you know, when I get my husband to help “us” build one. :)) Great post! (found you via Serenity Now’s weekend link party!)
Beautiful!
Wow!! What a gorgeous table. Aren’t we so grateful for husbands who are willing to carry out our crazy projects :)
Thanks for sharing!!
Gorgeous! Great job.
I LOVE LOVE LOVE your table and bench! I also thought it was ironic you had a picture of a Marine. My husband was in the Marine Corps Reserves for several years! I found you from Delightful Order! Have a great weekend!
WOW! What a beautiful table! I love that one side has a bench. I would love it if you shared this on my link party, pretty please :) http://www.michellestastycreations.blogspot.com. Have a great weekend.
Hugs,
Michelle
Looks like that’s the Ana-White.com farmhouse table plan! I built that same table for our dining room, but with slimmer legs, a little shorter length and with 1″ thick boards. I love it! Your men did a fabulous job on it. Next time you should take a stab with the saw, it’s a lot of fun!
beautiful job!!
Oh my goodness, it’s FABULOUS!!!!!!!!!!!! I’m SO going to have my husband make me one of these one day. Thanks for all the great pictures and the link to the tutorial. :)
Anna
http://www.askannamoseley.com
Thanks Anna, glad you like it!
The table is fantastic! You guys did a fabulous job. I love it and it looks wonderful in your dining room. Enjoy all your talent and hard work =)
What a stunning piece! It’s absolutely beautiful!! I would love for you to share this with my Unveil Your Genius link party! http://taylornorris.blogspot.com/2012/04/unveil-your-genius-link-party-6.html
(New linky every Thursday…each linky runs for a week)
Happy Sunday!
I absolutely adore the finished product. I have always wanted a larger dining table, but with one of two sons already left home and the other soon to go, it seems there isn’t much point for us any more. Plus we’d need a bigger dining room.
Oh my goodness, this is fantastic! You guys did such an amazing job, love it.
Gorgeous! Absolutely gorgeous!
Wow. That is impressive, and beautiful. You can’t beat a farmhouse table. Love them! Great job!
That table is truly amazing! I’m speechless … and trust me, I am not a quiet one …
:)
Linda
WHOA!!! That is an amazing JOB!!!! Dont know if I have courage to tackle that but seriously, you did so awesome!!!
This looks so great!
It looks AHH-mazing! Pinned it!
wow!! what a gorgeous table! y’all have so much to be proud of. great inspiration.
awesome table!! You all did an amazing job. love it~Angie
Absolutely gorgeous, Ashley!! Love it! How nice that you can fit so many people around your table now! :)
xoxo laurie
That is just beautiful – a true heirloom piece!
thanks for sharing,
gena
Wow! That is one gorgeous table! Love the finish.
Oh my, I think that is one of the prettiest tables I’ve ever seen!
Looks great! We actually just built one as well that looks very similar! Still working on the bench though….we are trying to make that a storage bench, so it will be a little different. Thanks for sharing!
Shara @ Palmettos and Pigtails
A storage bench is a great idea!
This looks amazing!! I love your chairs too!
Shannon@SewSweetCottage
I LOVE it. Lol, I hinted to my hubby that he could make one, and I don’t think it’s going to happen. Maybe one day, I will just do it myself.:) It’s beautiful.
Ah, that’s too bad, though you would totally be my hero if you made one yourself! I bet you could bribe your hubby into helping, ifyouknowwhatimean.
I have been on the hunt for a new dining set. This is such a ridiculously affordable option! Pluuuus handmade! Love it. I might recruit my mom to help me give this a shot. Thanks for sharing. Excited to be a new follower.
I really hope I am brave enough to try to make one of these incredible tables. I am in the process of redecorating a dining room for a client and she wants a big rustic farm table. I haven’t been able to find one we love in her budget. This would work perfectly. Thanks so much for sharing – you made it look easy … but then again – you ARE just a girl. :) Missi
I am completely drooling over this. The color is beautiful & I am also *dyyyyyying* over your chevron curtains. Beautiful!!
– Kim @ twotendesigns.com
Impressive. This is so great. I’m pinning this so when I get a house, I can so build one…er…attempt to build one. I love the farmhouse styles :)
I can’t even spit out the words to tell you how much I love this! The style, the color… it’s all perfect.
We have some applewood we got out of an old box car that carried wine that we want to make in to a harvest table. I only hope it turns out as nicely as this one!
I love this table and bench. Such a great job. Not sure if I’ll ever be able to accomplish this :)
Kimberly
Gorgeous!!
Absolutely beautiful! The only thing I need your help with is learning how to convince MY husband that he should make this for me. ;)
Gorgeous!!! I can’t believe that’s a DIY build – it looks just like Pottery Barn. It really transforms your space too. Thanks for linking up!
That table is amazing! kudos! and seriously, those are some cute brothers ;)
Gorgeous! I think any single brothers should just use it as their profile pic on dating sites.
Oh wow!! Your table looks so amazing, I am so impressed that you guys made it! I really love the color of the stain you chose too, it’s perfect :)
Wow, great job!
Awesome! My husband has been planning to make this table, but having your extra pictures of the process will be so helpful. Thanks for posting! By the way, found my way over here through Addicted 2 Decorating.
Bobi
This is great! We really want to do the same thing – can you guy do a quick post/comment to let us know HOW DID YOU GUYS MAKE THOSE NOTCHES?! thanks!!
Lets see if I can make this make sense….the notches were made by using a circular saw to make a bunch of cuts within the notch boundaries. Then they used a chisel to get out all the slivers and make it smooth. Does that make sense?
Beautiful – I have been want a table similar to this for a very long time. Maybe it’s time I tackle it.
Just to let you know I featured your wonderful project on homework today. Stop by and grab a featured button. Thanks for linking up your project – have a wonderful weekend.
carolyn | homework
Hi – this table is beautiful, it is exactly what I hope to have in my dining room one day. You did a great job.
You totally ROCK! I’m featuring you tomorrow! XO, Aimee
Beautiful table! I hope to have my very own someday. You guys did a wonderful job and you have such a beautiful home!
This table is absolutely fabulous. What an amazing job y’all did. Thanks for sharing it at Wow. This is definitely a Wow.
WOW!! I am so impressed that you did this! You’ve got to LOVE when you sit down for a homecooked meal and know that you made your own table. Great job! Thanks for sharing at oopsey daisy!
Wow! You’re my inspiration that we *can* do this. I already bought the wood for it. Nice to know that someone else did it and it turned out as well as Tommy and Ellie’s.
Thank you so much for your photos.
Oh wow, go you! I’m sure it will turn out beautiful. And even if it’s a little jacked up…it farmhouse, so it’s okay. Gives it character! Our’s has plenty of character :)
Ashley– This is GORGEOUS! And I adore that it was a family affair. From the notched out legs, to the beautiful dark stain….it’s perfection! I’m another Texas gal…and my entire family is from San Antonio (I am the youngest and the only one born in Austin…so I consider SA a second home). We now live about an hour north of Austin off I35. Always great to meet another Texas blogger. I’m featuring you at tomorrow’s Mop It Up Monday {coming out later tonight}! Hope you’ve had a wonderful weekend!
{HUGS},
kristi
Thanks so much Kristi! I’m always happy to meet other Texas bloggers :) Sounds like your in…Temple?
Thanks for featuring me!
LOVE! Did the table sell?
Nope, still available. I think I’m going to have to go more local and throw it on craigslist. Are you interested?
You by chance aren’t making anymore to sell are you? I know this was a long time ago but this would be perfect for my kiddos. I have 7 or them. If you want to sell one let me know .. in SA
Ok we TOTALLY have the same taste… I think its a Texas thing… and the fact that we both have handy, attractive husbands with family that we exploit for cheap labor :-) Hooray handy family!!
Im pinning this and may even convince my hubs to make one… it looks great!
Samm
http://www.LittleHouseintheBigD.com
I am in LOVE with this table!!! Think you could whip me one up real quick like?? K, thanks! ;) Thanks for linking to Fancy This Fridays!!! We FEATURED this today!!! :) http://www.trulylovelyblog.com/2012/04/fancy-this-features-71-and-72/
It’s really beautiful. Definitely worth three days work!
The table turned out awesome. I’m so glad that our building plans combined with Ana-White’s plans helped you build this amazing piece of furniture. It looks flawless!
http://www.tommyandellie.com/
Great table and fab bench! You all did a terrific job. Love it! Hugs,
FABBY
Checking this out, can’t wait to show the husband what he will build for me… then BAM! All I can think of is, “Hey! I have those same rubber boots!” lol
LOL! No really, I’m not just saying that…totally made me laugh out loud over here.
Wow, that’s exactly the kind of table I’ve been wanting for the last few years. Who knew it could be achieved so cheaply. Thanks for the inspiration, now to try and convince my husband to build it!
I love the table. I made a trestle style table out of pine years ago. It now needs to be refinished. What did you apply after you stained it to protect it? Thanks.
So happy that you are joining the Bloggy Olympics!! It is going to be fun!
By the way…that table is stunning!
This is the same plans I have been drooling over! Thanks for sharing that another human did them! I am almost feeling ready to tackle it after your post! LOOKS AWESOME!
This is totally a long shot and several months later, but did you end up selling your extra table?
Nope, we never sold it! Lots of people said they were going to buy it but that’s as far as it went. Interested?
I sent you an email!
I love the table. I made a trestle style table out of pine years ago. It now needs to be refinished.
Yeah, I see ours needing to be refinished many times in the future. Pine isn’t the best wood for furniture, but it sure is cheap!
We just moved to San Antonio from Japan and I am looking for a huge table. :) Would the one your friend made be for sale still perhaps? In the mood to make another? We are still in a hotel, we hopefully get to move into our home mid september. I walked into Pottery Barn the other day and couldn’t believe the price so I may just have to make one my own. Love all the pictures. If you have any recommendations of things to do in the area please email me back. :) [email protected]
We just sold the table a few weeks ago…so sorry! Your going to love San Antonio, there are lots of things to do! Of the top of my head here are some things to do….you have to do the Riverwalk and Alamo of course, get all the touristy stuff out of the way. The zoo is great (and cheap), Breckenridge park is right next door (kids can ride the train). The childrens museum is great as well, though I haven’t been there in years. My husband would say the first thing you should do is go to Bill Millers…I say Taco Cabana. We love Fralos in Leon Springs (I10 outside of 1604) and La Cantera is an awesome outdoor mall. Of course, you have to do Sea World. Landa Park in New Braunfels is great, it also has a train and natural swimming pool. You have to go to Gruene sometime…Gruene River Grill (New Braunfels) is Adam and I’s favorite restaurant. And of course you need to toob the Guadalupe (the Horseshoe in Sattler) or the Comal (new Braunfels, through the tube chute). That should keep you busy for awhile :)
How did the notches in the legs come out so smooth? In the tutorial you mentioned, theirs are all bumps and yours are perfect! What tool did you use??
YOu said that there was a farmhouse table for sale. Do you still have one available and for how much? Thanks!
I love your blog! I am interested in a farmhouse table and live in the San Antonio area. You mention in your blog that your friend Darin sells them. I would love LOVE an opportunity to buy one…if possible. Does Darin have a contact email for pricing information? What an awesome result! Y’all did a great job!
Oh Melissa, I’m sorry! He actually doesn’t make them, he just made one…just for fun, just cause we were. I wish I could tell he he would be up for making more, but I know that isn’t the case. Sorry!
I would love it if you sent me exactly what I need and the messurments you used for this table. I LOVE IT. I’ve looked at lots of them, and this is the one I want.
Hey Ashley my hubby and I are going attempt this project, and we were wondering how did you do the notches in the 4x4s? And what tool did you use?
The notches were made using a circular saw to make lots and lots of cuts within the notch, then they used a chisel to clean it all out. Does that make sense?
Absolutely Gorgeous!! I am adding this to my husband’s honey-do list! :-)
It’s beautiful, just beautiful. My family is going to be expanding soon due to fostering children, so I need a large, functional table. I wonder if I could get my brother to fly down from Alaska and make a version of that table????
Beautiful finish, Ashley. I really enjoy your blog.
Amazing! We’ve been looking for a bigger (sturdy) dining space. This is a great inspiration. Thanks!
This table is nothing if not sturdy! Thanks and good luck with yours :)
What stain did you use and how many coats of stain and polyurethane did you do?
The stain is English Chestnut by Minwax and we just did one coat – we painted it on thick with a paintbrush and didn’t wipe it off. Its probably equal to 6-8 regular stain coats. For the finish I want to say we did three coats, lightly sanding with 400 grit between each one.
My amazingly handy husband is currently building your table and bench! Thanks for the inspiration! We’re new to San Antonio so I’m in major decorating mode with a new house! Your idea couldn’t have come at a more perfect time!
YAY for handy husbands and welcome to San Antonio!
Love your table and in the process of making one for our kitchen. Hubby wants to know how many and what size planks you used for the top. Is it 2 10’s and 2 12’s??? And, did you have to skim off of the sides of the wood on the interior pieces so that they would lay flush against one another?
Thanks!
You have good eyes, it is two 2×10 and two 2×12’s. I just asked Adam about skimming the interior pieces and he said that they did and they used a joiner. He said you could also use a table saw and to be sure and use bar clamps to hold it together super tightly until everything is dry.
Love this table!! Hubby thinks he can make it for our new house!! Love what you have diy with your place!
Love your table!! Gorgeous! Thanks for sharing! Can people sit at the ends without hitting their knees?
No, that’s really the only downfall to the table…the ends are pretty much useless.
Live here in SA….Your table is gorgeous! No one makes pieces like this in SA. Wondering if you/husband have considered making anymore?
Oops! Nevermind to my above question…I just read the Frequently Asked Questions area and found my answer :(
Y’all did a fabulous job! No wonder you’ve had so many requests!!! :)
You’re too kind :) We actually built another table recently (haven’t blogged about it yet) and are selling our old one. We have some friends that might buy it, but if that doesn’t work out I will e-mail you!
yes..please keep me posted. Thanx!
We’re planning on building a table soon…thanks for the GREAT pics and details! Where did you find 4×4 legs? Here in SA too and have called multiple places..no luck.
We bought everything at Home Depot. We wanted kiln dried but they didn’t carry that in a 4X4, so the legs are Fir.
i’m thinking about making this table. did you ever end up adding extensions? how’d you do it?
No, we never did make extensions.
ok, thanks for replying :)
…but of course :) Sorry I couldn’t help you out!
Hi there Ashley,
My dear wifey has put this table on my honey-do list and looking forward to knocking it out…you guys really did a great job. However, we have a large family and large gatherings. The only way this is going to work out for us is if I can incorporate some type of extensions on both sides.
I know you said you didn’t build the extensions, but can you happen to share the plans you might have used and how they would fit / attach to this table?
Thanks so much!
Please if you do put the plans for the extension can you send them to me as well. I have a tiny kitchen and would have to make the table smaller than what you did and add extensions to make it the larger size.
I just had a quick question about the table, it looks great by the way. Do you still have the table? If so have you had any trouble with the wood expanding? I’m looking to build a very similar table and I am particularly concerned with attaching the breadboards with pocket screws. I have read/heard that this can cause the table top to crack/separate as the wood expands and contracts. So I was wondering how your table was holding up? Thanks!
Alex, I think I can help with this one. You will not have any trouble with expansion. Actually, contraction is the problem. If you buy plain stud lumber like we did it will shrink over time. This did not create any issues with the pocket screw joints. Wood contracts more in width than it does in length, so over time your breadboards may end up a little longer than your table is wide (think 3/8″ or so, easily fixable with a skill saw when you refinish a few years down the road). If you can purchase kiln dried pine you would take away 90% of the problem (you can order it online from Home Depot). The only part of the table that attempts to warp in any way is the outsides of the breadboards (the far ends of the table), they tend to cup a little since there is no joint to hold them in place, a couple angle braces underneath would fix that if it was an issue on your table. We just sold the table to a friend the other day and replaced it with the new pecan table, we’ll see how long we can go before I get an itch to replace that one!
Awesome! I really appreciate your response. I did a bunch of research online and of course everyone has something different to say. It’s good to hear from someone who has been there. I did buy kiln dried pine from Lowes. I’m glad to hear that yours stood up well over time, gives me hope for mine. Once again thanks, and I’m hoping my table will turn out as good as yours! Merry Christmas!
I love it. The farm house look is gorgeous and the stain you applied against the white is gorgeous :) your marine is to!
What an amazing table and bench. Thanks for sharing your tutorial.
I’ve been trying to find the perfect design for a table to build for our family of 5 (right now we have to sit at separate tables because ours aren’t big enough) and this one looks perfect!! Thanks for sharing!
Can you give me specifics about the finishing process and exactly which items ie: polyurethane, wax , etc….
I sent my last question about steps you took in finishing….Not sure I stated it , but I am speaking of the Farmhouse Table and Bench…..
Hi! I am curious how the table it holding up over time being that it is pine. My husband is considering making tables to sell and I want to make a product that will last a long time and still affordable for customers. Thanks!
Would love to have the dimensions for the bench. Can’t seem to find them anywhere.
I’m curious as to where you got plans for this table. Looks amazing!!
Can you share with me the plan you used to create your table. I’m excited to make one for our home, thanks!
Can you share with me the plan you used to create your table. I’m excited to make one for our home, thanks!
Hello! This looks fantastic! I’m in the process of making one right now. Can you tell me how yours has held up all these years? I’m worried about the top twisting or warping in the humid Summer’s here in Ohio. I used wood from a home improvement store and it’s now my understanding that I shouldn’t have done that because it’s known to warp overtime because of the moisture content. Where did you get your wood? From a mill? Thanks!!
We got ours from a hardware store as well, and it did warp the tiniest bit…just on the breadboards on the end. I can’t comment how it has held up over the years since we sold it about a year after we made it…it looked good when we sold it though and I can’t imagine it has fallen apart over the years.
Thank you for that! I’m thinking I won’t even attach the breadboard ends to the rest of the top, just to the apron instead, with screws in an elongated hole. I wonder if this will help with anything. I’m also not doing the support in the legs so I don’t have to cut out the notcjes. Instead I used 2 angled 2×4’s per leg bracing the apron to the leg (if that makes sense. I’m hoping that will keep it sturdy enough without that uderneath section. Fingers crossed!
Hello! I love this table!! You did an amazing job! I tried to click the link for the full tutorial but it isn’t available anymore. Do you have one saved perhaps? Or know how to get in touch with the person who created it?
Thanks a million!
I just checked the link and you are right, the blog is down. From the error message it looks like it’s just down temporarily though and not forever, so I might try back tomorrow. If not then I didn’t save it and don’t have a way to get in touch with them, so sorry. Try Anna White though, she has all kinds of farmhouse table plans that are very similar if not exactly this.
Re: Your Farm-house table
You alluded to table extensions “that had not yet been built”. Do you have plans/drawings showing these are built and how they attach to your table? My daughter has a small kitchen and needs a “not too long” table, but does have occasions where extensions would be a welcome accessory.
Thank you,
Bill
No, I’m sorry but I don’t. We never actually built the extensions, instead we sold this table and built a bigger one.
Great to see that… I made it too. Plans from http://www.woodprix.com/ helped me a lot :) My husband used these plans from WoodPrix’s plans and he’s very satisfied. However. I love Yours !
It’s working great.